Painting, decorating and home improvement tips blog
How to paint new wood
Posted by Adrian
April 30th, 2014
How to paint new wood
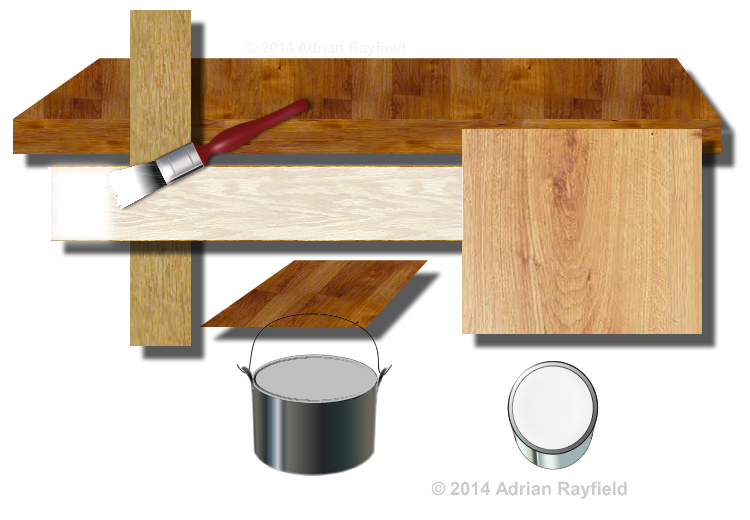
It is important when painting new wood to prepare the wood and paint it correctly, this will ensure the wood lasts for a long time. Most interior wood is softwood, such as skirting boards, door frames, architraves and doors. Whereas exterior wood can be both softwood, such as in fascia boards, but maybe hardwoods for windows and doors etc. This post mainly deals with softwood, such as pine, and painting the wood rather than staining or varnishing.
Preparation is the first job for any new wood, a rub down to ensure the surface is smooth and ready for painting. If you are going to be painting the wood, that is to say not going to varnish the wood, you should apply kotting solution to the knots. This can be applied with a brush or rag. Some knotting solution comes with a brush. Apply two or three coats to the knots and let it dry.
Primer
One the knotting is dry you can apply a suitable wood primer. This can either be solvent or water based, I prefer water based as it dries quickly. Once the first coat is dry, lightly rub down the first coat and then apply a second coat of primer.
Once this is dry, again give it a light rub down, you should now have a well coated piece of wood ready for an undercoat.
Undercoat
An undercoat is used to allow a topcoat such as gloss or satinwood to be applied. Apply one or two coats of a suitable undercoat, for some paints a coloured undercoat can be used, such as a dark grey undercoat for a dark blue or black topcoat for example.
If you are applying more than one undercoat, leave to dry fully and give the wood a light sanding between coats. You may have to give the wood two undercoats depending on how well the wood is covered and how porous the wood is.
Topcoat
Topcoat can be gloss, satinwood, eggshell, solvent based or water based they all come under the heading topcoat as it is the last coat or finishing coat to be applied to the wood.
Once you have applied the primer and undercoat you need to rub the wood down a final time in preparation for the topcoat. Dust of the wood and make sure the wood is free from dirt and grease, then apply the topcoat to the wood. In some cases a second coat may be required, if this is the case allow the first coat to fully dry and then lightly rub the first coat with fine sandpaper and then remove any dust and apply the second coat.
Giving a second coat can give a better gloss in the case of water based paints, it can also give a deeper, fuller finish.
Painting new hardwood
To paint new hardwood, such as a front door, the process is the same, you may not require any knotting solution as hardwood has far less knots. Again, rub down, prime, undercoat and topcoat ensuring you rub down between each coat to ensure a good smooth finish.
Tags: Door, Door Frame, Exterior Wood, Fascia Boards, Gloss, Hardwood, Interior Wood, Knotting Solution, New Wood, Pine, Primer, Satinwood, Skirting Boards, Softwood, Staining, Topcoat, Undercoat, Varnish, Varnishing, Windows
Posted in Decorating Tips | No Comments »
Painting over varnished wood
Posted by Adrian
March 14th, 2012
Preparing to paint over varnish or old stained wood
I recently did a job that had new fire doors installed and because of this new door stops also had to be fitted, when the stops were fitted the paint came away with the old door stops. The paint had been applied over stained and varnished wood. You may have this in your home if it’s old enough, does the paint chip easily and reveal dark wood underneath? More than likely you have varnish or stained wood and painted over without the proper preparation. As you can see by the following picture it looked a bit of a mess.
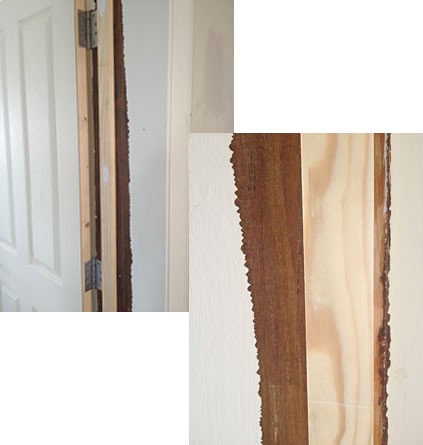
The paint hadn’t adhered to the varnish underneath and simply flacked off, as you can see by the following quick video it wasn’t too much of a job to scrape the paint off due to lack of preparation when the varnish was painted over.
The following image shows the paint removed and prepared ready for the first coat of primer.
Tags: BIN, Door, Paint, Painting, Primer, Satinwood, Varnish, Zinsser
Posted in Decorating Tips, Video | 2 Comments »
Water-based or Oil-based: Always read the label
Posted by Adrian
August 15th, 2011
Water-based or Oil-based paint? Always read the label
When you buy paint you should always read the label printed on the tin, not only to see what the manufactures say you should do, but also to find out the type of paint you are using.
Sounds like a silly question, but if you are using a gloss or satinwood finish, is it water-based (or acrylic) or is it an oil-based product?
By knowing weather it is water-based or oil-based it will determine a few things, such as drying times, the application method you may want to use, and what you need to use to clean your brushes with, either water or brush cleaner/white spirit.
Things to look out for;
The symbols on the tin. It should have a symbol saying “clean brushes with water” or “clean brushes with brush cleaner” for oil based paints.
The VOC level will be low to medium on water-based paint and high on oil based.
Why do you need to know this information?
Knowing if the paint your using is oil or water based could help you make a decision about what type of paint to buy, if you prefer oil-based paints as you find them easier to work with than water-based paint, or do you prefer water-based as it dries quicker? As you need to get a job done before it rains, or the kids come home!
It also good to know if you can simply wash your brushes in water or if you have to wash then in brush cleaner such as white spirit. You don’t want to be washing them out in the wrong thing, or storing them incorrectly as this will ruin your brush.
Tags: Gloss, Oil-based paint, Satinwood, VOC, VOC 2010, VOC 2011, water-based paints
Posted in Decorating Tips | No Comments »