Painting, decorating and home improvement tips blog
What you will find under your wallpaper
Posted by Adrian
April 27th, 2018
what you will find under your wallpaper
When removing wallpaper, you never know what you might find underneath. This is typically true of older houses but can also apply to newer houses.
I’ll use one of my jobs as a case study. The job was a spare bedroom, a simple remove old wallpaper, paint the ceiling and woodwork and then re-paper, but like the title of this post says, you never know ‘what you will find under your wallpaper’.
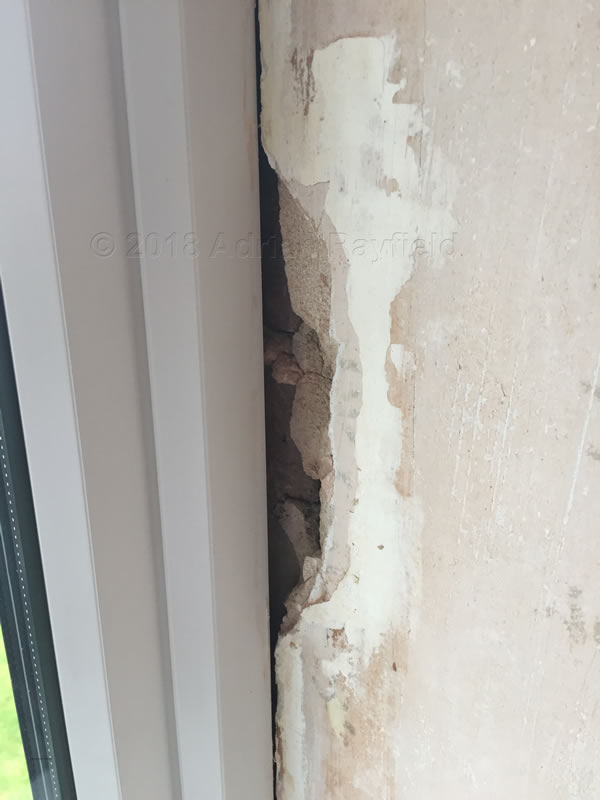
Removing Wallpaper
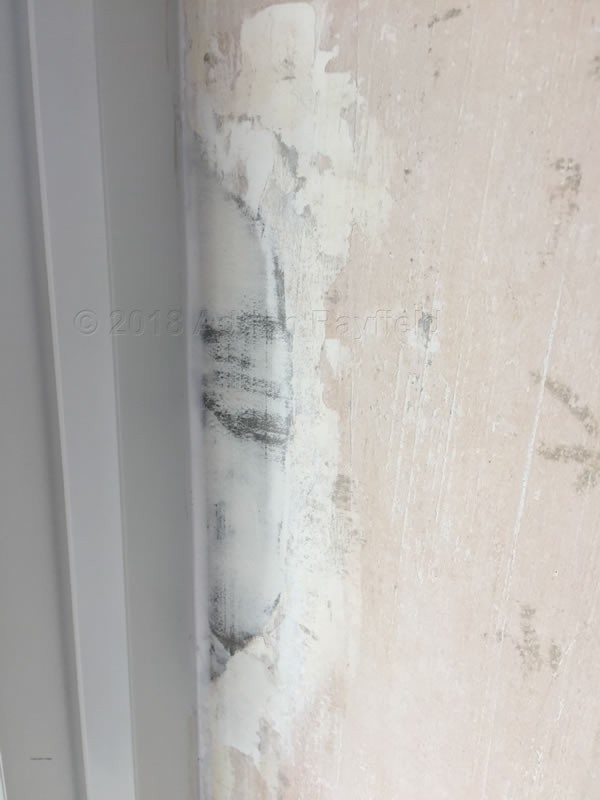
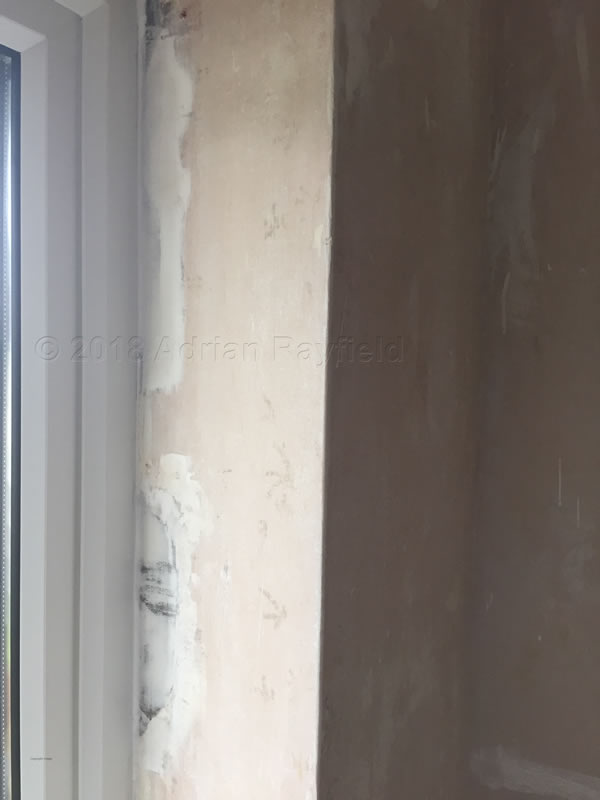
I removed the wallpaper top layer and soaked the under layer, all was going well and as expected. Then I removed the paper around the windows. These were not original windows and had been renewed with uPVC windows.
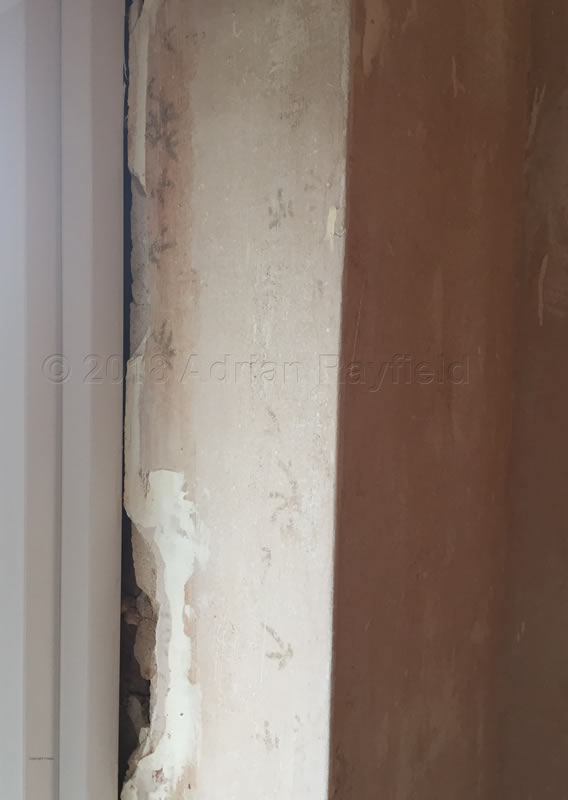
It was here that I found the broken away plasted that had left a deep hole. I have come across this problem many times so wasn’t surprised.
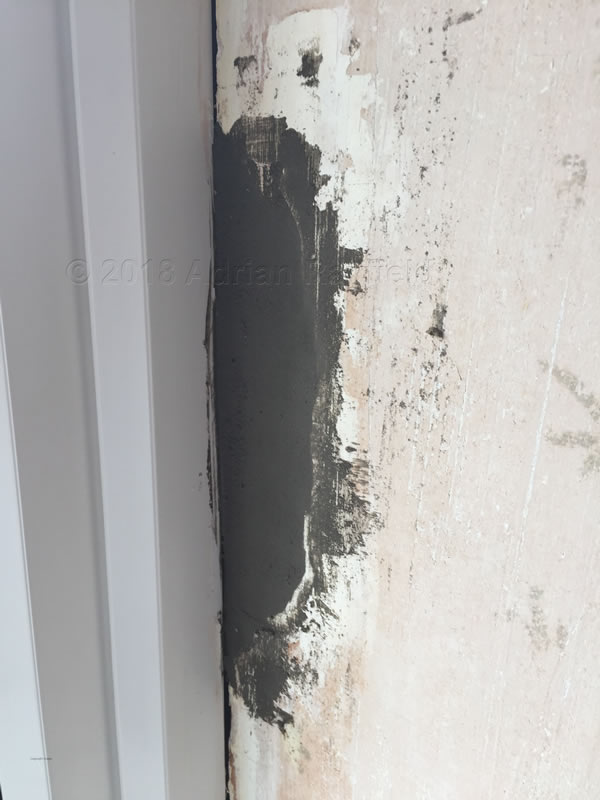
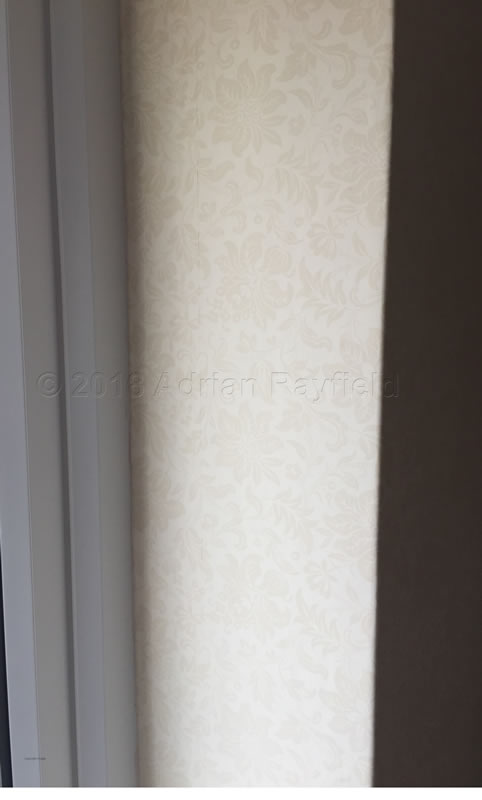
Luckily I always carry a fast setting filler so I could fill the deep hole to just below the surface, and finish of with a fine filler. This was done within half a day so I wasn’t help up, I then waited until the next day to hang the wallpaper and could complete the work on time at no extra cost.
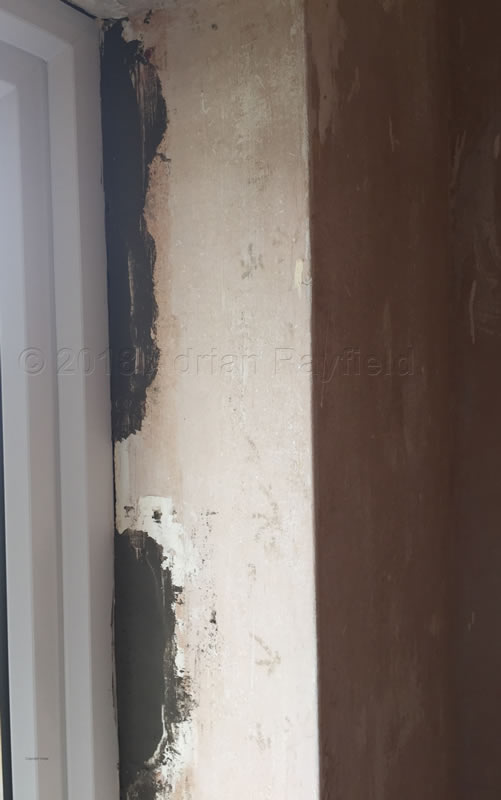
As you never know what you may find under the old wallpaper, it is best to expect the unexpected, sometimes it maybe just lots of holes, other times it may involve blown plaster or loose render and plaster around replaced windows and doors.
You may be lucky and only find the dates of when the room was decorated over the years written on the wall, don’t forget to add yours!
Tags: bedroom, Ceiling, Door, Filler, Holes, Paint, Plaster, Removing Wallpaper, Render, replacement windows and doors, UPVC, Wallpaper, Walls, Window, Woodwork
Posted in Decorating Tips | No Comments »
How to fit new glass into a window or door frame
Posted by Adrian
November 2nd, 2016
How to fit new glass into a window or door frame
Fitting a new piece of glass into a wooden or metal frame is a job you may need to do from time to time. Before you start running out to the shed a grabbing a hammer and chisel, safety first.
Make sure you wear suitable gloves to protect your hands and safety glasses or goggles for your eyes. You may also want to wear safety boots or at least sturdy shoes or boots and suitable clothing, this is not a flip flop, t-shirt and shorts kinda job!
Once you have to correct safety gear on you are ready to get the tools you require. Firstly determine the tools you need, is the glass held in with beading or putty?
For glass held in with putty you will need:
- A hammer
- A chisel or alternative to remove old putty
- Small tacks to hold new glass in
- Putty
- A tape measure
- A new pane of glass
For glass that is held in with glazing beads you will need:
- A hammer
- A chisel or alternative to remove glazing beads
- Pincers or pliers
- A tape measure
- A new pane of glass
- Putty, silicone, or caulk
It may be easier to remove the door of window and lay flat, but it isn’t always practical.
Removal and fitting of glass in a putted window or door
Firstly you need to remove any loose and large pieces of glass, it is a good idea to apply masking tape to the broken glass (carefully) so that as you remove the glass another piece doesn’t fall out. Once the loose glass is removed you need to remove the old putty from the frame, do this carefully with a hammer and chisel, taking care not to cut into the frame.
Ensure all putty is removed as any hard bits left can cause problems as you put the new glass in, and even crack the new glass. Remove any old tacks that held the glass in also.
Once all the old glass,putty and any tacks are removed, clear up, dispose of the old glass safely and remove dust and debris from the frame. A vacuum maybe useful to pick up any small bits of debris.
Now you can measure up for the new glass, of you haven’t done so already. Measure the width, height and thickness of the old glass, then you can either cut some glass yourself or go to a merchant and get them to cut some glass to size for you. The glass should be slightly smaller than the frame it is going in.
Now you are ready to fit the new glass, it is best to remove all the putty from the tub and put onto a board and knead like it is bread, this will mix in any linseed oil back into the putty and also warm it slightly to make it easier to use.
When this is done you can apply some putty to the frame, do this only on the edge the glass sits in. Then put the new glass in the frame, gently push the glass into the frame and making a seal with the new putty. Put some tacks in to hold the glass in place. clean of excess putty from inside frame.
Now you need to apply putty to the frame and smooth off giving an angled bead all around the glass with mitred corners.
Once you have glazed the frame, leave it alone, allow the putty to dry for a day before touching it at all, and a week or more before applying paint.
Removal and fitting of glass in a beaded window or door
You should remove any large pieces of glass, place masking tape of the glass to help prevent more glass falling out as you remove one piece, once all the broken glass is removed you can start to remove the glazing beads.
Take a hammer and chisel and gentle prize up the bead from the frame. You should be able to pull the nails out with pincers or pliers. Be very careful not to break the beading as it can be re-used. Make a note where each bead came from so that you can replace them into the same place.
Now measure for the glass allowing some movement, so 2-3mm smaller on each side. Either cut the glass to size yourself or get a merchant to do it for you. Now you have the glass the correct size you are ready to fit it.
Ensure the frame is clear from debris, use either a brush to dust or vacuum cleaner. The depending on situation and preference you need to apply putty, silicone (this can not be painted over) or caulk or the frame where the glass touches, then push the glass into position, pushing gently onto the glass to seal it against either the putty, silicone or caulk.
You can now start replacing the glazing beads, it is best to start at the bottom, put the bead into place and push it against the glass, lift the glass slightly off of the bottom of the frame and then put a nail into the bead to hold it tight, don’t hammer it all the way in just in case you need to adjust or remove the bead. Now add the second bead in the same way, and finally the two remaining beads. Once you are happy you can hammer all the nails all the way in and fill the holes ready for painting.
Tags: caulk, Door, Glass, Glass panelled door, Glazing bead, Putty, Silicone, Window
Posted in Decorating Tips | No Comments »
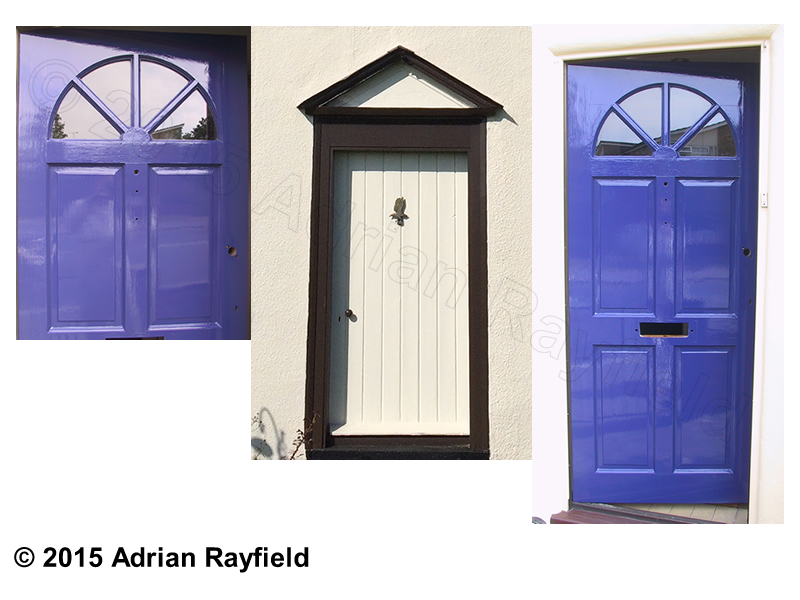
How to paint a front door
Posted by Adrian
May 18th, 2015
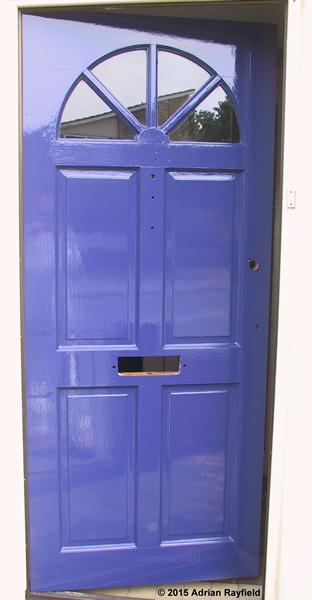
How to paint a front door
From time to time you will need to paint your front door, if it is wood that is. Ideally pick a couple of dry days to complete the job such as spring or summer. Pick a good quality exterior paint to ensure a long lasting job.
The front door is one of the most seen parts of your house, a good looking door gives a good impression to visitors, and especially if you are selling your house as it gives kerb appeal.
You should gather all the tools required before starting, you will need:
- Screwdrivers
- Adjustable spanner
- Sandpaper (various grades)
- Primer
- Undercoat
- Topcoat (Satin or gloss)
- Paint stripper (optional)
- Heat gun (optional)
- Scraper (optional)
Ironwork / Door furniture
The first job is to remove all ironwork or door furniture such as locks, knocker, letterbox, escutcheon, door pull and numbers. This will make it far easier for working on the door. Put everything to one side being careful not to lose any screws as some can be tiny and you will need them again later to refit the ironwork / door furniture. You may need an adjustable spanner for the knocker or letterbox.
Preparation
As with all decorating jobs, preparation is key and will take most of your time. Now is the time to decide if you are simply going to re-decorate your door, or give it a real overhaul and strip the existing finish off back to bare wood.
If you are going to remove all the existing paint finish you can do this either by using a heat gun and scraper, or paint remover and scraper. The choice is really up to you. Once the door is stripped give it a good rub down and fill any crack and holes and sand these level and smooth. Once you have done this you are now ready to move to the next section, prime.
If you decide against stripping the door back to bare wood, or it simply doesn’t need it you should give the existing surface a good clean off to remove dirt and grime with a cloth and maybe water, the give the surface a good rub down. Fill any cracks or unwanted holes and rub them down level and smooth. Dust off and you can move onto the next section, prime.
Prime
Once you have prepared the door you should prime the entire door if you have stripped it back to bare wood, or spot prime bare wood if you have just rubbed down and filled. Allow to dry before moving onto undercoating.
Undercoat
Once you have primed the door, whether it be the entire door or spot primed, give the primer a light sand down before applying one or two coats of undercoat. Allow each coat to dry fully if you give it more than one coat sand back between coats for that perfect smooth finish.
Topcoat
Once you have prepared the door correctly and given it it’s necessary coats of primer and undercoat you can now give the door it’s final sand back and the final coat, the topcoat. This maybe a satin finish or a gloss. Again you may want to give two topcoats, but read the manufacturer’s instructions to ensure you leave enough time between coats, and a word of warning, if you sandback, you a fine paper and use light strokes. If you are too harsh you could scratch the surface too much, or even worse roll up the first coat and ruin all your hard work.
Non-painted or varnished doors
This post deals with painted doors, such a glossed doors but for other finishes, such as varnish or stained door the principle is the same, apart from you wouldn’t use primer or undercoat, however the preparation part is still applicable and needs to be done.
Tags: Door, Door Furniture, Filler, Filling, Gloss, Ironwork, Knocker, Letterbox, Lock, Paint, Painting, Preparation, Primer, Satin, Topcoat, Undercoat, Varnish, Woodstain
Posted in Decorating Tips | 1 Comment »