Painting, decorating and home improvement tips blog
How to solve problems with cracks around the ceiling
Posted by Adrian
March 24th, 2010
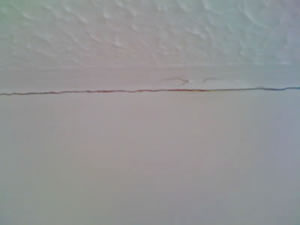
Cracking ceiling
The problem
Movement in the ceiling or walls often causes cracks around the ceiling line as they expand and contract. Raking out the crack and filling can solve the problem as can applying decorator’s caulk to the crack. Both of these solutions may only be a short-term fix.
Houses are ‘living’ things and naturally expand and contract with the heat and cold, modern houses are often built with stud interior walls, in other words are made from timber and plasterboard, these naturally move over time.
Other causes of these types of cracks could be house settlement, especially on new builds or extensions. They are nothing to worry about.
The solution
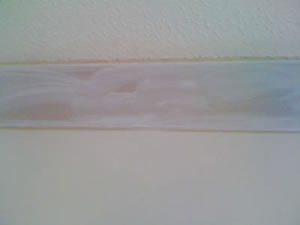
For a long-term solution fixing coving / cornice around the ceiling/wall line will cover up the crack but at the same time move with the house and also give a nice decorative ‘soft’ edge to any room.
Fixing coving to a room should be an inexpensive but a long-term solution.
There are several types and designs of coving to choose from but the most popular is a concave design and made from paper-faced plaster.
There are also different sizes but again, the most popular is either 90mm or 127mm.
There are different types of materials used to make coving from ultra lightweight polystyrene to the more ornate plaster of Paris. The paper-faced coving is gypsum sandwiched between two layers of thick paper.
Fixing coving
Fixing coving is a relatively easy job to do and can be carried out by one person, however it can be easier with two people if longer or heavy cove is used.
Follow the manufactures instructions for fitting, cutting internal and external corners using a saw and template.
Leave the cove for between 12 and 24 hours for the adhesive to dry fully, then paint.
Tags: Ceiling, Coving, Decorator Caulk
Posted in Decorating Tips | 13 Comments »
Found this article useful? Thinking of papering your cracked ceiling with lining or wallpaper, why not use our ceiling wallpaper calculator to work out how much paper you need?
Ceiling wallpaper calculator: http://www.propertydecorating.co.uk/blog/?p=89
What causes cracks in a gloss painted surface on a wooden windowframe? The frame was painted two years ago.
Is it the initial primer, (over 100 years old), The primer prior to both undercoat and top gloss coat?
Without a photo it is hard to say. Is that cracking in the joints (movement) or in the actual film (Cracking occurs when the top coat of paint is unable to expand to the same degree as the previous coating. eg when an undercoat has not been given sufficient time to dry, or if a paint dries too quickly, for example if decorating exterior surfaces in excessive heat.
Like Andy says it’s difficult to say without seeing the window itself. As you say the window is 100 years old the first thing I thought of was it could be the original paint causing the problem.
The paint back then wasn’t flexible and was almost tar like. If this original paint has been painted over it maybe the problem as it maybe moving under the new gloss coat. Modern paint is more flexible but can still crack depending what it’s been painted over.
If this is the case the only long-term solution would be to remove all previous paint back to bare wood and then prime, undercoat and gloss.
Raking the Cracks out with a filling knifes a bad idea unless the filing knife is a cheap naff one.
My filling knifes however are far from cheap so i use a nice thin cheap screwdriver.
I Can tell whoever wrote this is clued up.. But only to a Degree.
@ Howard Maddock
Sound’s like the woods at fault here. Is the Wood.. Cheap or Damaged(Rotting?)
A Primer should never crack.. Anyway.. The undercoat & gloss should cover it.
Is coving OK to put up in a bathroom please?
@Jonathan, Yes it’s fine to put up coving in a bathroom.
I have hairline cracks in my parts of my coving – how do I resolve this problem
Over time ceiling movement (beneath a flat roof) causes gaps to appear betwen the ceiling and coving and sometimes between the coving and the wall, and can eventually leads to the coving falling off. Any solutions/advice welcome
@David
You could securely fix the coving with plasterboard screws into the ceiling (ensure no cables are pipes are in the way). Countersink holes first, then screw coving up, then use decorators caulk to fill gap between coving and walls / ceiling.
The coving shouldn’t fall off then.
Hope that helps.
Is there any other fix than coving? I’ve tried just using filler and re painting but the small cracks have come back! We’re not living here for life so don’t really want to spend a lot on coving.
@Dan
Have you tried decorators caulk?
Decorators Caulk