Painting, decorating and home improvement tips blog
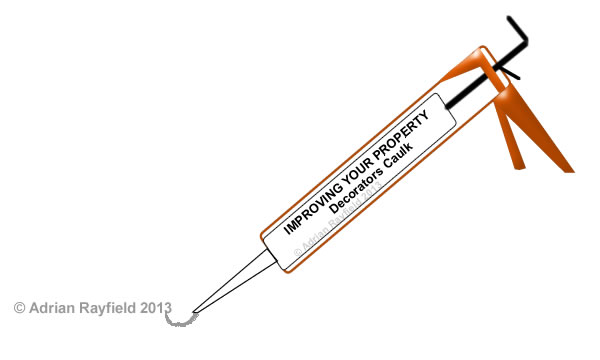
What is decorators caulk
Posted by Adrian
February 22nd, 2019
What is decorators caulk / filler
Decorators caulk is a decorating gap filler, is made of an acrylic and is flexible once dried. It is ideal for areas that have movement but cannot be used like a powder filler and cannot be rubbed down, it can be painted over. It is the best kept decorators secret ever, my wife had never heard about “flexi-filler” as she calls it until I met her.
Notice the spelling also, it is decorators caulk, not cork.
What is decorators caulk used for
Decorators caulk, or decorators filler as it’s sometimes called is used for filling gaps around door and window frames, along the top of skirting boards, gaps around the ceiling and coving line and is ideal for using if there is movement due to it’s flexible properties.
Use decorators caulk for:
- Around Door frames
- Around Window frames (Wood or UPVC)
- Skirting boards
- Ceiling and wall line
- Around coving
- Staircases
- Interior wall corners
How long does decorators caulk take to dry
This is dependent on many factors such as room temperature and humidity, size of gap filled and porousness of where it has been applied. The drying time can be anything from 20 minutes to 2 or more hours. If unsure it is best to leave for a few hours before over painting it.
How to use decorators caulk
Decorators caulk is easy to use, we have written a post detailing how to use decorators caulk on our other blog DIY By Design so there isn’t any need to cover it in depth here.
Why does decorators caulk crack
Decorators caulk may crack if the gap you filled is too large, it may also sink or shrink slightly. If this is the case apply a second layer of caulk over the top of the first one.
If the caulk has cracked or crazed when you have painted it, this could be you didn’t leave it long enough for it to dry.
It isn’t uncommon for paint to crack or craze on top of the filler, this is mostly a problem for emulsions, a simple solution is to paint over the caulk with a non-vinyl paint, such as an acrylic primer.
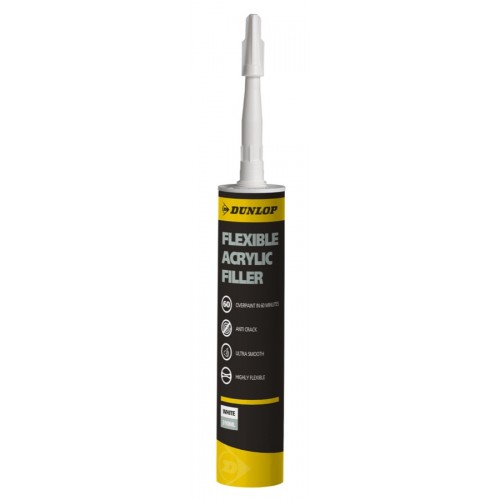
Update
I have done a review on a caulk that doesn’t crack or craze, I have been using it for a while and the results are good.
Read my Review Of Dunlop Pro Decor Flexible Acrylic Filler Caulk here. And if you would like to buy some for yourself you can buy Dunlop Pro Decor Flexible Filler caulk from here.
Tags: Acrylic, caulk, Caulking, Ceiling, Coving, Decorators Caulk, DIY, Door, Filler, Frame, Handyman, Skirting Boards, Window
Posted in Decorating Tips, Home Improvements | 1 Comment »
How to fit coving and why use it
Posted by Adrian
March 24th, 2013
How to fit coving and why use it
Coving or cornice is very popular, it comes in a wide range of styles, sizes and made from a variety of materials such as plaster or polystyrene. A lot of you may have coving in your house, it helps break up the hard edge between the wall and ceiling and gives a nice aesthetic decorative look. You may have a plain concave coving or something more fancy such as egg and dart or Swag and Bow.
How to fit coving
To fit your chosen coving you will need the appropriate cove adhesive, this maybe a lightweight coving adhesive or a powder ‘mix your own’ adhesive for heavier paper faced plaster coving or just plaster coving. You will also need to cut mitres in each or the internal and external corners, it is easier if you use a mitre block or mitre tool that the coving manufacturer make.
Mark the ceiling and wall as described in the instructions as your guide lines, where the lines go will depend on the size of coving. You will need to measure the length of the wall and cut the coving and mitres accordingly, do this around the room until you have all the lengths cut, now mix enough adhesive up (if you need too) to fix a couple of lengths of coving as the adhesive will harden fairly quickly and be unworkable.

Apply adhesive to both edges of the back of the coving noting which is the wall and ceiling edge, this will be printed on the back of the coving. Once the adhesive is applied, push the length into place. Push the coving fairly hard to squeeze out the adhesive so it has a good bond to wall and ceiling. Use a scraper to remove the excess adhesive and a paint brush or sponge to wipe down the face of the coving.
Use adhesive to fill in joints and mitres, continue with the coving in this way until you are done. Leave the coving to dry overnight and then lightly rub down the joints and mitres, then apply 3-4 coats of emulsion to get a good coverage.
Why fit coving
Coving is primarily used in modern homes as a decorative item but it does cover up the nasty looking crack you often get between the ceiling and wall line, this crack is caused my movement in the house, nothing to worry about it is perfectly natural. The house expands and contracts as it gets hot and cold, the crack is caused by the movement of the two.
Coving can also add a nice soft edge rather than a hard edge and make a room look softer and more welcoming. If you are thinking of decorating a room, why not consider adding some coving.
Rooms with low ceilings suit smaller coving such as a 90mm but high ceiling rooms can go for 127mm or larger.
For a list of types of profiles and a little more information about coving, take a look at Wikipedia.
For more in-depth instructions on fitting coving, take a look at the article I wrote on our DIY By Design blog about how to fit coving.
Tags: Concave, Cornice, Cove Adhesive, Coving, Egg and Dart, External, Internal, Plaster, Swag and Bow
Posted in Decorating Tips | No Comments »
How to solve problems with cracks around the ceiling
Posted by Adrian
March 24th, 2010
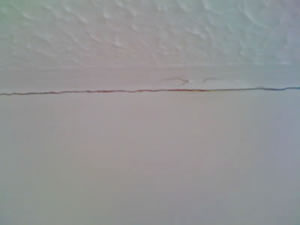
Cracking ceiling
The problem
Movement in the ceiling or walls often causes cracks around the ceiling line as they expand and contract. Raking out the crack and filling can solve the problem as can applying decorator’s caulk to the crack. Both of these solutions may only be a short-term fix.
Houses are ‘living’ things and naturally expand and contract with the heat and cold, modern houses are often built with stud interior walls, in other words are made from timber and plasterboard, these naturally move over time.
Other causes of these types of cracks could be house settlement, especially on new builds or extensions. They are nothing to worry about.
Continue reading How to solve problems with cracks around the ceiling
Tags: Ceiling, Coving, Decorator Caulk
Posted in Decorating Tips | 13 Comments »