Painting, decorating and home improvement tips blog
How to paper a ceiling
Posted by Adrian
September 16th, 2010

How to paper a ceiling
Papering a ceiling can be a daunting thought for many people. I recently had to paper a ceiling with lining paper. The client required the existing paper to be removed, which was an Anaglypta.
After removing the paper, filling the cracks and giving the entire ceiling a good rub down I then re-papered it with 1400 gauge lining paper leaving a smooth flat surface in preparation for painting.
So how do you paper a ceiling?
If you have someone to help you it is an easier job but you can do it yourself.
Firstly you need to work out how many rolls of paper you need, to do this use our ceiling wallpaper calculator.
Next ensure the ceiling is prepared properly, do this by filling any cracks and holes, rubbing the ceiling down and ensuring any stains are blocked out first.
Next, measure the length of the room, for example the ceiling I did was just under 3.7 metres. I then cut the paper allowing enough for trimming at both ends, so in my case I cut the paper at 3.7 metres.
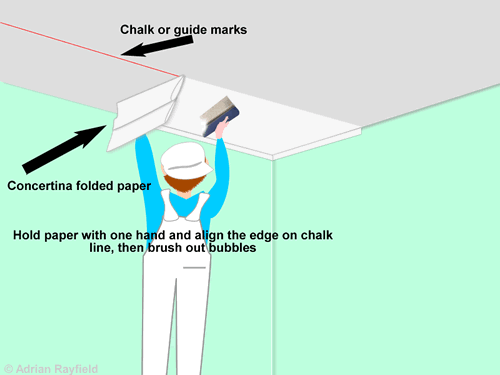
When you have cut the paper you need to mark a straight line or guide marks on the ceiling to follow to get the paper on straight. Measure the width of the paper, lining paper is 56cm wide. Allow for trimming and mark the ceiling from the wall with a pencil, I marked at 54cm allowing 2cm for trimming the edge.
If you have someone who can help you the best way is to mark the ceiling at each end and then use a chalk line to mark the ceiling.
Once you have done your guide marks on the ceiling you need to prepare the ladders or scaffolding etc that you will be using. Now you can paste the paper, make sure it is well pasted and you cover all the edges; fold the paper in a concertina style, allow the paper to soak until supple, for lining paper I allow 10 minutes.
When the paper is ready take the first concertina and put the edge against your guide marks or chalk line allow for trimming and the end also, hold the rest of the paper in one hand and brush out any bubbles. Then unfold the next concertina and smooth out, do this until you get to the end, you can then check the paper is on your marks, if not you should be able to slide the paper a bit until it is.
Next trim both of the ends and the edge.
If you have someone to help you get them to hold the concertinaed paper whilst you smooth out the bubbles and align the edge.
Once the first sheet is in place you can paste the next sheet and put this up, do this by again allowing enough for trimming and the end, butt the edge of the paper with the previous sheet and continue to the end. Carry on doing this until you have finished your ceiling, you then need to allow 24 hours for the paste to dry before painting.
You will no doubt have some sort of light fitting on your ceiling, when you get to this you will need to cut around it. Cut around in small sections removing the paper as you go. Ensure the electric supply is turned off before removing any part of a light fitting.
Tags: Ceiling, Lining Paper, Wallpaper, Wallpaper Calculator
Posted in Decorating Tips | 3 Comments »
Painting an up and over Steel Canopy garage door
Posted by Adrian
August 17th, 2010

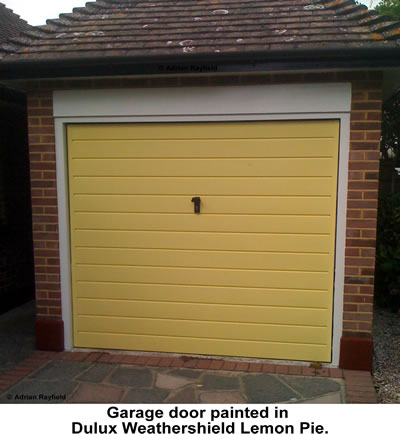
How to paint an up and over Steel Canopy garage door
When over painting an up and over garage door you need to prepare the surface as you would any other surface.
Wash off any dirt and grit, then abrade the surface with sandpaper, I tend to use 80-grit for this. Key the surface all over including the bottom and sides.
Now you can dust off the door and undercoat with the appropriate colour undercoat.
I normally start by painting the two edges, but not the bottom of the door. Be careful when painting the edges of the door not to get any on the frame if the door is a different colour, lift the door up about half way, you can now paint the edges.
Next, if your door has horizontal sections start at the top working down, if the door has vertical sections start from one side working across, if the door has panels do these first and then paint the rest of the door.
When I paint either a door with horizontal or vertical sections I do the same thing, I paint the groove first, then the panel, then paint the next groove and then the panel and so on, then with the last panel I paint the bottom of the door.
When the undercoat is dry do the same procedure as before but with your chosen topcoat.
When you topcoat, work fast, that way the paint flows nicely and you can put a good amount on. As you paint the door lift it up as you go, it’s far easier; you don’t have to bend down and the paint wont run!
Finally, when you’re done lift the door all the way up, this serves two purposes, firstly the paint won’t run and will flow well, and secondly it stops insects, dust and dirt blowing over the wet paint on the door as most of it is in the garage.
Be aware of rain though, if the door is left up and it rains the rain will lay on the door and ruin your paint.
Tags: Garage Door, Paint, Painting, Steel Canopy Garage Door, Up and Over
Posted in Decorating Tips | 3 Comments »
Lead flashing
Posted by Adrian
July 24th, 2010
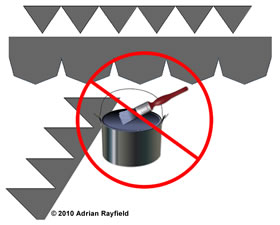
Why not to paint lead flashing
I’ve been working on exterior houses over the past few weeks and I thought I would share this tip with you.
Whilst painting the exterior of a house, many jobs include the painting of the lead flashing, because the paint on the lead has started to peel. Many houses have lead flashing either under the windows or maybe along the roof of a conservatory.

One of the reasons why the paint peels off of lead is because the lead oxidises, this means the lead has a chemical reaction with the oxygen in the air, this lifts the paint and leaves a white powder on the surface of the lead. Another reason for paint peeling is the lead expands and contracts with the heat, this can crack the paint allowing moisture or water in and lifting the paint.
If your lead flashing has been painted it can be a long job cleaning it all off which is why most people re-paint the lead.
If you do repaint the lead, remove all the loose flaky paint and any white powder substance, which is the oxidisation. Next use a flexible undercoat and topcoat, such as Dulux Weathershield undercoat and gloss, I have found this lasts OK, although not forever.
What you should do with lead flashing.
If you have new or unpainted lead please don’t start to paint it! The best solution is not to paint it and to use an oil to treat the lead; this will keep it supple and stop it from cracking.
The best oil’s to use are one of the following, Patination Oil, WD40 or 3in1 oil, all are widely available from hardware shops or builders merchants.
Simply take a cloth, tip some oil onto the cloth and then work it into the lead, you will notice the lead becomes darker as the lead absorbs some of the oil. Continue doing this until you’re happy with the result. Your lead will now look good, be able to breath and be supple to stop it from drying out and cracking.
You will need to re-apply the oil when the lead is starting to look a light grey or just a little bit weathered. If you stick with this method your lead will last for years and you don’t have to worry about paint peeling off it ever!
Tags: Dulux, Lead, Lead Flashing, Oil, Paint, Weathershield
Posted in Decorating Tips | 46 Comments »
