Painting, decorating and home improvement tips blog
Feature Walls : How To Wallpaper A Fire Breast Wall
Posted by Adrian
July 3rd, 2010
Feature Walls : How To Wallpaper A Fire Breast Wall
As wallpaper can be expensive it is very popular nowadays to have a feature / accent wall to give interest to a room without breaking the bank!

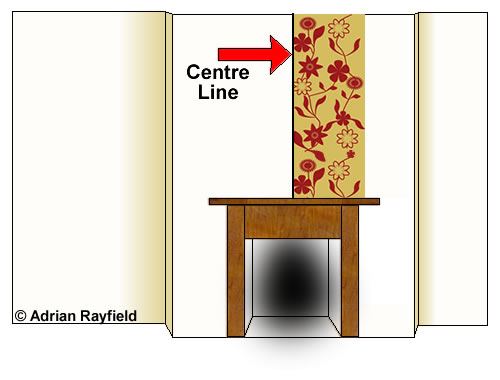
Fire breast feature wallpapering
The first thing you need to do once you have decided to wallpaper your fire breast or fire breast wall is to work out how much wallpaper you will require, by measuring the wall and using our wallpaper calculator for this.
Next you need to work out the centre of the breast, do this by measuring across the width and divide it by two. Next mark the centre and draw a straight line from top to bottom. This is your centre line to work from.
Now you need to take the width of the paper and work out where you need to start.
This will be either with the edge of the paper on the centre line or the centre of the sheet across the centre line. The aim of this is to make sure you don’t end up with a sheet finishing on the external corner, or a sheet not leaving enough to go around the corner for the next sheet you butt up to. If the edge of the sheet is to close to an external corner it may not stick very well and be difficult to join your paper, especially if the corner runs out (i.e. the corner is not vertical).
Like all wallpapering jobs, you need to work out where to start before you actually put paper on the walls. Once you have worked out all the measurements and decided where your first sheet needs to go you can start to paper. As always, follow the manufactures guidelines and soaking times.
It is up to you if you wish to just paper the fire breast or continue doing the walls either side of the breast.
Tags: Feature Wall, Fire Breast, Wallpaper, Wallpaper Calculator
Posted in Decorating Tips | 1 Comment »
How to deal with water stains
Posted by Adrian
June 1st, 2010

How to deal with stains
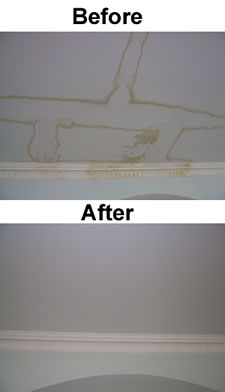
Following a recent job I did I thought I would do a post about how to deal with stains, in this case, water stains.
I had a call from a client who had a Velux window that appeared to be leaking and had stained the ceiling of their garden room.
After the roofer came and found the source of the problem, a broken tile, and repaired it I went back and decorated the room for them.
The source of the leak had been fixed and the water had dried out so I could start to decorate.

The first thing I did was identifying the stain by drawing around each stain with a pencil so it was easier to see when I used the stain block.
Once I had highlighted all the water stains with a pencil I used Polycell Stain Block to cover the stains, using a brush I painted over the stains, I knew how far to go as I had drawn around the stains. I covered the stains and pencil lines with the stain block, I then prepared the rest of the garden room by filling cracks to the walls while I waited for it to dry which took about two hours.
Once the stain block was dry I could paint the ceiling with white emulsion and the ceiling was as good as new, I then painted the walls to complete the job.
Another job and another satisfied client.
Always ensure the source of the leak is fixed and that you allow time for the water to dry out before decorating.
Some stains may need a second coat of stain block, allow to dry between coats.
Allow the stain block to dry fully before decorating.
Some people use an oil-based paint such as gloss, undercoat or satinwood to block out the stain, I have done this in the past but would only recommend using satinwood or undercoat due to it’s sheen level.
Tags: Polycell, Stain Block, Water Stain
Posted in Decorating Tips | 1 Comment »
How to strip wallpaper
Posted by Adrian
May 2nd, 2010

How to strip wallpaper, and not take off half the wall with it!
At sometime or another wallpaper has to be removed from walls or ceilings, this could be due to many reasons but mostly because it’s faded, old and out-dated.
Knowing how to remove paper without taking off half the plaster with it is important and could save you a load of work and money.
Many people think they will simply go and hire a wallpaper stripper and an hour later all the wallpaper will be off, it’s not as simple as that.
You can save yourself money and not hire a wallpaper stripper just yet, you may not need one, firstly try the old fashioned method.
To start, gather the equipment needed.
You will need:
- Dustsheets – to cover the floor and furniture
- A scraper – to remove wallpaper
- A bucket – Filled with water
- A step ladder – Optional
- A paste brush or a large brush – To wet the wall
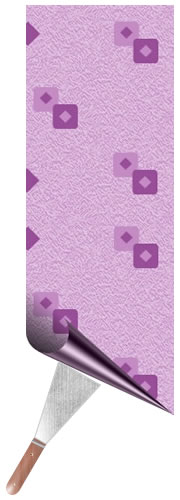
Firstly you need to remove the top layer of the wallpaper, with most papers you can remove the top layer as they are peelable, start in a corner by lifting the paper with your scraper and remove the top layer.
By removing the top layer you leave the backing paper behind, don’t be tempted to leave this on and either paint it or paper over it. The backing paper can bubble or lift as you paint or stick the new paper over it.
Tags: Decorating, Filling, Strippiing Wallpaper, Wallpaper, Wallpaper Steamer, Wallpaper stripping
Posted in Decorating Tips | 5 Comments »
