Painting, decorating and home improvement tips blog
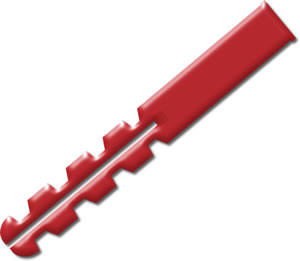
How to remove Rawl plugs
Posted by Adrian
June 20th, 2013
How to remove Rawl plugs
Before you decorate you may wish to remove old Rawl plugs. You may think they are hard to remove because of what they are designed for, making a secure fixing for a screw to go into, however when done correctly they are not that hard to remove. It is always best to remove them rather than filler over them leaving unsightly lumps on the wall that show once you have decorated. If you try to remove the Rawl plug and it simply will not budge, you can either make sure the plug is sunk below the surface of the wall or cut the flange off of the plug if it is proud of the wall and then fill the hole, as I mention in this post about Rawl plugs.
Removing Rawl plug video
Below is a quick video of me removing a Rawl plug from a wall using a screw and claw hammer. If you want to protect your walls whilst removing the plug, use a piece of wood to lever the claw hammer off of, rather than the wall, by doing this you put pressure on the wood and will not dent your wall with the hammer.
If you liked this post, please share it with your friends, family and colleagues via the social media buttons below. You can also subscribe to my Property Decorating YouTube channel.
Tags: Dowel, Raw Plug, Rawl Plug, Screw Anchor, Wall fixiing, Wall plug
Posted in Decorating Tips, Video | 4 Comments »
How to mix wallpaper paste
Posted by Adrian
November 14th, 2012
How to mix wallpaper paste
How many times have you mixed up wallpaper paste to put up that new wallpaper you just bought and end up mixing something that resembles lumpy porridge, jelly or water. The reason for this is you must have mixed it wrong.
So how do you mix wallpaper paste? Firstly you will need to gather the tools you require. You will need :
- A clean bucket
- Something to stir the paste such as a stick
- A sachet of wallpaper paste
Mixing the wallpaper paste
Take your clean bucket and fill it with water, the amount of water will depend on the type of wallpaper you are going to be hanging and how many rolls you are going to hang. It’s always easier to mix an entire sachet rather than trying to mix half as it’s not easy to get the ratio right, unless like me, you have mixed up gallons of the stuff!
Here is a guide to how much water to use and how many rolls you can expect to do with one standard sachet of paste.
| Paper Type | Cold water in Pints | Cold water in litres (approx) | Number of rolls |
|---|---|---|---|
| Normal paper including woodchip | 14 | 8 | 10-12 |
| Washable and vinyl | 12 | 7 | 7-9 |
| Textured and blown vinyl | 10 | 5.5 | 4-6 |
| Embossed papers (Anaglypta® Original) | 10 | 5.5 | 3-5 |
| Embossed papers (Anaglypta® SupaDurable) |
9 | 5 | 1.5-3.5 |
Take the bucket of water and give it a good stir (not with the wife’s wooded spoon from the kitchen), next cut the top off the sachet of paste an tip it all in, now stir again one way then the other, do a figure of eight, do this for around 20-30 seconds.
Once the paste chips are all dissolved leave to stand for a further 90 seconds then give it a final stir before using.
Once mixed, paste will last for a few days in the bucket so you can come back to it cover it to stop anything dropping into it and come back to finish the job another day.
If you need to know how many rolls of wallpaper to buy, why not use our wallpaper calculator.
Tags: Anaglypta, Decorating, Wallpaper, Wallpaper Calculator, Wallpaper Paste, Wallpapering
Posted in Decorating Tips, Video | 19 Comments »
Painting over varnished wood
Posted by Adrian
March 14th, 2012
Preparing to paint over varnish or old stained wood
I recently did a job that had new fire doors installed and because of this new door stops also had to be fitted, when the stops were fitted the paint came away with the old door stops. The paint had been applied over stained and varnished wood. You may have this in your home if it’s old enough, does the paint chip easily and reveal dark wood underneath? More than likely you have varnish or stained wood and painted over without the proper preparation. As you can see by the following picture it looked a bit of a mess.
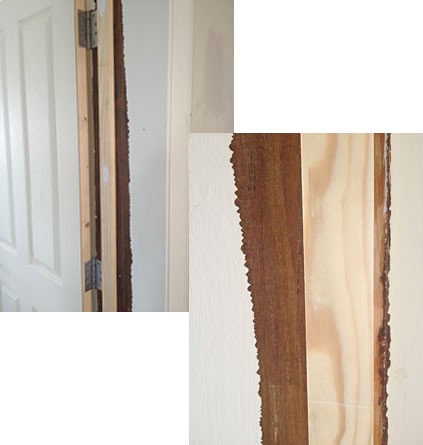
The paint hadn’t adhered to the varnish underneath and simply flacked off, as you can see by the following quick video it wasn’t too much of a job to scrape the paint off due to lack of preparation when the varnish was painted over.
The following image shows the paint removed and prepared ready for the first coat of primer.
Tags: BIN, Door, Paint, Painting, Primer, Satinwood, Varnish, Zinsser
Posted in Decorating Tips, Video | 2 Comments »