Painting, decorating and home improvement tips blog
How to paint cladding
Posted by Adrian
March 24th, 2014
How to paint cladding
Cladding is mainly used on the exterior of houses, although it can be found on the inside a house also, such as wood panelling in a bathroom. Cladding can be fixed horizontally or vertically and comes in a variety of wood types, such as pine, Cedar, and Larch.
Depending on the type of wood and the finish you require will depend on how you prepare the wood for the final protective coat, but painting, varnishing, staining etc should all be painted in the following way for best results.
Painting wooden cladding
As with any painting job, preparation is key. You should sand any previously painted surfaces and use an appropriate undercoat if required before topcoating. If the wood is new you should prepare and prime the new wood before undercoating and topcoating.
If however you are staining or varnishing a primer isn’t required, but the preparation is, for example sanding previously painted surfaces.
However you are protecting your cladding and here is a tip best to achieve the best results, you should ensure the adjoining edge is painted, or the underside for example on shiplap, once this is done fill in the board itself. Always use long strokes and don’t stop half way along a board if possible, go to a joint, stop (to move ladder for example) and then start from the joint again. If you stop half way along a board then move and start again the finish coat may of dried in and you may see a join in the final finish.
What can I paint wooden cladding in
Wooden cladding can be painted in a variety of paints and finishes, it all depends on where the cladding is and the environment it is in, for example if the cladding is on the exterior of a house you need to use an exterior paint, such as a varnish, stain, gloss or satin. Always check on the paint can to ensure the paint you wish to use suits the environment the wooden cladding is in.

Tags: Cladding, Feather Edge, Paint, Painting, Shiplap, Square Edge, Staining, Tongue and Groove, Varnish, Wood
Posted in Decorating Tips | 6 Comments »
How to paint a bathroom
Posted by Adrian
February 12th, 2014
How to paint a bathroom
Bathrooms can be a retreat, a place where you can have a long bath a relax from the day to day stresses, so a beautiful tranquil bathroom is what you need with relaxing colours, candles, soft fluffy towels, but if however you do not spend too much time in the bathroom, you just have a quick shower and use the loo then a more practical ‘clinical’ type bathroom may suit your needs.
Bathroom paints
When you paint a bathroom there are a few things to consider, such as the type of paint to buy. Do you go for a special bathroom paint that inhibits mould growth and is moisture resistant, or do you save yourself a few pound and go for standard emulsions?
Well, the choice is yours really, circumstance will dictate a little as which one to choose. If you suffer from mould and dampness, such as you have teenages that spend half an hour in the shower or leave the bath running hot water until it’s nearly overflowing, then you may consider the bathroom paint. Ideally having an extractor fan fitted will also reduce condensation.
If you have a good extractor fan, or open the window to let the steam out so you don’t have a bathroom that looks like a fog from yesteryear you could simply go for a standard emulsion.
Preparing for painting
Before you jump straight in with the paint there are a few things you should do first, such as remove anything on the walls, such as toilet roll holder, towel rail, medicine cabinet, mirror etc, unless you want to either mask them up or paint around them. If you wish to remove them they are simple enough to do. Most toilet roll holders and towel rails have a small grub screw holding them on, these are typically an allen key or small screw, loosen these off to remove the item. You can then remove the fixing, or cut in around it.
If you are removing heavier items such as a mirror or medicine cabinet it is always a good idea to have an extra person give you a hand, you don’t want to be dropping a mirror on the floor!
You can then cover up with dust sheets, cover the toilet including the cistern, the bath or shower cubicle and the hand basin and anything else that isn’t removable, and don’t forget the floor.
Once everything has been removed and covered it is time to prepare the ceiling and walls, fill any holes and cracks with filler, sand level and smooth when dry. You should also wash down any splashes from walls and ceiling and make sure that any mould is washed down and removed, for this you can use a mould and mildew remover, or a little bleach. You should always follow the safety advice on these products to avoid accidents.
Painting the bathroom
Start off with the ceiling and coving, if you have any. Give this at least two coats allowing each coat to dry fully between each coat, once the ceiling is done you can paint the walls, cut into the ceiling and around the fixtures and fittings such as toilet, basin etc and fill in with a roller, you can use a small four inch roller to get into those hard to reach places, such as behind the toilet. Give the walls a minimum of two coats to get a good coverage.
Once the walls are done you can paint any woodwork, such as doors, doorframes, windows, skirting boards, and the floor if it is painted or varnished. Rub them down and if you are painting them give them an undercoat before a topcoat. If you are varnishing, rub down and give two coats, if the floor is varnished it may be advisable to give three or more coats to help protect the wood against the water.
A recent completed bathroom
Below is a picture of a recent completed bathroom I painted, I painted this bathroom in 1999 after it had a complete overhaul and modernisation. I recently painted it using Dulux Soft Sheen Violet White on the walls, Vinyl matt brilliant white on the ceiling down to the picture rail and White satinwood on the woodwork and finished off by re-varnishing the floor with six coats of Ronseal Diamond Hard clear satin floor varnish.

Tags: Bath, Bathroom, Ceiling, Extractor Fan, Floor, Flooring, Mould, Paint, Painting, Toilet, Varnish
Posted in Decorating Tips | No Comments »
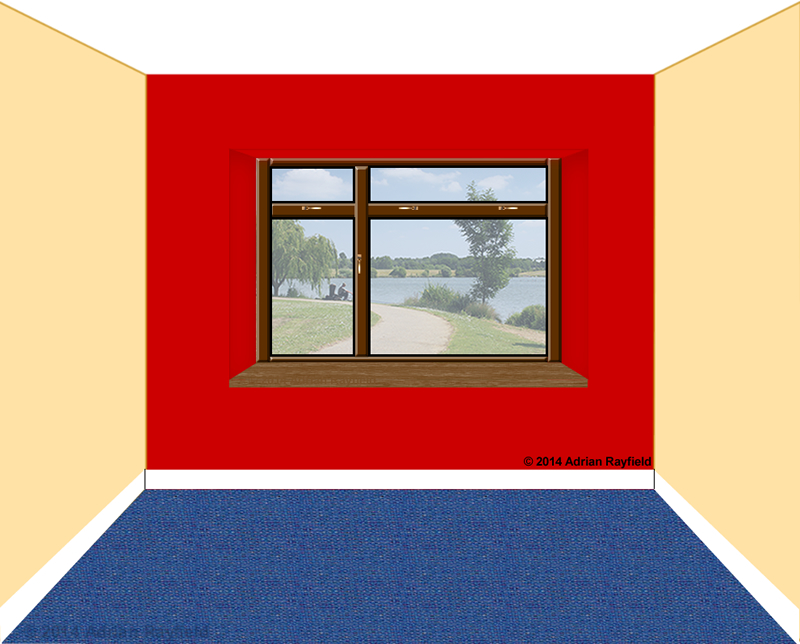
Feature Walls : How To paint a feature wall
Posted by Adrian
January 14th, 2014
Feature Walls : How To paint a feature wall
Feature walls have become very popular in recent years, they are a great way of giving a room a new look without the expense of changing everything in a room or completely redecorating. Simply by re-painting the feature wall can transform the look of a room. You can also follow the latest trends simply by re-decorating the feature wall.
Feature walls can be painted or wallpapered, it is personal choice and it will depend on the type of look you are going for.
Sometimes a feature all is called an accent wall, but they are both the same thing.
Deciding on paint for a feature wall
Deciding on what colour paint to buy for a feature wall will be determined by how the remaining walls have been decorated, typically a contrasting colour is used. But if the other walls have been wallpapered you can pick a colour from the paper to use as the feature wall colour.
Once you have decided on the colour for your feature wall you can buy the paint, you can buy ‘Feature Wall’ paint, this is just over a litre in size and should be enough to paint one wall. You don’t have to go this route, you can buy any colour in any sized can of paint. You could even use leftover paint if it suits your needs.
If you are unsure how much paint you will require for your feature wall, give our paint calculator a go, simply fill in the required figures and hit the calculate button and you will be told how many litres you need to by for your given area.
Painting a feature wall
To paint your feature wall, you can either mask the adjoining walls, skirting and ceiling with low tack masking tape, then cut in with a brush around the edge of the feature wall, just overlapping the masking tape but being careful not to paint any other surface. The use a roller to fill in the main wall area. By using masking tape you should achieve a straight line.
If you are confident in cutting in you can cut in without masking up. Cutting in is the term used whereby you use a paintbrush to go up to an adjoining surface, be it a wall, ceiling or skirting boards.
Once you have cut in or painted up to the masking tape and painted the first coat onto your feature wall, allow the paint to fully dry before applying a second coat. When you have painted the second coat you can remove the masking tape, if you used any.
Making a statement
By painting a feature wall you are making a statement, and making this one wall the focal point of a room. You may want to do this to highlight some pictures that are hanging on the wall, you maybe make a fireplace the focus of the room or simply it can give orientation to a room.
Whatever the reason for painting a feature wall, it can quickly and easily transform any room and give a focal point to an area of a room.
Tags: Decorating, Emulsion, Feature, Feature Wall, Paint, Paint Calculator, Painting, Statement, Wall
Posted in Decorating Tips | No Comments »