Painting, decorating and home improvement tips blog
Parts of a window
Posted by Adrian
August 27th, 2013
Parts of a window
You will certainly have windows in your property but there are lots of types of window styles such as, a sash window where the top and bottom windows slide up and down, or a casement window, this type of window opens outwards like a door and is very common in new houses.
Windows are also available in many types of materials such as hardwood, softwood, aluminium and Upvc to mention few. The glass may be plan or have coloured glass, lead lights or latticework to make a window more ornate.

In this post I am talking about a traditional casement window with a fanlight, however many of the terms used relate to all styles of window.
Window frame
The window frame consists of a head that runs along the top, a sill along the bottom and two jambs running vertically at either side. The frame holds the window itself either hinged as in the case of a casement window or free running as in a sash window.
Top drip
Some windows will have a top drip, this encourages the water to run off the tip of the window rather than to run down the window and glass, or even into an open window.
Casement
The casement is the part the glass sits in, the part that opens. A basic design of a casement consists of four parts, a top rail running horizontally at the top, a bottom rail that runs horizontally along the bottom and two styles that run vertically that go to make the casement. This would typically be hinged on one side or along the top and attached to the window frame.
Mullion
A mullion is the central vertical part that makes up the frame on a casement window and separates two windows, for example a opening casement window and a fixed pain window.
Transom
A transom is a horizontal part separating two windows, for example a fixed pain and a fanlight / vent window.
Window sill
The sill is at the bottom of the frame and attached to the two vertical jambs to complete the window frame, the sill will slant away from the window to encourage water to run away from the window frame, the sill will also have grove underneath it to allow the water to drip off and to stop the water running back under the window frame.
Many new windows now come with trickle vents, these are air vents that are in the head of the frame that have a grill on the outside and a closing vent on the inside, this allows air flow into the property and help prevent condensation forming on the windows.
Tags: Casement Window, Fanlight, Mullion, Sash Window, Sill, Style, Transom, Window, Window Frame, Windows
Posted in Decorating Tips | No Comments »
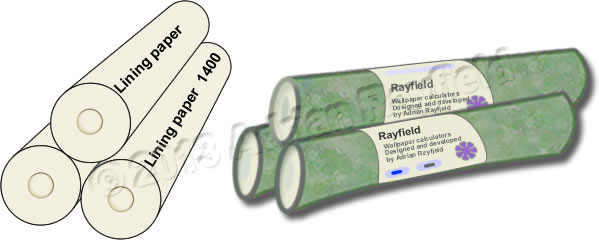
Should I use lining paper before wallpapering
Posted by Adrian
July 9th, 2013
Do I need to hang lining paper before I put up wallpaper
Is it necessary to put up lining paper prior to wallpapering? in most cases the answer would be no. If your walls are old and have been filled many times or there are lots of imperfections then you may consider lining the walls before wallpapering. Putting lining paper up before wallpapering doesn’t mean you don’t have prepare the walls first, because you do. Preparation is always the most important part of decorating.
Another reason for lining the walls prior to wallpapering would be if the wallpaper is thin, or if it is a foil paper and you need a good sound surface to wallpaper onto. Some manufacturers say on their wallpaper, “We recommend you line the walls first”, in which case it is best to take their advice.
You may also have different finishes on a wall such as gloss where shelves used to be or maybe different strong dark colours that may show through, in this case you could simply use matt emulsion to obliterate the colour and have the same finish over the entire room, or you may decide to use lining paper.
Lining paper shouldn’t be required for heavy textured papers, Anaglypta wallpapers, of woodchip as these are designed to hide imperfections on walls. If you line the walls unnecessarily you are just wasting your time and money.
What grade of lining paper
In most cases 1200 to 1400 gauge lining paper will be sufficient to apply to the wall before wallpapering. However if your walls are in a really bad condition you could use a 2000 gauge lining paper. You can also buy specialist papers such as thermal liners, sound proofing liners and damp proof liners, but typically standard lining paper will suffice.
How do I measure for lining or wallpaper
Before you buy lining paper or order wallpaper you need to know how much to buy. I have written an article on how to measure a room for wallpaper that explains how you need to do it. I have also written a wallpaper calculator so you can work out how many rolls of wallpaper you need to buy.
Things you should know about lining paper
Before you rush out and buy lining paper and hang it there are a few things you should know first, lining paper can shrink when it dries, this isn’t too much of a problem if you are wallpapering over it as long as the gaps are small.
You may also consider hanging the lining paper horizontally, or cross lining as it’s known. This will prevent any joints of the wallpaper laying on top of the lining paper which may lift the lining paper when it dries.
If you use lining paper before you wallpaper, ensure it is well stuck , you don’t want the lining paper lifting once your expensive wallpaper is on the top of it, ensure you soak the lining paper well enough, so it is supple before hanging, ensure plenty of good quality paste is used. Once the lining paper is hung and dry you can go over it with paste to help seal the lining paper and give the wallpaper a little bit of extra stick when you hang it.
Tags: Anaglypta, Cross lining, Damp Proofing, Foil wallpaper, Lining Paper, Sound Proofing, Thermal liner, Wallpaper, Wallpaper Calculator, Woodchip
Posted in Decorating Tips | 53 Comments »
How to remove Rawl plugs
Posted by Adrian
June 20th, 2013
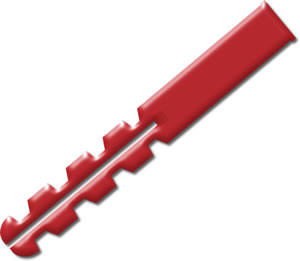
How to remove Rawl plugs
Before you decorate you may wish to remove old Rawl plugs. You may think they are hard to remove because of what they are designed for, making a secure fixing for a screw to go into, however when done correctly they are not that hard to remove. It is always best to remove them rather than filler over them leaving unsightly lumps on the wall that show once you have decorated. If you try to remove the Rawl plug and it simply will not budge, you can either make sure the plug is sunk below the surface of the wall or cut the flange off of the plug if it is proud of the wall and then fill the hole, as I mention in this post about Rawl plugs.
Removing Rawl plug video
Below is a quick video of me removing a Rawl plug from a wall using a screw and claw hammer. If you want to protect your walls whilst removing the plug, use a piece of wood to lever the claw hammer off of, rather than the wall, by doing this you put pressure on the wood and will not dent your wall with the hammer.
If you liked this post, please share it with your friends, family and colleagues via the social media buttons below. You can also subscribe to my Property Decorating YouTube channel.
Tags: Dowel, Raw Plug, Rawl Plug, Screw Anchor, Wall fixiing, Wall plug
Posted in Decorating Tips, Video | 4 Comments »