Painting, decorating and home improvement tips blog
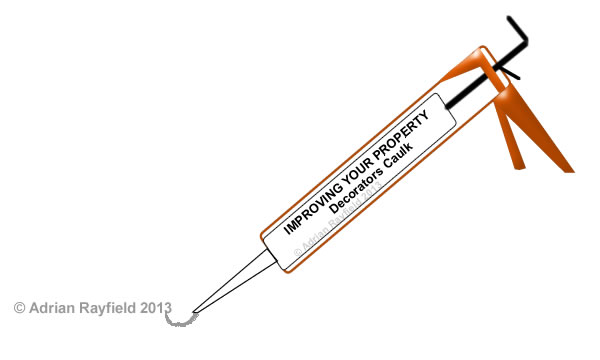
What is decorators caulk
Posted by Adrian
February 22nd, 2019
What is decorators caulk / filler
Decorators caulk is a decorating gap filler, is made of an acrylic and is flexible once dried. It is ideal for areas that have movement but cannot be used like a powder filler and cannot be rubbed down, it can be painted over. It is the best kept decorators secret ever, my wife had never heard about “flexi-filler” as she calls it until I met her.
Notice the spelling also, it is decorators caulk, not cork.
What is decorators caulk used for
Decorators caulk, or decorators filler as it’s sometimes called is used for filling gaps around door and window frames, along the top of skirting boards, gaps around the ceiling and coving line and is ideal for using if there is movement due to it’s flexible properties.
Use decorators caulk for:
- Around Door frames
- Around Window frames (Wood or UPVC)
- Skirting boards
- Ceiling and wall line
- Around coving
- Staircases
- Interior wall corners
How long does decorators caulk take to dry
This is dependent on many factors such as room temperature and humidity, size of gap filled and porousness of where it has been applied. The drying time can be anything from 20 minutes to 2 or more hours. If unsure it is best to leave for a few hours before over painting it.
How to use decorators caulk
Decorators caulk is easy to use, we have written a post detailing how to use decorators caulk on our other blog DIY By Design so there isn’t any need to cover it in depth here.
Why does decorators caulk crack
Decorators caulk may crack if the gap you filled is too large, it may also sink or shrink slightly. If this is the case apply a second layer of caulk over the top of the first one.
If the caulk has cracked or crazed when you have painted it, this could be you didn’t leave it long enough for it to dry.
It isn’t uncommon for paint to crack or craze on top of the filler, this is mostly a problem for emulsions, a simple solution is to paint over the caulk with a non-vinyl paint, such as an acrylic primer.
Update
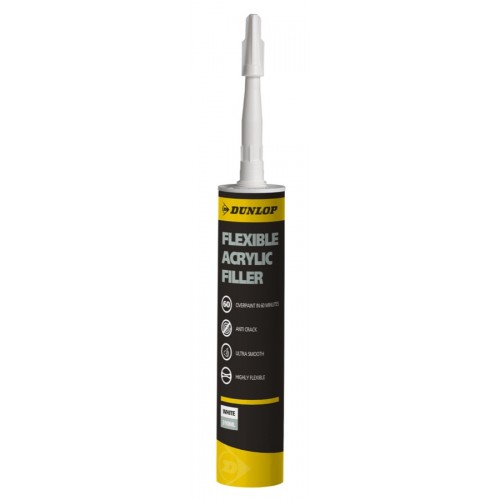
I have done a review on a caulk that doesn’t crack or craze, I have been using it for a while and the results are good.
Read my Review Of Dunlop Pro Decor Flexible Acrylic Filler Caulk here. And if you would like to buy some for yourself you can buy Dunlop Pro Decor Flexible Filler caulk from here.
Tags: Acrylic, caulk, Caulking, Ceiling, Coving, Decorators Caulk, DIY, Door, Filler, Frame, Handyman, Skirting Boards, Window
Posted in Decorating Tips, Home Improvements | 1 Comment »
Saving money on your energy bills
Posted by Adrian
December 21st, 2018
Saving money on your energy bills
Over the past few weeks the UK has endured some very cold weather including strong winds and several centimetres of snow. The first thing people do when we get this type of weather is turn on the heating and turn it up, but could you be doing things to stop the cold draughts and heat loss from your home?
If you lose heat from your house you are literally burning money, badly fitting doors and windows are often a major contributory factor to heat loss as well as badly insulated walls and loft spaces. So what can be done?
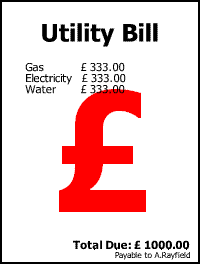
By spending a little bit of time and money you can reduce your electricity, gas or water utility bills. Many things you can do yourself if your are a keen DIYer or Handyman.
Doors and windows
Draughts from around doors and windows not only let cold in but can allow heat to escape, you can fit a self-adhesive rubber or foam seal around the window or door to shut onto to reduce draughts, fitting brush draught excluders on the bottom of a door will reduce the cold from coming under the door. Even fitting a simple key hole cover over a door lock will reduce heat loss.
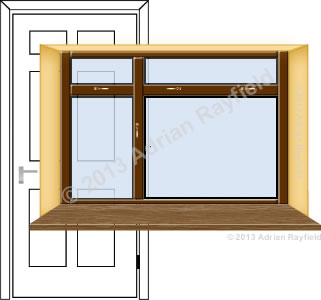
Ideally good fitting double glazed windows is the best option but these can be expensive to have fitted, but if you have single glazed windows you can still do more, such as fitting thick lined curtains and pulling them across mid afternoon as it gets dark and the temperature starts to drop. You could also fit secondary glazing throughout the winter months and remove it during the warmer summer months.
If you have a letterbox on your door consider fitting a draught proof flap on both sides, alternatively you can add a brush letterbox cover inside to reduce draughts and heat loss.
You can also buy, or make a draught excluder for the bottom of the door, these are often ‘sausage dogs’ if you buy them but can easily be made from and old pillow case and filled with old rags, whatever they are made from or the style they can reduce heat loss from the bottom of the door.
Lofts and Loft hatches
Heat rises so ensuring the loft space has enough insulation, current recommendations for mineral wool insulation is 270mm but other types of insulation may need more or less, check with the manufacturer. Also don’t forget flat roofs, they also need to be insulated.
Having a well fitted insulated and draught proofed loft hatch also can not be overlooked, no point in insulating the loft space then not doing the loft hatch. Attach insulation on the inside and fit a rubber seal for the hatch to shut onto, just like any other door.
Pipes and pipework
You can buy pipe lagging very cheaply and is easy to fit, it is often made from foam and can be fitted over the pipes, both hot and cold. You can also buy felt insulation but is harder to fit over installed pipework. If you buy the foam type just ensure you but the correct bore size for the size of copper pipe, normally either 15mm or 22mm.
Often an overlooked area is the outside, if you have pipes going outside, make sure the gaps around them are filled in, this includes plastic pipes such as waste pipes as well as copper pipes. If you have copper pies outside, lag these to stop them from freezing.
Radiators
If you have radiators, make sure you bleed the air out of them, to tell if they need doing feel the top, middle and bottom, if the top is colder it is more than likely filled with air and need bleeding. This is a simple job and all you need is a bleed key, then open the bleed valve on the radiator a small amount until water comes out, then do the bleed valve up tight again.
If you have cold areas in your radiator you are not using the radiator efficiently and if you turn the heating up to compensate for the cold area on the radiator you are using more energy to heat the bottom of the radiator, bleed them and turn the heating down a bit.
Hot water tanks
Your hot water cylinder is where you store your hot water, if this isn’t insulated properly and you lose heat from it you will need to keep re-heating the water, so using more energy. The insulation should be at least 75mm thick, if it isn’t you can buy a hot water cylinder jacket to wrap around it.
Walls
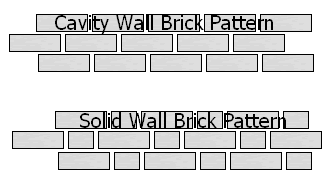
If your walls are not insulated but you have a cavity between the inner and outer walls it is worth insulating them, this will reduce the heat loss from your walls. If you are unsure if you have a cavity in you wall or if you are unsure if your walls have cavity wall insulation, if you can see your bricks, look at the pattern if it is regular you will more than likely have a cavity, if the bricks have alternate, that is if you can see a full length brick, then the end of a brick you may not have a cavity but a solid wall, check with a cavity wall insulation firm in your area.
If your house was built before or up to the 1920’s it is most likely to have solid walls, after this time it should have a cavity and any house built from the 1990’s will most likely have a cavity wall with cavity wall insulation.
As for the inside of the walls, you can line them with a thermal liner, this only really needs to be done on the exterior walls as it is fairly expensive, but can be done on all of the walls. By having a thermal liner it will help even more with the heat loss through your walls.
Solar Panels
If you wish to go a step further, you can install solar panels on your roof to help with your electricity bills, and even reduce your bills by feeding the grid with your unused electricity. Although initially expensive to install it is a long term investment.
Finally
Please remember that houses need to be ventilated to stop mould growth, wet and dry rot and to keep a healthy environment inside the house so please do not block any air bricks, window trickle vents or air vents such as those near a boiler.
With many of the ways to save money on your energy bills mentioned above, you may be able to get Government grants, financial support and even earn money such as if you install solar panels, so have a look around to see what you can get help with.
Tags: Cavity Wall, Door, Draught Excluder, Electric, Electricity, Gas, Insulation, Pipes, Radiators, Solar Panels, Solar Power, Thermal liner, Utility, Ventilation, Water, weather, Window
Posted in Home Improvements | No Comments »
What you will find under your wallpaper
Posted by Adrian
April 27th, 2018
what you will find under your wallpaper
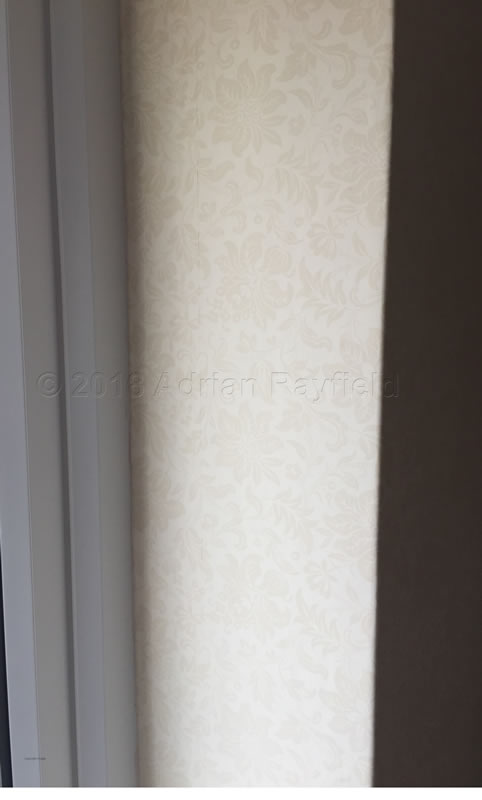
When removing wallpaper, you never know what you might find underneath. This is typically true of older houses but can also apply to newer houses.
I’ll use one of my jobs as a case study. The job was a spare bedroom, a simple remove old wallpaper, paint the ceiling and woodwork and then re-paper, but like the title of this post says, you never know ‘what you will find under your wallpaper’.
Removing Wallpaper
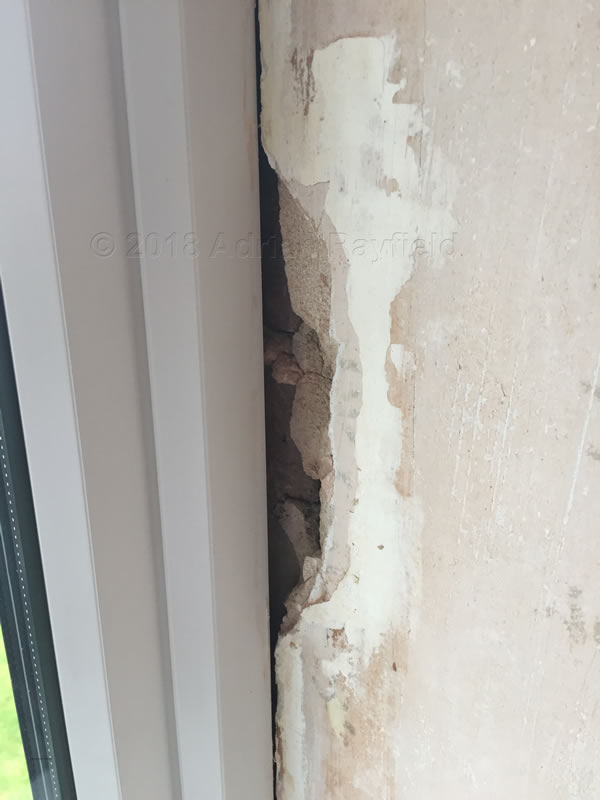
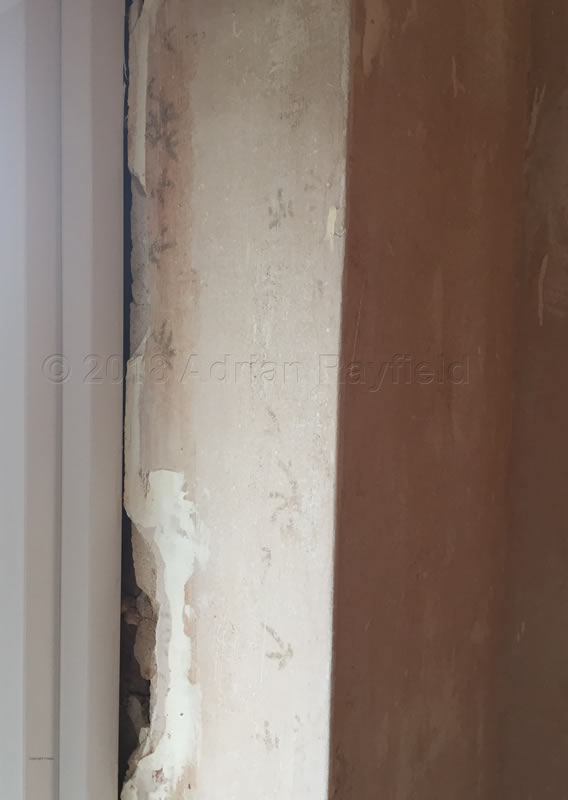
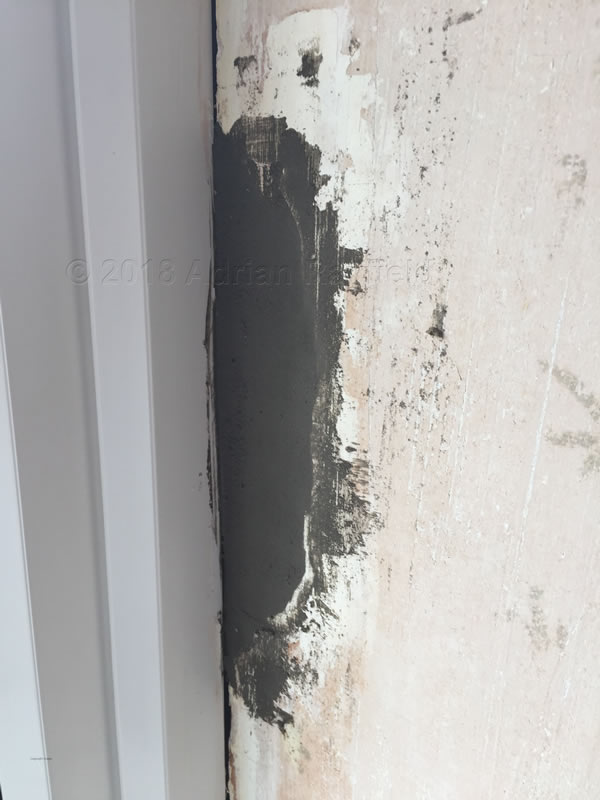
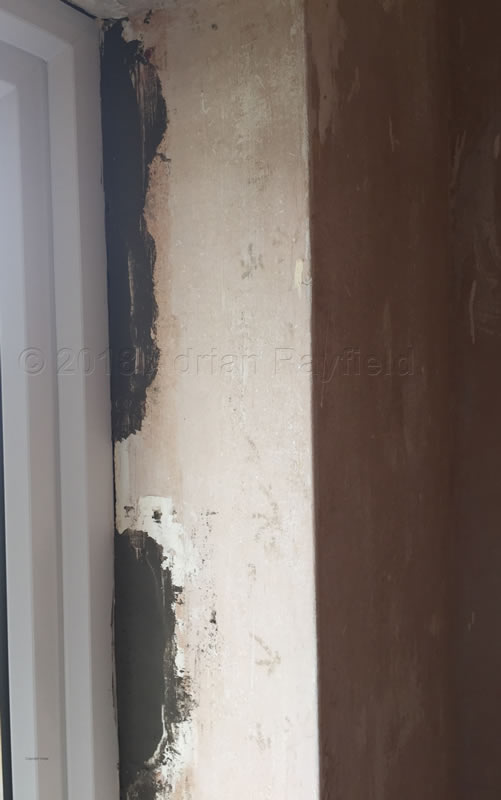
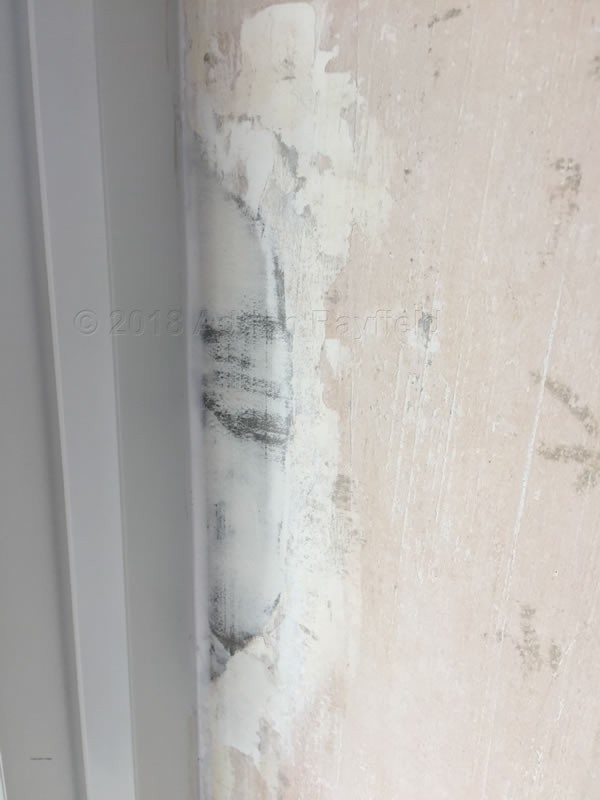
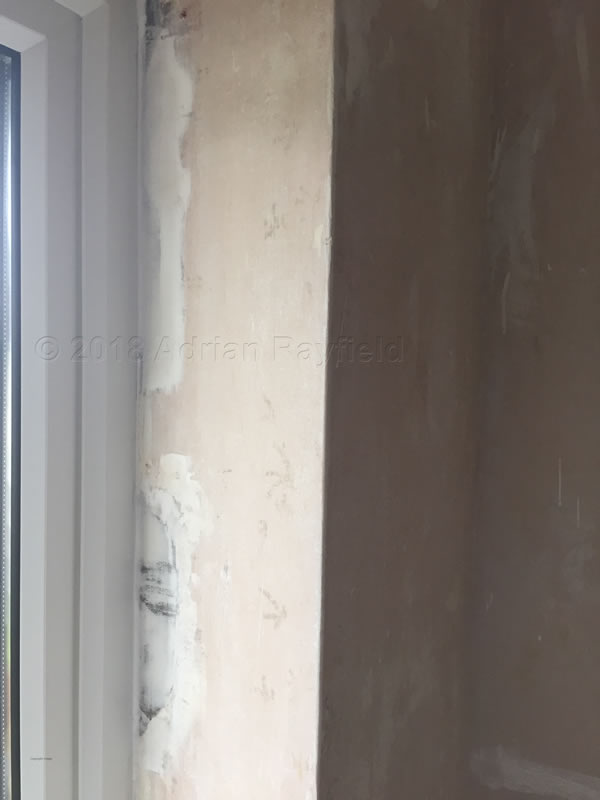
I removed the wallpaper top layer and soaked the under layer, all was going well and as expected. Then I removed the paper around the windows. These were not original windows and had been renewed with uPVC windows.
It was here that I found the broken away plasted that had left a deep hole. I have come across this problem many times so wasn’t surprised.
Luckily I always carry a fast setting filler so I could fill the deep hole to just below the surface, and finish of with a fine filler. This was done within half a day so I wasn’t help up, I then waited until the next day to hang the wallpaper and could complete the work on time at no extra cost.
As you never know what you may find under the old wallpaper, it is best to expect the unexpected, sometimes it maybe just lots of holes, other times it may involve blown plaster or loose render and plaster around replaced windows and doors.
You may be lucky and only find the dates of when the room was decorated over the years written on the wall, don’t forget to add yours!
Tags: bedroom, Ceiling, Door, Filler, Holes, Paint, Plaster, Removing Wallpaper, Render, replacement windows and doors, UPVC, Wallpaper, Walls, Window, Woodwork
Posted in Decorating Tips | No Comments »