Painting, decorating and home improvement tips blog
How to solve problems with cracks around the ceiling
Posted by Adrian
March 24th, 2010
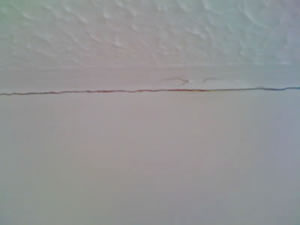
Cracking ceiling
The problem
Movement in the ceiling or walls often causes cracks around the ceiling line as they expand and contract. Raking out the crack and filling can solve the problem as can applying decorator’s caulk to the crack. Both of these solutions may only be a short-term fix.
Houses are ‘living’ things and naturally expand and contract with the heat and cold, modern houses are often built with stud interior walls, in other words are made from timber and plasterboard, these naturally move over time.
Other causes of these types of cracks could be house settlement, especially on new builds or extensions. They are nothing to worry about.
Continue reading How to solve problems with cracks around the ceiling
Tags: Ceiling, Coving, Decorator Caulk
Posted in Decorating Tips | 13 Comments »
How to paint an interior wall
Posted by Adrian
March 8th, 2010

How to paint an interior wall
To start gather all the equipment needed
You will need:
- Dustsheets – To cover floor and furniture
- A brush – 1½ or 2 inch
- A roller cage – for the roller sleeve to go onto
- A roller sleeve – for smooth walls use a fine or medium pile roller, ideally a 9-inch sleeve
- A roller tray – big enough for a 9-inch roller
- A paint kettle – to tip some paint into for cutting in
- Paint – The paint for the walls, normally emulsion (use our paint calculator to determine how much paint you need)
First cover the floor and furniture with dustsheets. Next open your tin of paint and stir well, tip a small amount into the paint kettle, then fill the paint tray.
Now cut in (i.e paint around the edge) using the brush and kettle, cut in around one wall at a time including any sockets or switches.
Once you have cut in, take your roller and get some paint onto it, roll it on the tray to work the paint into the roller sleeve and get it all around the sleeve.
Now take the roller and roll it over the wall, it is best to roll in a ‘W’ motion, this will ensure you don’t end up with lines and also will give a nice even coat across the wall. When you have covered a wall, go lightly over the wall with an unloaded roller to get rid of any ‘orange peel’ effect.
Simply repeat this operation for each wall you need to paint.
Tags: brush, Emulsion, Paint, Paint Calculator, Paint kettle, Roller
Posted in Decorating Tips | 1 Comment »
How to paint a radiator
Posted by Adrian
March 1st, 2010
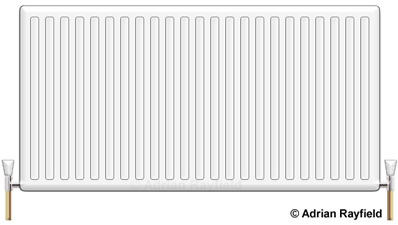
How to paint a radiator
To paint a radiator firstly turn it off and let it go cold if it has been in use. Once the radiator is cool your ready to begin.
Firstly give the old paint on the radiator a ‘key’ for the new paint to adhere to, basically this means give the radiator a light rub down with a fine to medium grit abrasive such as sand or glass paper. You could also use wet and dry.
Next, dust off the radiator or wipe it over with a damp cloth to remove and dust. You are now ready to start painting.
It is advisable to lay a dustsheet under the radiator to catch any spills, splashes etc.
Where to start?
I normally paint the ends first, painting around the bleed valve end then the other end.
Load the brush with paint and paint the first three or four flutes (the indented parts) at the top and the bottom ensuring they are covered well.
Next paint the first few flutes from top to bottom, then with an unloaded brush, brush from top to bottom spreading the paint over evenly.
Depending on how big the radiator is you can paint all the flutes and then the top and bottom of the radiator. If the radiator is big or if you work slowly it is better to do a few flutes and then work the top and bottom along as you go.
When you have worked your way along the entire length of the radiator go back and check for any runs, normally at the bottom of the flutes, if there are any runs simply brush them out with an unloaded brush.
Finally, stand back and admire your work!
Please note that when you do turn the radiator on again it will give off a smell, this is the paint and is normal, the smell will go after the radiator has been on a few times and the paint is fully cured.
Tags: Paint, Radiator
Posted in Decorating Tips | 3 Comments »