Painting, decorating and home improvement tips blog
12 essential tools for your DIY decorating toolbox
Posted by Adrian
April 4th, 2011
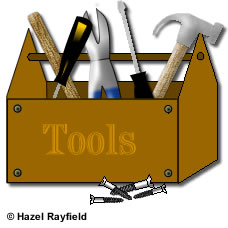
Tools you should have in your toolbox
The following is a basic list of tools you should consider having in your decorating toolbox, you may need more than those listed but these are really the twelve essentials to get you started. This list doesn’t include sundries such as sandpaper.
Dustsheet, heavy and light
Dustsheets are needed to cover over furniture and flooring, they can be heavy weight or lightweight or even plastic disposable ones depending on the job they are required for.
Scrapers
You may find having more than one scraper of use, a thin bladed one for things like opening cracks and a wider one for filling cracks, scraping walls and ceilings and removing wallpaper.
Screwdriver
A selection of screwdrivers would be useful for removing things such as shelves, door furniture and electrical items* such as wall lights, ceiling lights, switches and sockets.
Sharp knife
This can be used to open tubes of decorators caulk, packets of filler and wallpaper paste and for cutting wallpaper, or even to sharpen your pencil !!
Continue reading 12 essential tools for your DIY decorating toolbox
Tags: Decorating, Decorator Caulk, Dustsheet, Hammer, Knife, Masking Tape, Paint kettle, Paint tray, Paintbrushes, Roller Cage, Roller Sleeve, Scraper, Screwdriver, Toolbox, Tools, Wallpaper
Posted in Decorating Tips | No Comments »
How to paint an interior wall
Posted by Adrian
March 8th, 2010

How to paint an interior wall
To start gather all the equipment needed
You will need:
- Dustsheets – To cover floor and furniture
- A brush – 1½ or 2 inch
- A roller cage – for the roller sleeve to go onto
- A roller sleeve – for smooth walls use a fine or medium pile roller, ideally a 9-inch sleeve
- A roller tray – big enough for a 9-inch roller
- A paint kettle – to tip some paint into for cutting in
- Paint – The paint for the walls, normally emulsion (use our paint calculator to determine how much paint you need)
First cover the floor and furniture with dustsheets. Next open your tin of paint and stir well, tip a small amount into the paint kettle, then fill the paint tray.
Now cut in (i.e paint around the edge) using the brush and kettle, cut in around one wall at a time including any sockets or switches.
Once you have cut in, take your roller and get some paint onto it, roll it on the tray to work the paint into the roller sleeve and get it all around the sleeve.
Now take the roller and roll it over the wall, it is best to roll in a ‘W’ motion, this will ensure you don’t end up with lines and also will give a nice even coat across the wall. When you have covered a wall, go lightly over the wall with an unloaded roller to get rid of any ‘orange peel’ effect.
Simply repeat this operation for each wall you need to paint.
Tags: brush, Emulsion, Paint, Paint Calculator, Paint kettle, Roller
Posted in Decorating Tips | 1 Comment »
Cleaning paint trays and paint kettles
Posted by Adrian
January 15th, 2010
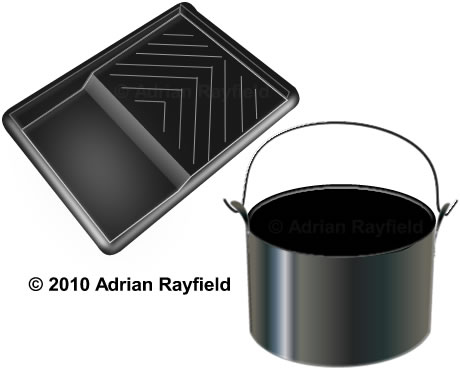
Don’t clean out paint trays or paint kettles
Use tin foil to cover then throw away.
Tired of cleaning out your used paint trays or paint kettles?
Use this useful tip and save yourself hours of cleaning.
Take your paint tray or paint kettle, get some tin/aluminium foil, and tear off a length enough to cover the inside of the paint tray or kettle. You could also use cling-film if you prefer.
Now cover the inside of the tray or kettle with the foil, be careful not to pierce the foil with your finger. You may want to add a second layer.
Now tip the paint into your covered tray or kettle and paint away.
When you are done painting, tip out any remaining paint back into the paint can, then remove the foil and dispose of it.
If you want to paint a feature wall this solution is ideal. It is quick and easy for changing the colour in the paint tray and paint kettle from feature wall colour to main colour without having to wash it out first.
A simple but effective decorating tip!
Tags: Feature Wall, Paint kettle, Paint tray
Posted in Decorating Tips | 1 Comment »