Painting, decorating and home improvement tips blog
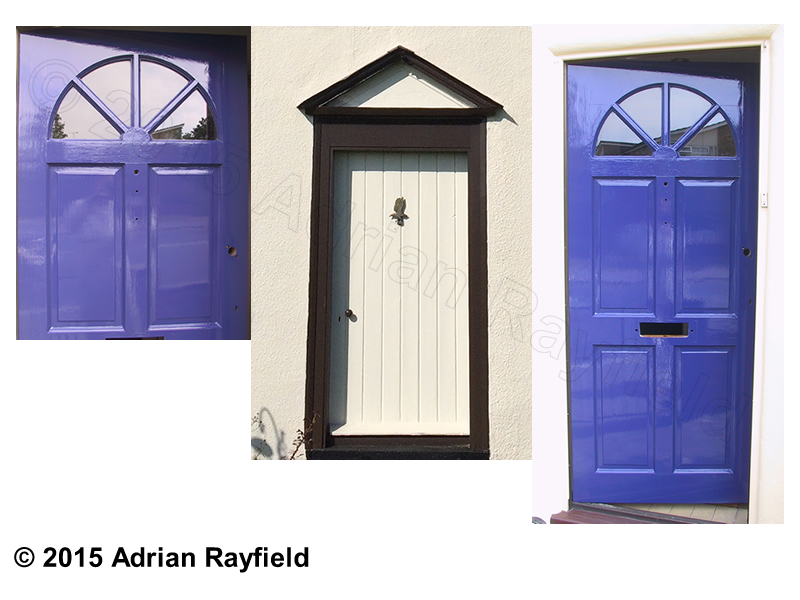
How to paint a front door
Posted by Adrian
May 18th, 2015
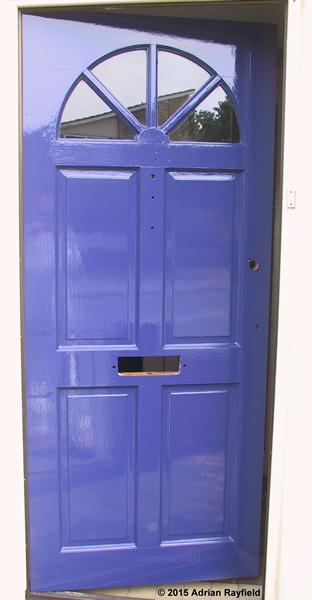
How to paint a front door
From time to time you will need to paint your front door, if it is wood that is. Ideally pick a couple of dry days to complete the job such as spring or summer. Pick a good quality exterior paint to ensure a long lasting job.
The front door is one of the most seen parts of your house, a good looking door gives a good impression to visitors, and especially if you are selling your house as it gives kerb appeal.
You should gather all the tools required before starting, you will need:
- Screwdrivers
- Adjustable spanner
- Sandpaper (various grades)
- Primer
- Undercoat
- Topcoat (Satin or gloss)
- Paint stripper (optional)
- Heat gun (optional)
- Scraper (optional)
Ironwork / Door furniture
The first job is to remove all ironwork or door furniture such as locks, knocker, letterbox, escutcheon, door pull and numbers. This will make it far easier for working on the door. Put everything to one side being careful not to lose any screws as some can be tiny and you will need them again later to refit the ironwork / door furniture. You may need an adjustable spanner for the knocker or letterbox.
Preparation
As with all decorating jobs, preparation is key and will take most of your time. Now is the time to decide if you are simply going to re-decorate your door, or give it a real overhaul and strip the existing finish off back to bare wood.
If you are going to remove all the existing paint finish you can do this either by using a heat gun and scraper, or paint remover and scraper. The choice is really up to you. Once the door is stripped give it a good rub down and fill any crack and holes and sand these level and smooth. Once you have done this you are now ready to move to the next section, prime.
If you decide against stripping the door back to bare wood, or it simply doesn’t need it you should give the existing surface a good clean off to remove dirt and grime with a cloth and maybe water, the give the surface a good rub down. Fill any cracks or unwanted holes and rub them down level and smooth. Dust off and you can move onto the next section, prime.
Prime
Once you have prepared the door you should prime the entire door if you have stripped it back to bare wood, or spot prime bare wood if you have just rubbed down and filled. Allow to dry before moving onto undercoating.
Undercoat
Once you have primed the door, whether it be the entire door or spot primed, give the primer a light sand down before applying one or two coats of undercoat. Allow each coat to dry fully if you give it more than one coat sand back between coats for that perfect smooth finish.
Topcoat
Once you have prepared the door correctly and given it it’s necessary coats of primer and undercoat you can now give the door it’s final sand back and the final coat, the topcoat. This maybe a satin finish or a gloss. Again you may want to give two topcoats, but read the manufacturer’s instructions to ensure you leave enough time between coats, and a word of warning, if you sandback, you a fine paper and use light strokes. If you are too harsh you could scratch the surface too much, or even worse roll up the first coat and ruin all your hard work.
Non-painted or varnished doors
This post deals with painted doors, such a glossed doors but for other finishes, such as varnish or stained door the principle is the same, apart from you wouldn’t use primer or undercoat, however the preparation part is still applicable and needs to be done.
Tags: Door, Door Furniture, Filler, Filling, Gloss, Ironwork, Knocker, Letterbox, Lock, Paint, Painting, Preparation, Primer, Satin, Topcoat, Undercoat, Varnish, Woodstain
Posted in Decorating Tips | 1 Comment »
How to mix wallpaper paste video
Posted by Adrian
April 1st, 2015
How to mix wallpaper paste video
I have written a post previously about how to mix wallpaper paste, many people have problems getting it just right and get lumps in it or make it to thick or runny, not too dissimilar to porridge or custard!!. I decided to make a video showing you how to mix the perfect wallpaper paste, I have done it this way for years and mix the perfect paste every time.
I decided to make a video of myself mixing the paste on a recent job I did, the paste mixed was used to hang lining paper.
So here is the video…..
How to mix wallpaper paste video
I hope you find this video as well as our other videos helpful and informative, look out for more in the future.
Tags: How to mix wallpaper adhesive, Video, Wallpaper, Wallpaper adhesive
Posted in News, Video | No Comments »
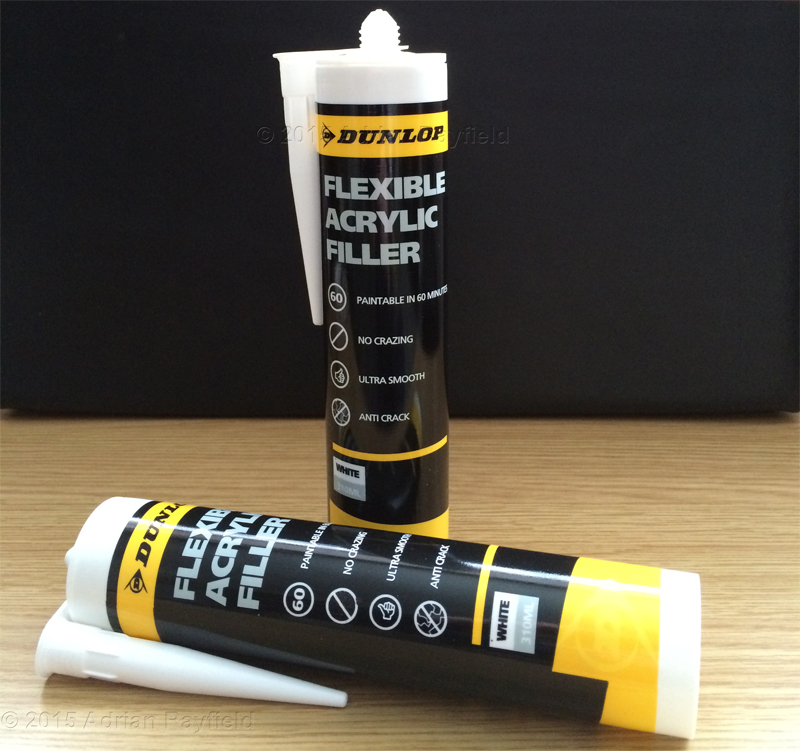
Review of Dunlop Pro Decor Flexible Acrylic Filler caulk
Posted by Adrian
March 9th, 2015
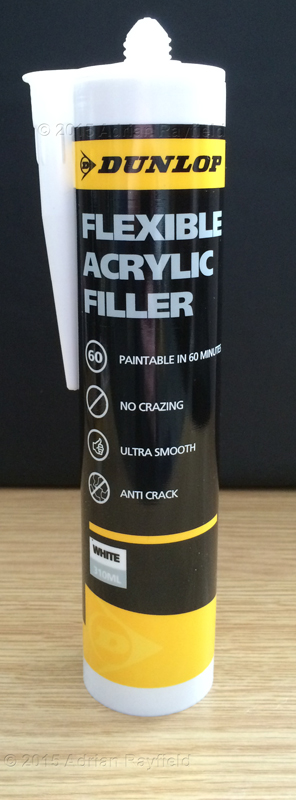
Review of Dunlop Pro Decor Flexible Acrylic Filler caulk
I recently received a tube of Dunlop Pro Decor Flexible Acrylic Filler to try and review, there has been a bit of a buzz over this product from professional decorators like myself, why, you ask, well because of its claims not to crack and its anti crazing properties. Now unless you use caulk daily like us decorators you may not know the ongoing problem we have when we use caulk and paint over it.
I have written about this problem before on this blog, Tips on using decorator’s caulk, also on Rayfields Interiors, How to use decorators caulk and also Fillers – knowing which one to use and on the Improving Your Property blog, What is decorators caulk / filler.
So when I got this opportunity to try this product and give a review I was very keen to do so, could this really be the end to cracking and crazing filer?
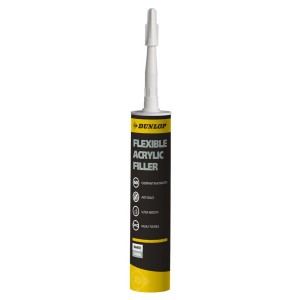
The tubes are filled with a white acrylic filler and come in a 310ml tube, allowing easy application by using a caulking gun.
I have tried the product and here is my review.
My review of Dunlop Pro Decor Flexible Acrylic Filler
On the Dunlop Decorators website it says this about the product:
FLEXIBLE ACRYLIC FILLER™
A high performance gunnable filler which can be used internally and externally for filling skirting boards, window and door frames as well as repairing cracks and damage to walls and ceilings.
- Paintable in 60 minutes
- No Crazing
- Ultra smooth
- Anti-Crack
I was very keen to test the no crazing and anti-cracking claims.
I tried the acrylic filler on my last two jobs, I have used it around skirting boards and ceilings, and painted over it with different types of paint, including water based primer /undercoat, gloss, satinwood and emulsion. I also noted the drying time and smoothness once dried.
The result
I was pleased to be able to try this acrylic filler and see if it met all of it’s claims, which for me it did. It seemed to dry fast allowing me to paint over it quickly. For the normal troublesome emulsion crazing / cracking issue I can say I didn’t come across any of this issue so was really impressed. Once dry the filler left a smooth surface that didn’t show once pained. I also didn’t see any cracking once it dried, I tried this product in both small and large gaps and had the same results.
In conclusion
I was very please with this acrylic filler, and from a professional decorators point of view the fact it stand up to it’s claims and doesn’t crack or craze like many other brands of decorator caulk, this is something we have been waiting for for years.
Now that I have used this product I will certainly be changing over to use this acrylic filler all the time and will certainly be wanting to try Dunlop Pro Decor’s other fillers such as deep hole filler and fine and lightweight fillers in the future.
Buy Dunlop Pro Decor Flexible Acrylic Filler caulk
You can buy Dunlop Pro Decor Flexible Acrylic Filler caulk from My Paintbrush.
Tags: Acrylic, Ceiling, Cracking, Crazing, Decorators Caulk, dunlop, Dunlop pro Decor, Emulsion, Filler, Skirting Boards
Posted in News, Resources, Reviews | 12 Comments »