Painting, decorating and home improvement tips blog
How to fit a door Cylinder rim lock
Posted by Adrian
September 30th, 2020

How to fit a door Cylinder rim lock
A cylinder rim lock is often known as a night latch lock or a Yale lock, it is a very common lock and can be found on lots of front doors, you may even have one on your front door. A cylinder rim lock is a lock that is mounted on the surface of the door, rather than being fitted in a door such as a mortise lock. With a rim lock the door is held closed by a latch that can often be deadlocked with the key externally or via a button on the inside of the door. It can only be opened from the outside via a key or a handle on the inside.
Choosing the correct position for a cylinder rim lock
A rim lock is fitted typically ⅓ from the top of the door or 1500mm from the bottom of the door, but there are no hard and fast rules. Decide the best place for you but avoid fitting a lock on a joint where a rail (horizontal part) goes into the stile (the vertical part) as this could weaken the door.
Fitting a cylinder rim lock
Firstly gather all the tools required to complete this job, you will need:
- A cylinder rim lock / night latch / Yale lock
- A drill
- Wood drill bits
- A Tape measure
- Chisels
- A pencil
- A door wedge
- Masking tape
- A junior hacksaw

When you have all the tools together, start by opening the lock packet and familiarise yourself with all the parts. Inside the pack should be a template, this will help you mark and drill the main hole through the door, you don’t want to get this bit wrong. There should also be a cylinder lock, keys, a backing plate, a lock body, fixing screws and a staple.
Place the template on the door as instructed, use some masking tape to hold it in position. You will need a large spade drill bit, typically a 32mm / 1 ¼ inch. You are going to need to drill a 32mm hole through the door, start drilling from one side, then as the tip of the drill comes through the other side, stop and drill from the other way, this will help prevent the wood splintering as you drill through.
Next drill two holes for the two fixing screws that hold the cylinder lock onto the door. Again, drill all the way through the door. You may need to drill the inside holes with a slightly bigger drill bit to allow the screws to go into the door when you screw the cylinder on and do not fail the operation of the backing plate when it is fitted.
Now take the backing plate and position this on the door, mark and drill the fixing holes, then remove. You typically will need to drill three holes.
On the template there may be a line for a recess on the door edge, mark this on the door and then hold the lock body in place, draw around the part of the lock body that goes onto the door edge, you will then need to chisel this area away to allow the lock to sit flush on the door edge. The recess will only need to be 2-3mm depending on the thickness of the lock body edge. Not all locks will require this as they do not all go onto the door edge.

Once you have done this mark the two retaining screws of the lock body on the door edge, drill pilot holes, but do not screw the lock on yet.
Fitting the Cylinder rim lock to the door
![]()
With all the parts of the lock off the door, you can now assemble the lock onto the door, place the cylinder in the large hole and the slip ring or cylinder latch pull if you have one, make sure the arrows on the rear of the lock body line up before filling it. Put the cylinder connecting bar into the slot on the backing plate, screw the backing plate on, screw the cylinder on. You may need to put the key in the cylinder and turn it to allow access to all the screw holes but make sure you put it back in the same place when your done. If the connecting bar is to long, you can shorten it using a junior hacksaw.
Once the cylinder and the backing plate are securely fitted you can now fit the lock body, hook one edge of the body on first, then with a little wiggle and slight operation of the lock handle you should be able to get the lock body on. Once it is on, use the retaining screw to secure it to the door.
Fitting the door lock staple
The staple is the part that holds the door shut and goes on the door frame. Once the lock is fitted to the door, close the door and mark the position where the staple has to go, chisel out a recess for it to sit in. Drill pilot holes to fit the staple to the frame and screw the staple to the frame. Ensure the gap between the lock and the staple is no more than 5mm, if it is the effectiveness of the lock is greatly reduced.
And finally, try the door to make sure it closes OK without catching the staple, if it does you may need to recess the staple a little more. Once the door closes OK try the lock from inside, then try opening the lock with a key from outside.


Tags: Backing Plate, Cylinder Latch Pull, Cylinder rim lock, Door, Lock, Mortise Lock, Night Latch, Staple, Yale Lock
Posted in Home Improvements | No Comments »
How to fit door handles or door knob
Posted by Adrian
May 24th, 2020
How to fit door handles or door knob
Once you have fitted a lock such as a mortise sash lock or a cylinder rim lock or are just simply replacing the handles. This post will explain how to do it, it is a fairly simple task and should’t take to long. This post assumes the lock is already fitted to the door and you just need to fit the handles or you are just replacing handles. If you are fitting a new door, you will need to fit a lock first.
As always, you will need to gather the tools you require together before starting the job, you will need:
- A door handle or knob set
- A drill
- A small drill bit
- A screwdriver
- A small level
- A junior hacksaw (possibly required)
Fitting the door handle or door knob
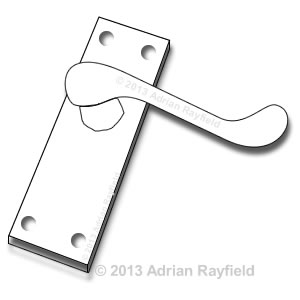
In the door handle pack you should have two handles, fixing screws and a square spindle. Open the pack and put to one side.
Firstly take the spindle and put it through the lock, then take one handle and place it on the spindle.
Now take the level and upright the handle by placing the level on the side of the handle, that is, of course as long as the handle doesn’t have uneven sides or it is a door knob.
When the handle is upright and level, hold it with one hand while you drill two pilot holes, do this for example for the top left and bottom right holes. Then screw the fixing screws in and then drill the final two holes for this handle or knob.
Now take the other handle and try it on the spindle, the spindle maybe too long and requires cutting. Put the second handle on the spindle and see how far the back of the handle is away from the door, you will need cut this amount of the spindle.
Once the spindle has been cut you can fit the second handle, do this the same way as you did the first one. Once all the screws have been screwed in you can try the handle, if the handle stays down without returning to its original position, try loosening the handle fixing screws slightly, this should help. If it doesn’t help, remove one handle and see if the spindle is rubbing on the door where the spindle goes into the lock, if it is remove the spindle and chisel away where it is rubbing, refit the spindle and handle and try again.
Finally, clean off and finger marks off the handle with a soft cloth.
Tags: Cylinder rim lock, Door, Door Handle, Door Knob, Handle, Mortise Sash Lock, Spindle
Posted in Home Improvements | No Comments »
How to stop squeaking hinges
Posted by Adrian
January 23rd, 2020
How to stop squeaking hinges
There’s nothing worse than the sound of an annoying squeak, such as a door hinge for example.
This can be simply rectified and is a quick job to do. Squeaking hinges are caused by being dry and the pin moving as the door is used.
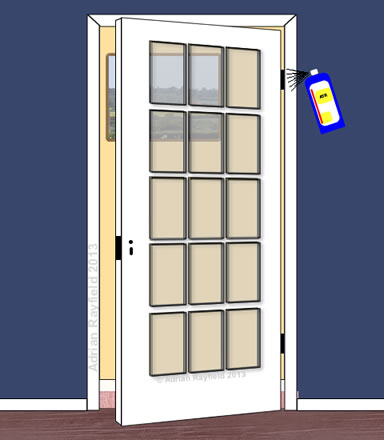
To fix this is problem you need to lubricate the hinge, this can be done with any lubricant but the key is it has to penetrate into the joint of the hinge. Most people use a spray lubricant, such as WD40, but a penetrating oil such as 3 in 1 will also do.
Fixing the squeak
Take your lubricant and apply it to the hinge, open and close the door to help the lubricant penetrate in the hinge joint, you may have to add a little more lubricant if the squeak doesn’t completely go first time.
Now take a cloth or kitchen paper and wipe the excess lubricant off the hinge, now try the door and it should not only be quiet but open and close easier.
Whilst you have the lubricant oil or spray out, why not do the rest of the hinges too?
Tags: DIY, Door, Handyman, Hinges, Lubricant, Penetrating Oil, Squeaking Hinges
Posted in Home Improvements | No Comments »