Painting, decorating and home improvement tips blog
Making and using a water level
Posted by Adrian
March 31st, 2021
Making and using a water level
Water levels can come in very useful when you need to make a level line across a big expanse, such as in a room and a level simply won’t do. You can buy laser levels but they can be expensive and you may only require it once, this post describes how to make a cheap water level.
Water levels can be used for things such as dado and picture rails, wallpaper borders etc.
Making a water level
To make a water level is fairly straightforward, you will need the following items.
- A long length of clear tubing
- Water
- Something to bung ends of tube (optional)
- Funnel (optional)
You will need a length of clear tubing, long enough to reach around your work area, such as a room. The tube needs to be clear so you can see the water, so a garden hose wouldn’t be any good as it isn’t transparent.
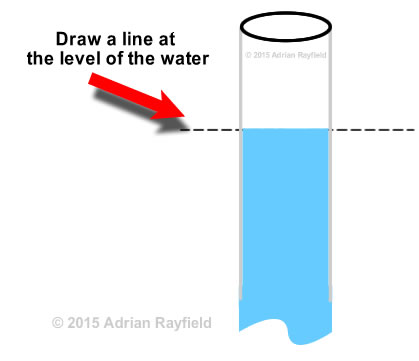
Once you have your length of tubing you need to fill it with water. This can be done by using a funnel in one end of the tube and running water into it to fill the tube. You can also try the syphon method, but whatever you find works best for you. Make sure that there are no air bubbles in the length of tube, if there are work them out to an open end.
Don’t fill the tube fully as you will need to allow the water to move without it coming out all over the place and for it to settle to get the level.
Once the tube is filled enough you will need to stop the water coming out again, this can be done simply by placing your thumb over the end or a bung of some kind if you have one.
Using a water level
Now that you have made your water level you are ready to use it. You will need a starting point, this can be achieved by measuring and making a pencil mark, or maybe using an existing level, such as a dado rail, it could even be something in another room if the tube is long enough. For example if you want to make sure the dado rail is the same in two rooms. This will be your starting point.
You will need a second person to help you with using the level. One stays at the original level point whilst the other uses the level and marks the wall at the level.
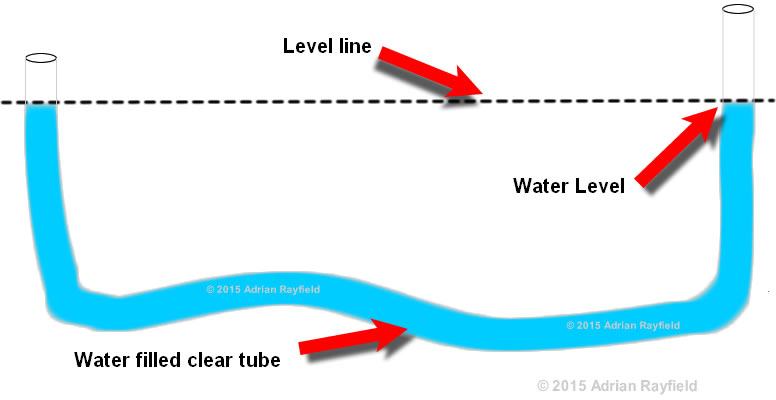
The person holding the ‘fixed’ end, that is the original level mark stays holding the tube at this point, whilst the second person moves to a new point and holds the tube against the wall. The first person instructs the second person to move up or down until the water is level with the original mark, the second person can then mark the wall level with the water in the tube, thus giving a level line.
Continue doing this in several places as required. Remember not to lift tube too high without having end blocked as it will flow out. You can then if required draw a line and join up the marks.
Tags: Dado rail, Decoratomg, DIY, Handyman, Level, Painting, Wallpaper Border, Water, Water Level, Woodwork
Posted in Home Improvements | No Comments »
How to bleed a radiator
Posted by Adrian
February 11th, 2020
How to bleed a radiator
If you have central heating and radiators you will from time to time need to bleed them. This basically means allowing any build up of air out of the system and allow that space to be filled with water.
If you do not bleed the system you will get cold areas within the radiator and the system will not be as efficient and you will not be getting the full heat out of the system.
How can I tell if I need to bleed my radiators
You can tell if you need to bleed your radiators simply by feeling them once they have been on for a while, the radiator will feel cooler at the top than the bottom, mostly the air will be at the top of the radiators, but you may feel cooler spots lower down also. If you find cooler areas more than likely this will be air which doesn’t get as hot as the water so therefore is cooler. If this is what you find, bleed the radiators.
How do I bleed my radiators
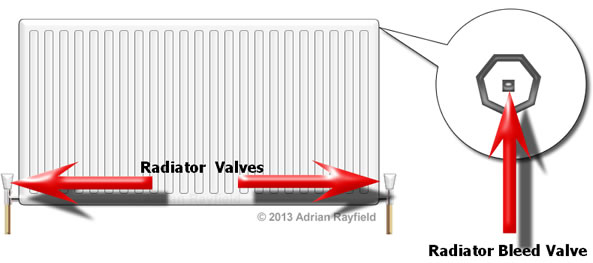
This is a quick and easy job, firstly open up all the radiator valves fully, including thermostatic ones, then run the system for around 10 minutes and then turn the system off. You will then need a radiator bleed valve key and a cloth. If you haven’t got a bleed valve key, they can be bought cheaply at a hardware store.
Go around all radiators and open slightly the bleed valve by turning anti-clockwise, this will be located at the top of each radiator and on one edge. Depending on the age of the radiator you may have a small plastic end over the bleed valve, this will direct the water away from the wall. Make sure this is facing away from the wall if not turn it so that it is, you could aim it into a bucket before opening the bleed valve.
Carefully open the valve slightly with the valve key, air should then come out, keep the valve open until water comes out then shut the valve by turning clockwise. Hold the cloth around the bleed valve as you do this to catch any water.
Once you have done this to all radiators you may have to check the pressure of the boiler by looking at the gauge, if the pressure has dropped you may have to ‘top up’ the pressure. This is normally done by opening a tap on the boiler until the correct pressure is reached. To top up the boiler open the tap on the filling Loop, check the boiler handbook to find out how to do this.
If you find that after you have bled the radiators the radiators nearer the boiler are hotter than those furthest away, this means the radiators aren’t balanced and you may have to turn the valves down on the radiators near the boiler and leave the ones furthest away fully open, this will allow the water to reach the furthest away radiators before cooling down.

Top Tip : If the bottom of the radiators are cold, this could be due to a build up of sludge and rust, this needs solving by draining the system down and flushing it all through. If you are unsure call a plumber / heating engineer.
Tags: Bleed, Boiler, Central Heating, DIY, Handyman, heating, Plumbing, Radiator, Valve
Posted in Home Improvements | No Comments »
How to stop squeaking hinges
Posted by Adrian
January 23rd, 2020
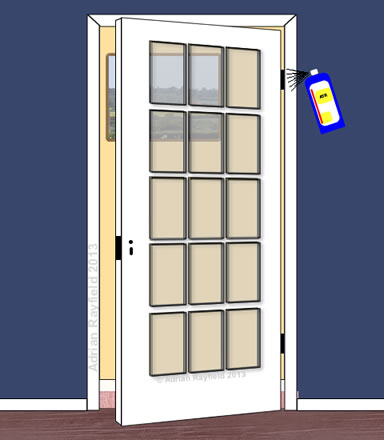
How to stop squeaking hinges
There’s nothing worse than the sound of an annoying squeak, such as a door hinge for example.
This can be simply rectified and is a quick job to do. Squeaking hinges are caused by being dry and the pin moving as the door is used.
To fix this is problem you need to lubricate the hinge, this can be done with any lubricant but the key is it has to penetrate into the joint of the hinge. Most people use a spray lubricant, such as WD40, but a penetrating oil such as 3 in 1 will also do.
Fixing the squeak
Take your lubricant and apply it to the hinge, open and close the door to help the lubricant penetrate in the hinge joint, you may have to add a little more lubricant if the squeak doesn’t completely go first time.
Now take a cloth or kitchen paper and wipe the excess lubricant off the hinge, now try the door and it should not only be quiet but open and close easier.
Whilst you have the lubricant oil or spray out, why not do the rest of the hinges too?
Tags: DIY, Door, Handyman, Hinges, Lubricant, Penetrating Oil, Squeaking Hinges
Posted in Home Improvements | No Comments »