Painting, decorating and home improvement tips blog
How to paint new wood
Posted by Adrian
April 30th, 2014
How to paint new wood
It is important when painting new wood to prepare the wood and paint it correctly, this will ensure the wood lasts for a long time. Most interior wood is softwood, such as skirting boards, door frames, architraves and doors. Whereas exterior wood can be both softwood, such as in fascia boards, but maybe hardwoods for windows and doors etc. This post mainly deals with softwood, such as pine, and painting the wood rather than staining or varnishing.
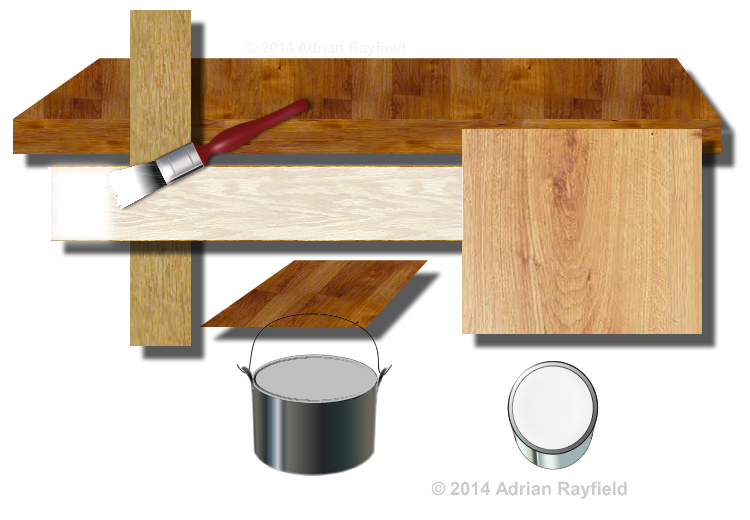
Preparation is the first job for any new wood, a rub down to ensure the surface is smooth and ready for painting. If you are going to be painting the wood, that is to say not going to varnish the wood, you should apply kotting solution to the knots. This can be applied with a brush or rag. Some knotting solution comes with a brush. Apply two or three coats to the knots and let it dry.
Primer
One the knotting is dry you can apply a suitable wood primer. This can either be solvent or water based, I prefer water based as it dries quickly. Once the first coat is dry, lightly rub down the first coat and then apply a second coat of primer.
Once this is dry, again give it a light rub down, you should now have a well coated piece of wood ready for an undercoat.
Undercoat
An undercoat is used to allow a topcoat such as gloss or satinwood to be applied. Apply one or two coats of a suitable undercoat, for some paints a coloured undercoat can be used, such as a dark grey undercoat for a dark blue or black topcoat for example.
If you are applying more than one undercoat, leave to dry fully and give the wood a light sanding between coats. You may have to give the wood two undercoats depending on how well the wood is covered and how porous the wood is.
Topcoat
Topcoat can be gloss, satinwood, eggshell, solvent based or water based they all come under the heading topcoat as it is the last coat or finishing coat to be applied to the wood.
Once you have applied the primer and undercoat you need to rub the wood down a final time in preparation for the topcoat. Dust of the wood and make sure the wood is free from dirt and grease, then apply the topcoat to the wood. In some cases a second coat may be required, if this is the case allow the first coat to fully dry and then lightly rub the first coat with fine sandpaper and then remove any dust and apply the second coat.
Giving a second coat can give a better gloss in the case of water based paints, it can also give a deeper, fuller finish.
Painting new hardwood
To paint new hardwood, such as a front door, the process is the same, you may not require any knotting solution as hardwood has far less knots. Again, rub down, prime, undercoat and topcoat ensuring you rub down between each coat to ensure a good smooth finish.
Tags: Door, Door Frame, Exterior Wood, Fascia Boards, Gloss, Hardwood, Interior Wood, Knotting Solution, New Wood, Pine, Primer, Satinwood, Skirting Boards, Softwood, Staining, Topcoat, Undercoat, Varnish, Varnishing, Windows
Posted in Decorating Tips | No Comments »
Parts of a window
Posted by Adrian
August 27th, 2013
Parts of a window
You will certainly have windows in your property but there are lots of types of window styles such as, a sash window where the top and bottom windows slide up and down, or a casement window, this type of window opens outwards like a door and is very common in new houses.
Windows are also available in many types of materials such as hardwood, softwood, aluminium and Upvc to mention few. The glass may be plan or have coloured glass, lead lights or latticework to make a window more ornate.

In this post I am talking about a traditional casement window with a fanlight, however many of the terms used relate to all styles of window.
Window frame
The window frame consists of a head that runs along the top, a sill along the bottom and two jambs running vertically at either side. The frame holds the window itself either hinged as in the case of a casement window or free running as in a sash window.
Top drip
Some windows will have a top drip, this encourages the water to run off the tip of the window rather than to run down the window and glass, or even into an open window.
Casement
The casement is the part the glass sits in, the part that opens. A basic design of a casement consists of four parts, a top rail running horizontally at the top, a bottom rail that runs horizontally along the bottom and two styles that run vertically that go to make the casement. This would typically be hinged on one side or along the top and attached to the window frame.
Mullion
A mullion is the central vertical part that makes up the frame on a casement window and separates two windows, for example a opening casement window and a fixed pain window.
Transom
A transom is a horizontal part separating two windows, for example a fixed pain and a fanlight / vent window.
Window sill
The sill is at the bottom of the frame and attached to the two vertical jambs to complete the window frame, the sill will slant away from the window to encourage water to run away from the window frame, the sill will also have grove underneath it to allow the water to drip off and to stop the water running back under the window frame.
Many new windows now come with trickle vents, these are air vents that are in the head of the frame that have a grill on the outside and a closing vent on the inside, this allows air flow into the property and help prevent condensation forming on the windows.
Tags: Casement Window, Fanlight, Mullion, Sash Window, Sill, Style, Transom, Window, Window Frame, Windows
Posted in Decorating Tips | No Comments »
Painting around a window or glazed door
Posted by Adrian
February 7th, 2010
How to paint around a window and get a professional looking job
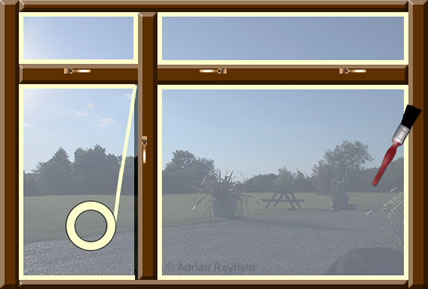
If you are unconfident of cutting in around windows or glazed doors you can use this following tip.
To stop getting paint on windows or glass panelled doors when you paint them you can use masking tape to mask the glass.
Take time and care to only get the tape on the glass.
Place the tape on the glass, you can then run a sharp knife along the frame to ensure the tape is only on the glass, but being careful not to cut into the frame.
Once you have gone around all the window/s you are ready to paint. Paint around the window, glazes door etc as normal.
Leave the paint to fully dry, and then remove the tape carefully. You may need to cut the tape around the window to ensure it doesn’t pull the paint off as you remove the tape, take your time and you will have a newly painted window or glazed door.
The other method is to paint around the window or glazing in your door and paint slightly onto the glass, leave to dry and then clean the paint off the glass with a sharp blade.
Both methods take longer to do than simply cutting in but if you don’t have a steady hand or aren’t confident either method will give you a more professional final job.
Tags: Door, Glass panelled door, Masking Tape, Paint, Painting, Windows
Posted in Decorating Tips | No Comments »