Painting, decorating and home improvement tips blog
Recently completed work
Posted by Adrian
July 21st, 2023
Recently completed work
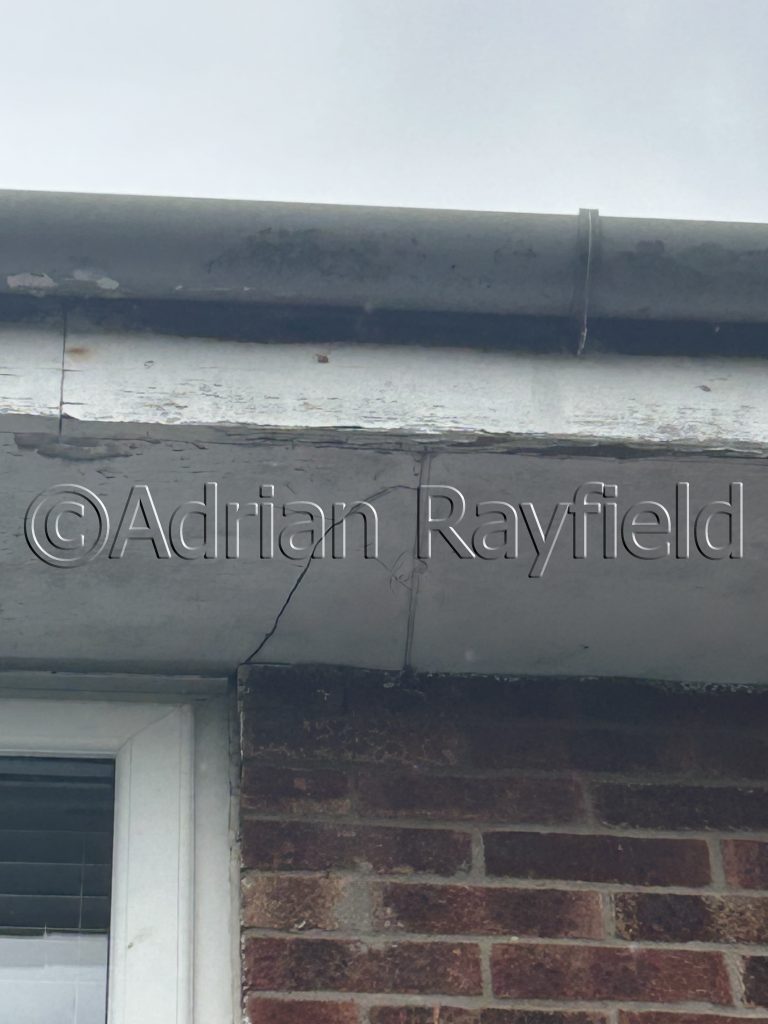
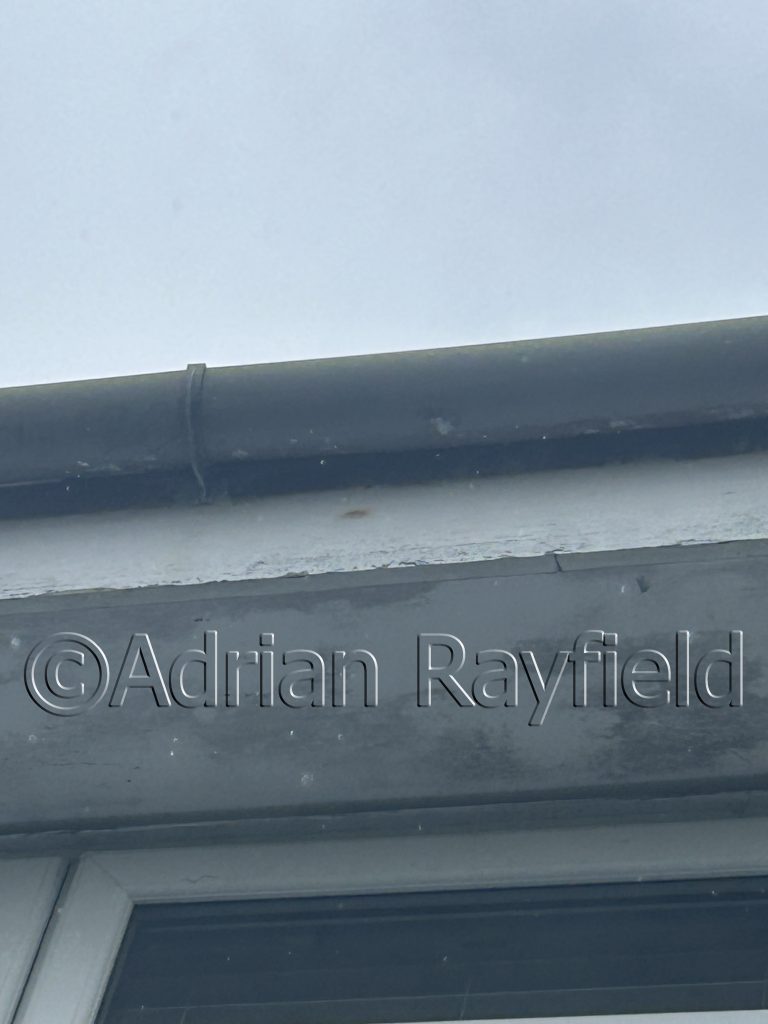
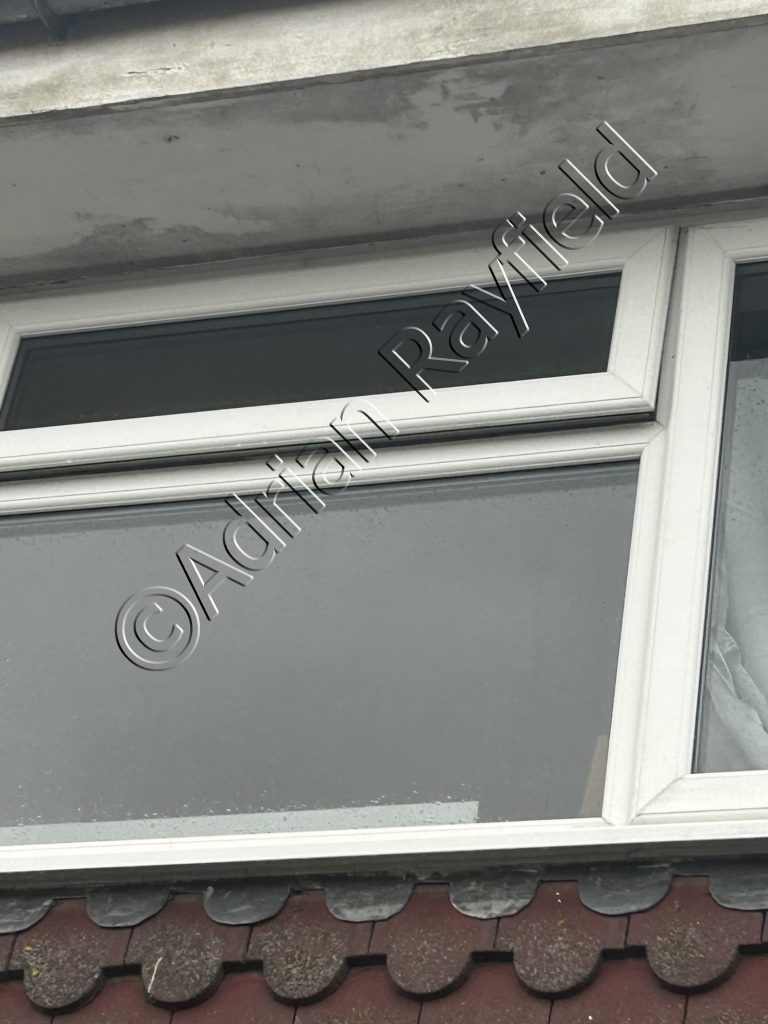
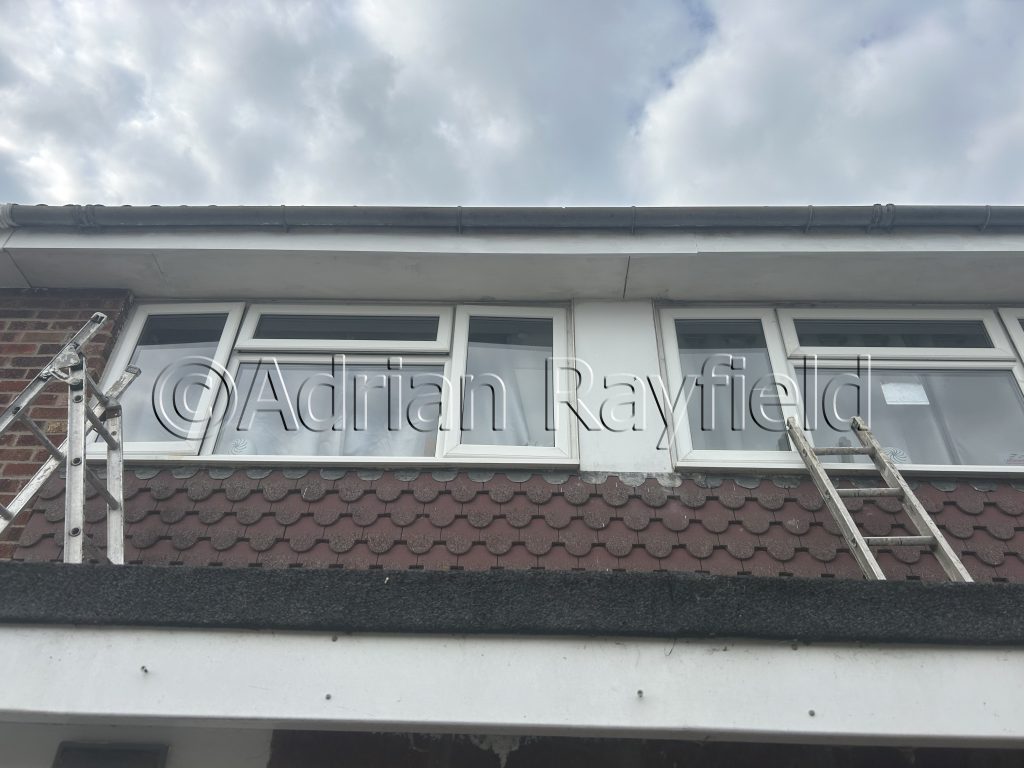
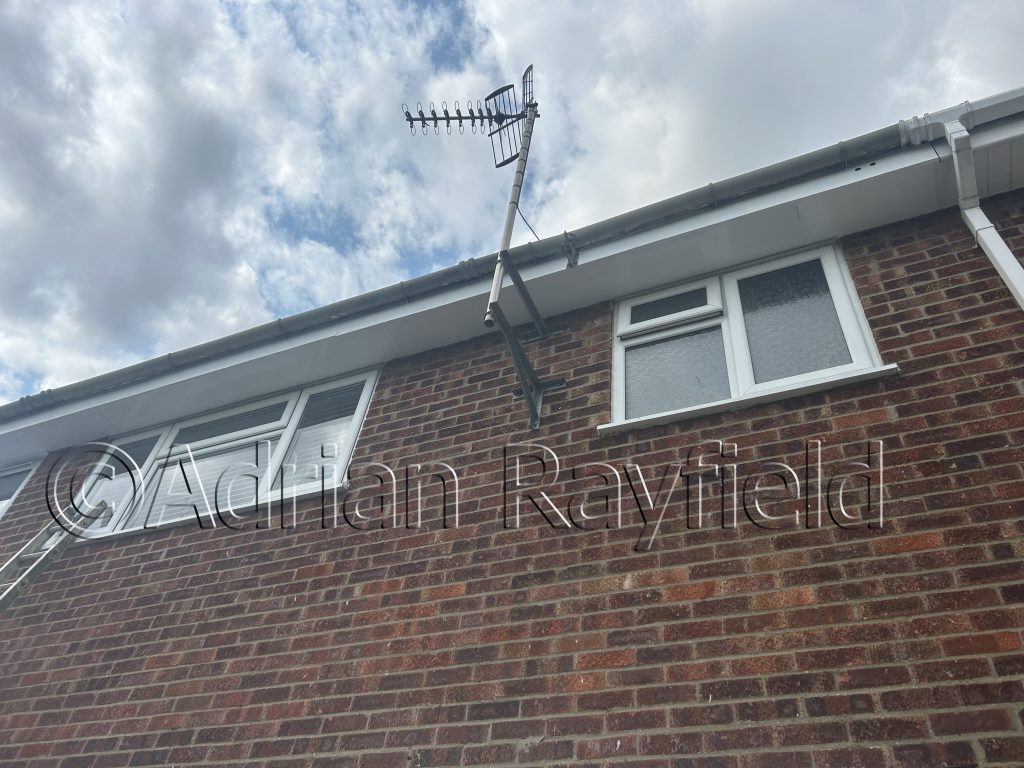
Below are some pictures of a recent exterior I completed.
As you can see from the first pictures, the fascia and soffits needed some attention. The house was a mid-terrace house, so only had fascia’s and soffits at the front and rear of the property.
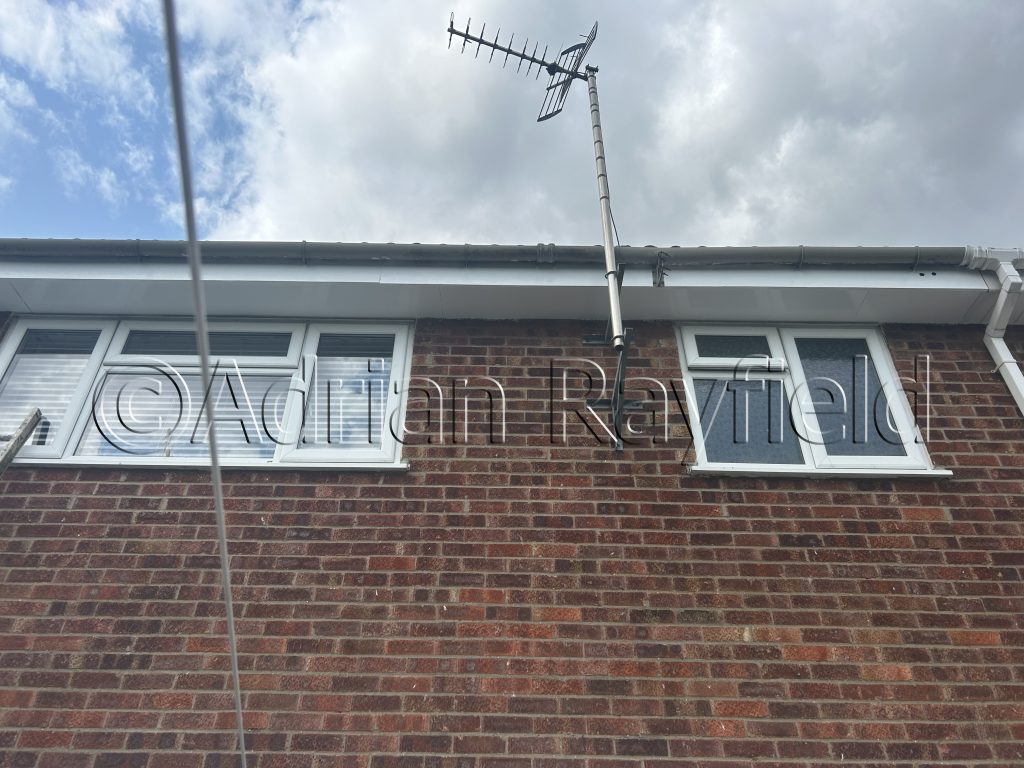
After giving them a good rub down and dust off, I primed the bare wood, followed by a coat of Dulux Weathershield undercoat, and then a topcoat of Dulux Weathershield white gloss. I think you would have to agree, a massive difference from the before and after pictures. The client was very happy, and their fascia boards and soffits will look good and be protected for the next few years.
And this is the final result
Tags: Decorating, Dulux, dulux weathershield, Exterior, Exterior work, Fascia, Fascia Boards, Paint, Painting, Soffit, soffit boards, Weathershield
Posted in Home Improvements, News | No Comments »
Painting And Decorating in Southend For 30 Years
Posted by Adrian
March 26th, 2023
Painting And Decorating in and around Southend For 30 Years
March 2023 sees the 30th year of my decorating career. It was thirty years ago this month that I first picked up my paint brushes and rollers and started painting and decorating. I have worked in a few places around the UK during this time, but I prefer to stay close to home, here in Southend on Sea and the surrounding areas.
Over the past 30 years of painting and decorating I have seen a lot of changes, not only in the painting industry but the economy also, as we all worry about the current living costs here in the UK, and further afield the war in Ukraine. And of course how the pandemic, Covid-19, changed many things for us, including work practises and day to day living. We have all had uncertain and hard times, but I’m still here and ready to decorate your property. So if you would like some work done, contact me for an estimate.

I have undertaken commercial work as well as residential work in my career and painted properties from warehouses to high street shops, to mansion houses, but most commonly I decorate residential properties, just like yours.
Styles and fashions continually change, and over the past 30 years there has been styles come and go, and come around again. Colours change as fashion does, and if you want to know the colours for 2023 have a look at my colour trends for 2023 post .
Painting And Decorating Website And Blog
Over the past eighteen years or so my website has had many designs, and my blog has grown and grown with many posts explaining how to decorate, how things are done and product reviews, with now in excess of 120 posts.
I also created and written the code for four materials calculators, a wallpaper calculator, a ceiling paper calculator, a tile calculator and a paint calculator, these have proved to be very popular with lots of hits per day with people working out their materials. These are used not only by DIYer’s but tradesmen also.
I enjoy writing blog post’s, although I don’t blog as much as I did for several reasons, but I like helping people who want to do painting and decorating or DIY jobs around the house but are not sure how to go about it. I find this very rewarding.
New Media
I continue to use social media, you can find me on Facebook, I also have a LinkedIn page, also a YouTube channel.

I can’t believe it has been 30 years, I would like to thank my past, present and future clients for their custom and continued support.
Tags: 2023, 30 years, 30years, colour of the year 2023, commercial, contact me, covid 19, Decorating, DIY, Emulsion, Estimate, Facebook, high street, Paint Brush, Paint Calculator, Painting, painting and decorating southend, pandemic, propertires, propertry, property decorating, Residential, rollers, Southend, Southend on Sea, ukraine, Wallpaper, Wallpaper Calculator, Wallpapering, youtube
Posted in Decorating Tips, Home Improvements, News, Resources, Reviews, Video | No Comments »
Colour Trends For 2023
Posted by Adrian
December 3rd, 2022
Colour Trends For 2023
Each year a team of top international design experts come together to discuss world wide trends. This is then translated into a colour scheme, then they compile a colour of the year with supporting colour palettes. They have selected a range of colours they think will be the trend throughout 2023.
What Is The Trend Colour For 2023

The colour of the year 2023 is…… 50YY 49/191 (also known as Wild Wonder).
“For the past 20 years, Dulux colour experts have been translating global insights into a Colour of the Year that matches the mood of the moment. Using these insights and a wealth of colour expertise, the team then chooses a Colour of the Year, and builds four new, easy to use paint palettes around it to help interior designers, decorators and building design professionals to create better, more comfortable homes and public spaces all over the world.
A light, earthy shade that connects us with the natural world, Dulux Trade Colour of the Year, Wild Wonder™ brings energy and positivity to our living and working spaces. It shows how living in tune with the natural world, bring balance to our busy lives and is versatile- helping to create different moods in interiors and exteriors across every sector.”
Quote from Dulux website.
You can see more of this years colour schemes here:
See more of this years colour of the year and colour schemes.
Paint Calculator
If you would like to use the colour of the year (50YY 49/191) or any other colour you need to buy and need to work out how much you need to buy, use our Paint Calculator.
Other useful links
Here are some further reading links:
Video from Dulux YouTube channel.
Tags: colour 2023, Colour Trends, Colour trends 2023, Decorating, Dulux, Dulux Colour Futures, Emulsion, Paint Calculator, Painting
Posted in Decorating Tips, Home Improvements, News, Resources | 1 Comment »