Painting, decorating and home improvement tips blog
How to remove artex
Posted by Adrian
June 4th, 2013
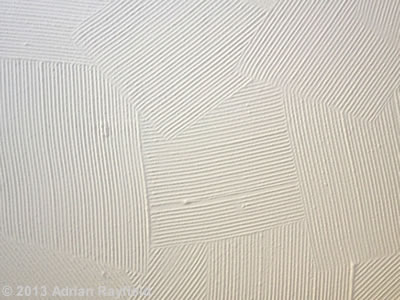
How to remove artex
Artex is a decorative finish, you may have it on your ceilings and maybe your walls. There are several popular finishes such as swirl, stipple, broken leather, scroll, circle and bark for the walls. Artex was very popular until the 1990’s were it became less popular in favour of smooth plastered ceilings and walls.
Before the mid-1980’s Artex contained white asbestos to strengthen it. Depending on when your house was build or when Artex was applied in your house will depend if it contains asbestos.
Artex and health issues
If you are unsure if your Artex contains white asbestos or not it is best to get a local firm to test it first, for advice, contact the Environment Agency or your local environmental health department or look at www.asbestoswatchdog.co.uk.
If the Artex is untouched and has been sealed with paint, or the Artex was produced after the mid-1980’s then there shouldn’t be any health risks, but if unsure always get it checked first.
For more information of Artex you can read more about Artex on Wikipeadia.
How to remove Artex from ceiling and walls
First be sure that your Artex doesn’t contain harmful white asbestos, if you are unsure get it checked before doing any removal or disturbing the Artex, or call a local firm to remove it for you.

Once you are sure the Artex doesn’t contain white asbestos you have a couple of options to get rid of it.
You can skim over it with plaster, making it smooth and ready to paint or wallpaper once dry. This option is a quicker and far less messy option, although it may require some scrapping to remove high spots before plastering.
The other option is to completely remove it, this can be done with a scrapper. Make sure you wear protective clothing, goggles and a mask and cover the floor with dust sheets. Use a scrapper to scrape the Artex off, this could take some time, once the worst is off you could use a wallpaper steamer to remove the rest. This will obviously make a fair bit of mess, especially if your removing Artex of the ceiling.
Once you have removed all the Artex you can then plaster or if the ceiling or walls are is in good enough condition paper over them, you may have to fill holes, joins and scrapper marks before this is possible.
If you found this or any other post on the Property Decorating blog, please feel free to leave a comment, share on Facebook, Twitter and Google+. You can also follow us and Like us to find out when we have a new decorating tip go live.
Tags: Artex, Broken Leather, Ceiling, Emulsion, Plaster, Stipple, Swirl, Wallpaper, Walls, White Asbestos
Posted in Decorating Tips | No Comments »
Spring decorating ideas
Posted by Adrian
May 5th, 2013
Spring decorating ideas
As the weather begins to warm up and the first signs of spring start to appear you may start thinking about doing some jobs around the home and garden. After what feels like an eternity since last years washout Summer and a very long Winter the house may well have been neglected for a year or so and in need of some decorating.
Interior decorating
If the weather turns for the worst or we get more frosty nights it is not the time to be painting your house outside, so why not turn to those decorating jobs inside. It’s time to clear out the spare room and give it a lick of paint, or give the home office new modern look. After such a long dull cold winter any room would benefit form a nice bright Spring like makeover.
If you are looking to keep your house looking ‘on trend’ then how about looking at the colour trends for 2013 and using some of the colours from this years palette, such as the colour of the year 90BB 09/186 or indigo blue to give it its name. This could be used as a feature wall to create a stunning modern look to any home.
You may want to do a little more than just paint the walls, you may want to do some repairs or make a room look more modern. If you have a nasty crack around the ceiling and wall line you could put some coving up, it will hide the crack and give a softer edge to the ceiling and wall line.
It could also be the time to tackle the job most DIYers hate, wallpapering the hall, landing and stairs. You could, if you prefer paint the hallway instead.
Exterior decorating
If your house needs some attention outside, wait until there are no more frosts before painting. Otherwise your hard work will not last long and the nice gloss finish on your front door will end up with a lovely bloom over it by the next day, and you will have to do it all again.
Wait for a day that is going to be dry and not windy ideally, not always easy in the UK! But for best results it is best to pick your day.
If you are thinking of painting your fascia or soffits or maybe the masonry there is an order in which to paint, if you paint in the correct order you will get the best results and make your life easier.
If you have algee, mould or dirt on you house, ensure you wash all of this off first, and never paint over it. If you have lead flashing that isn’t paint, don’t paint it just treat it.
If you have plants growing up the outside of your house, be aware the plants could damage your house. Ivy for example can suck the moisture out of the mortar or render and pull it out. Plants can also hold moisture against the house and cause damp issues, so be aware of this.
If you do not have rendered walls and you have plastic Upvc windows, do not forget the other exterior parts of the house, the fascia boards, soffits and bargeboards, these will need painting every few years. If you neglect these for long enough they will rot, birds will be able to get in and nest and they will be able to get into your loft space. You could also get other unwanted wildlife in your loft space such as squirrels.
Spring and Summer decorating
Hopefully this post has given you some ideas for decorating this Spring, and if the weather is bad there are always jobs inside you can do. I hope you found his post interesting, please feel free to leave a comment and share on Twitter and Facebook.
Tags: Bargeboard, Decorating, Exterior Decorating, Fascia, Interior Decorating, Masonry, Render, Soffit, UPVC
Posted in Decorating Tips | No Comments »
Wallpapering around light switches and sockets
Posted by Adrian
April 10th, 2013
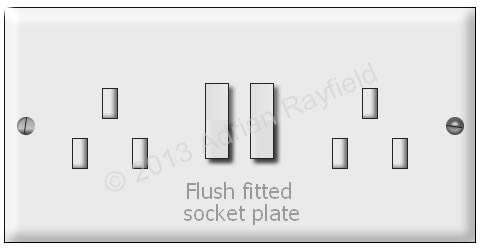
How to wallpaper around light switches and sockets
If you are wallpapering an entire room or simply a feature wall, more than likely you are going to come across a light switch, a socket, a TV Ariel or satellite point or a telephone socket. These may seem difficult to wallpaper around, but they don’t have to be.
The first thing to remember always is safety first, turn of the power to light switches or sockets before undoing any screws, yes this is a pain because you have to re-set clocks etc. But it’s far better to do that than get an electric shock. Wallpaper by it’s very nature is wet, the paste makes the wallpaper wet, this conducts electricity very well, so be safe, turn off the power.
The first thing to do is identify which kind of fitting you have, if your sockets or switches have the socket or switch box on the wall they are surface mounted, if just the face plate is showing then the box is sunk into the wall, this is flush fitted. You tackle these two types slightly differently.
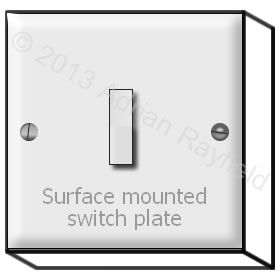
Wallpapering around surface mounted sockets and switches
Wallpaper down to the switch or socket, support the wallpaper with one hand and smooth the paper into the switch surface mounted box, cut along the top of the box, then carefully, pull the paper away from the wall slightly so you can smooth the paper to the edge of the box, trim this edge, now do the same with the other edge. Finally cut with scissors the remaining ‘square’ out of the sheet of wallpaper but leave enough to trim. Smooth down the paper and it should go around the switch box, finally trim the bottom edge.
Clean off any excess paste off of the wallpaper and switch, making sure not to get too much water on the switch, then allow to dry for a bit and turn the power back on.
Wallpapering around flush fitted sockets and switches
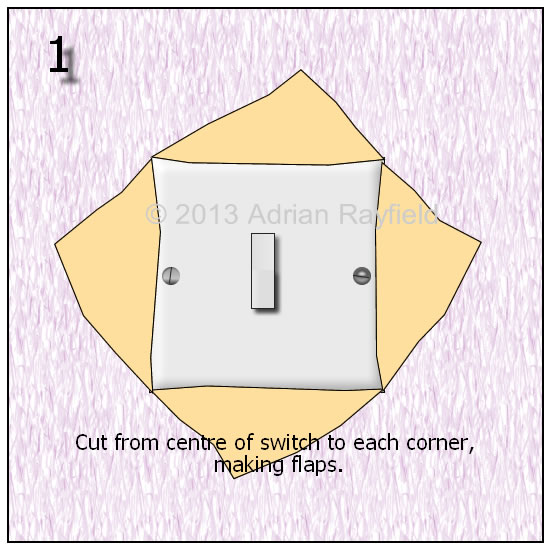
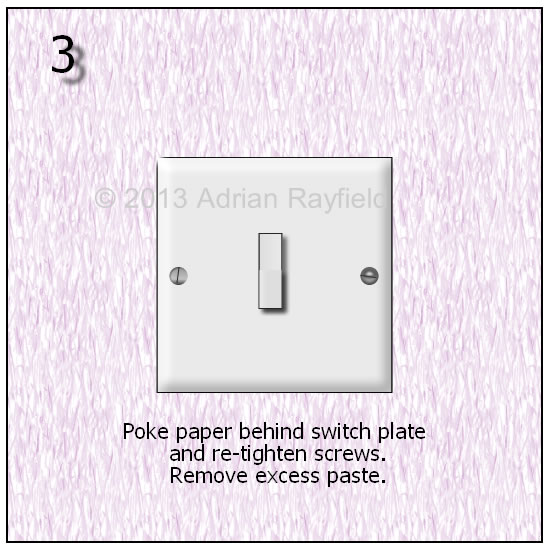
As you wallpaper down to the switch or socket, make a small hole in the wallpaper, about the centre of the switch, now from the centre hole you have just made, cut from the middle toward the corner of the switch, so diagonally. Now smooth the wallpaper down onto the wall and trim the ‘triangle’ sections off but leaving enough to tuck behind the switch. Do this to all the ‘triangle’ sections. Now loosen, but don’t remove the face plate, and tuck the wallpaper behind the switch. Smooth out and air bubbles toward the switch. Finally screw the face plate down again, making sure not to over tighten and crack it.
Clean off any excess paste on the wallpaper and switch making sure not to get too much water on the switch, leave the power off long enough allowing for the wallpaper to dry out enough and any paste to dry.

Tags: Electrical, Light Switch, Satellite, Socket, Switch, Telephone Socket, TV Ariel, Wallpaper, Wallpapering
Posted in Decorating Tips | No Comments »
