Painting, decorating and home improvement tips blog
How to build a step
Posted by Adrian
June 30th, 2020
How to build a step
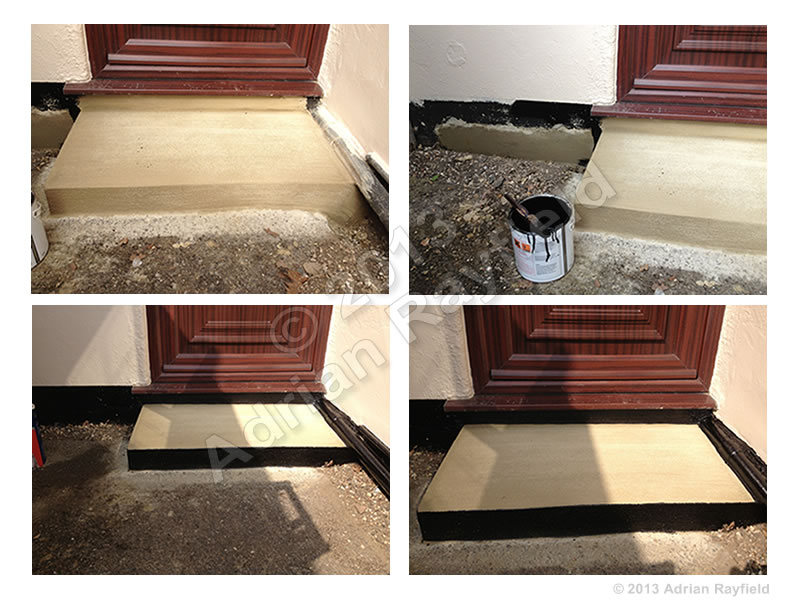
On a recent job I was asked if I could repair a step to a back door, the step was already built out of Celcon blocks and rendered over. The rendering had broken off and become loose over time. I was asked to re-render the step, which I did. I have included some photos of the finished job below.
Building a step
Before you build your outside step you need to work out the height, width and depth of your step, you also need to decide on the materials used to build it, such as concrete, bricks, blocks, block paving blocks, are you going to top it off with slabs?
Once this has all been decided you can start building your step. If you are going to use bricks, lay the edge bricks out to make sure you are happy with the size, you can then fix these down with mortar. Once these are set you can fill in using sand and cement, concrete or hardcore. You can then fix slabs on the top.
If you are going to use concrete only you are going to need to build a form (this is a temporary mold) use timber such as skirting boards to build the shape and size of the step you require, once you have done this you can mix and pour the concrete into the form, tamp it down to ensure all areas are filled and any air bubbles come to the top. You are going to want to have a textured finish the the top of the step to avoid it becoming slippery when wet of with snow and ice on it. The best way to do this is once the concrete is at the top of the form and levelled off, take a piece of wood wider than the step and tamp down across the form, this should leave ridges in the top of the concrete so when it dries you are left with a non-slip surface.
Once the concrete has set you can remove the form leaving you with a concrete step.
With the step I repaired the blocks were already in place, all I had to do was re-render the step, I did this by removing the loose render, cleaning the exposed bricks and sealing with a PVA sealer to aid adhesion. I then mixed up my render and rendered the step, I did this without a form so I could render the top and sides in finish the surface. Once I had got the basic shape, and ensured the top of the step sloped away from the house I left it to dry for a few hours, I then returned to see if it had set enough to ‘work’, which it had, at this point I used a rendering float to rub over the step, this showed up and low spots I needed to fill in. Once this was done I rubbed over with the rendering float to remove the sharp square edges and to leave a non-slip textured step and sides. I then painted the edges of the step to match the plinth, which also had a repair done to it.
To finish off I painted the plinth and the edge of the step in black bitumen paint.
Finished step
Below is the step that I repaired and painted.
Tags: Building a step, Concrete Step, Doorstep, Render, Step, Step Repair
Posted in Home Improvements | No Comments »
What you will find under your wallpaper
Posted by Adrian
April 27th, 2018
what you will find under your wallpaper
When removing wallpaper, you never know what you might find underneath. This is typically true of older houses but can also apply to newer houses.
I’ll use one of my jobs as a case study. The job was a spare bedroom, a simple remove old wallpaper, paint the ceiling and woodwork and then re-paper, but like the title of this post says, you never know ‘what you will find under your wallpaper’.
Removing Wallpaper
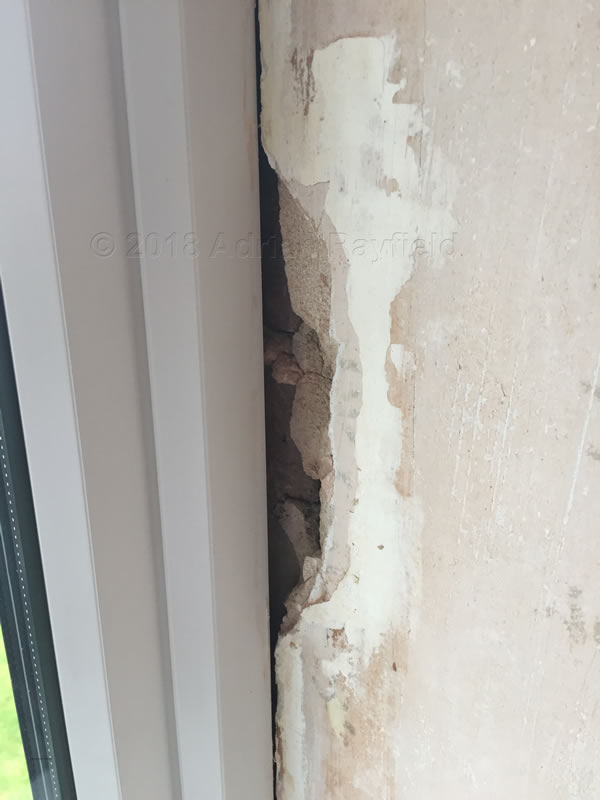
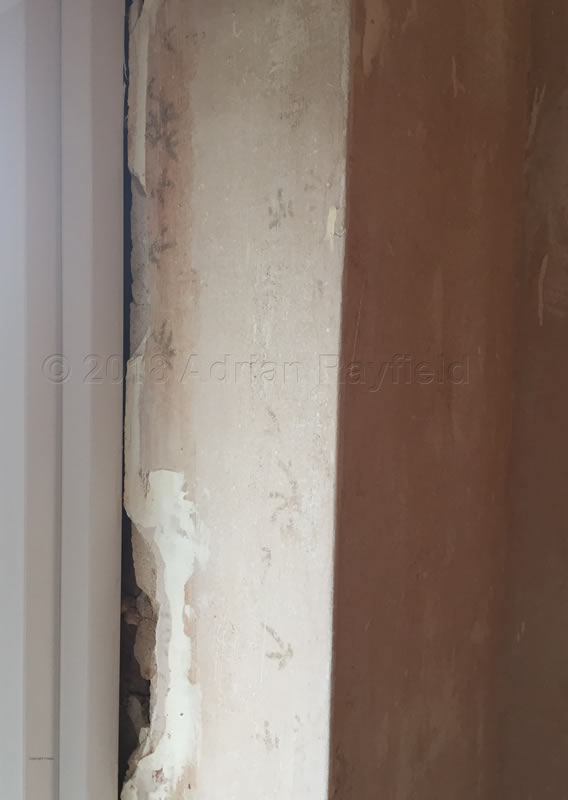
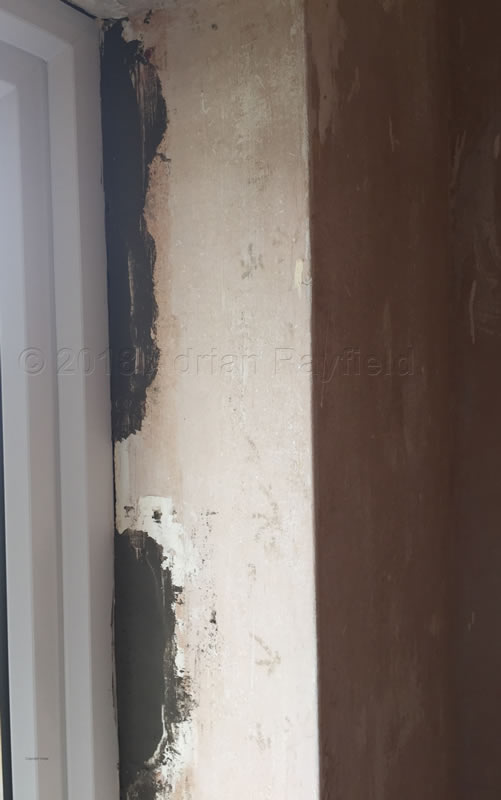
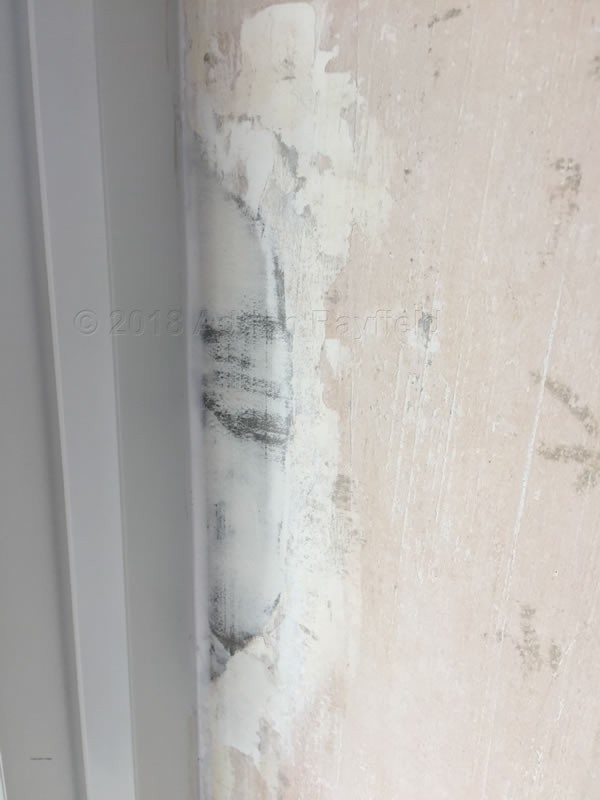
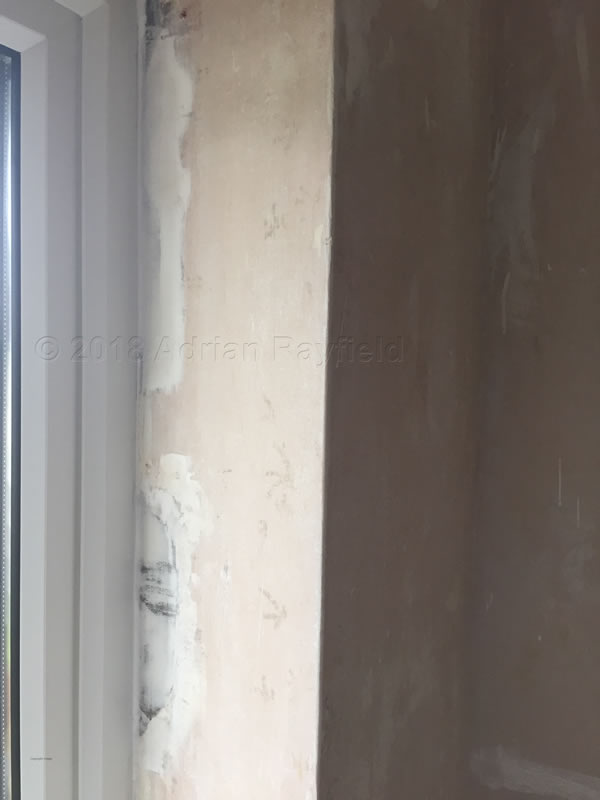
I removed the wallpaper top layer and soaked the under layer, all was going well and as expected. Then I removed the paper around the windows. These were not original windows and had been renewed with uPVC windows.
It was here that I found the broken away plasted that had left a deep hole. I have come across this problem many times so wasn’t surprised.
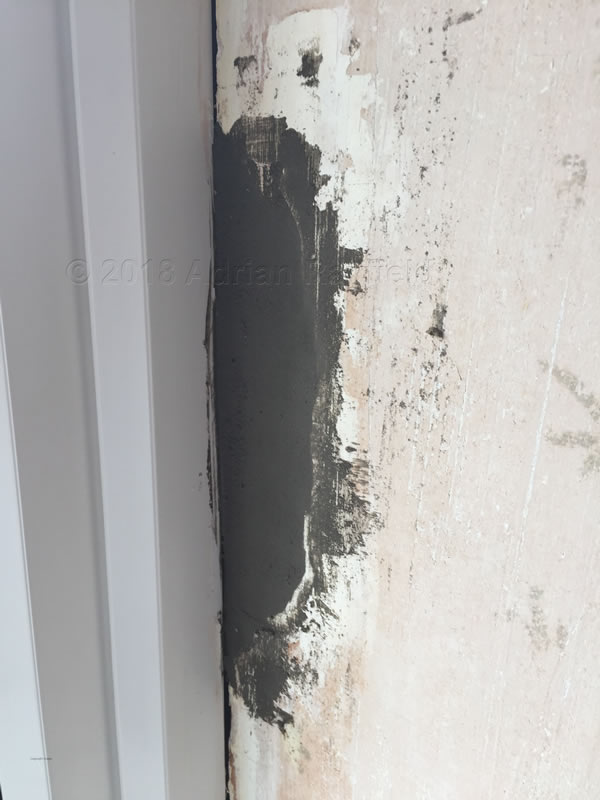
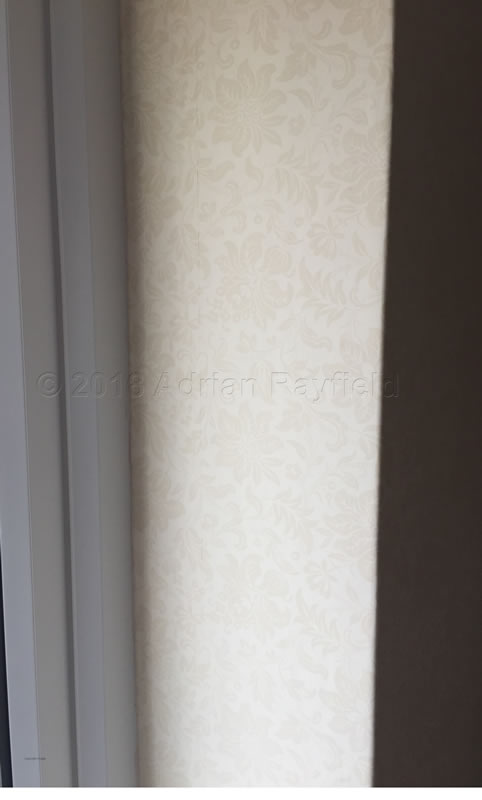
Luckily I always carry a fast setting filler so I could fill the deep hole to just below the surface, and finish of with a fine filler. This was done within half a day so I wasn’t help up, I then waited until the next day to hang the wallpaper and could complete the work on time at no extra cost.
As you never know what you may find under the old wallpaper, it is best to expect the unexpected, sometimes it maybe just lots of holes, other times it may involve blown plaster or loose render and plaster around replaced windows and doors.
You may be lucky and only find the dates of when the room was decorated over the years written on the wall, don’t forget to add yours!
Tags: bedroom, Ceiling, Door, Filler, Holes, Paint, Plaster, Removing Wallpaper, Render, replacement windows and doors, UPVC, Wallpaper, Walls, Window, Woodwork
Posted in Decorating Tips | No Comments »
Spring decorating ideas
Posted by Adrian
May 5th, 2013

Spring decorating ideas
As the weather begins to warm up and the first signs of spring start to appear you may start thinking about doing some jobs around the home and garden. After what feels like an eternity since last years washout Summer and a very long Winter the house may well have been neglected for a year or so and in need of some decorating.
Interior decorating
If the weather turns for the worst or we get more frosty nights it is not the time to be painting your house outside, so why not turn to those decorating jobs inside. It’s time to clear out the spare room and give it a lick of paint, or give the home office new modern look. After such a long dull cold winter any room would benefit form a nice bright Spring like makeover.
If you are looking to keep your house looking ‘on trend’ then how about looking at the colour trends for 2013 and using some of the colours from this years palette, such as the colour of the year 90BB 09/186 or indigo blue to give it its name. This could be used as a feature wall to create a stunning modern look to any home.
You may want to do a little more than just paint the walls, you may want to do some repairs or make a room look more modern. If you have a nasty crack around the ceiling and wall line you could put some coving up, it will hide the crack and give a softer edge to the ceiling and wall line.
It could also be the time to tackle the job most DIYers hate, wallpapering the hall, landing and stairs. You could, if you prefer paint the hallway instead.
Exterior decorating
If your house needs some attention outside, wait until there are no more frosts before painting. Otherwise your hard work will not last long and the nice gloss finish on your front door will end up with a lovely bloom over it by the next day, and you will have to do it all again.
Wait for a day that is going to be dry and not windy ideally, not always easy in the UK! But for best results it is best to pick your day.
If you are thinking of painting your fascia or soffits or maybe the masonry there is an order in which to paint, if you paint in the correct order you will get the best results and make your life easier.
If you have algee, mould or dirt on you house, ensure you wash all of this off first, and never paint over it. If you have lead flashing that isn’t paint, don’t paint it just treat it.
If you have plants growing up the outside of your house, be aware the plants could damage your house. Ivy for example can suck the moisture out of the mortar or render and pull it out. Plants can also hold moisture against the house and cause damp issues, so be aware of this.
If you do not have rendered walls and you have plastic Upvc windows, do not forget the other exterior parts of the house, the fascia boards, soffits and bargeboards, these will need painting every few years. If you neglect these for long enough they will rot, birds will be able to get in and nest and they will be able to get into your loft space. You could also get other unwanted wildlife in your loft space such as squirrels.
Spring and Summer decorating
Hopefully this post has given you some ideas for decorating this Spring, and if the weather is bad there are always jobs inside you can do. I hope you found his post interesting, please feel free to leave a comment and share on Twitter and Facebook.
Tags: Bargeboard, Decorating, Exterior Decorating, Fascia, Interior Decorating, Masonry, Render, Soffit, UPVC
Posted in Decorating Tips | No Comments »