Painting, decorating and home improvement tips blog
What you will find under your wallpaper
Posted by Adrian
April 27th, 2018
what you will find under your wallpaper
When removing wallpaper, you never know what you might find underneath. This is typically true of older houses but can also apply to newer houses.
I’ll use one of my jobs as a case study. The job was a spare bedroom, a simple remove old wallpaper, paint the ceiling and woodwork and then re-paper, but like the title of this post says, you never know ‘what you will find under your wallpaper’.
Removing Wallpaper
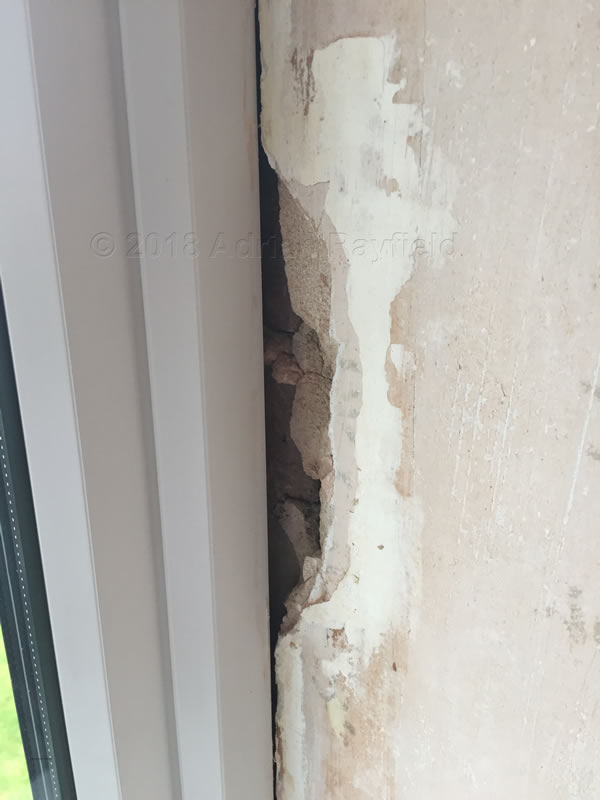
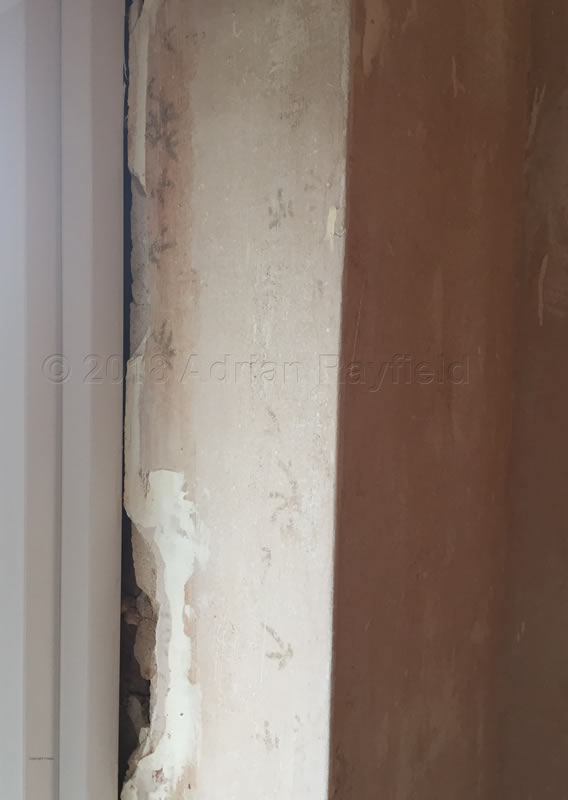
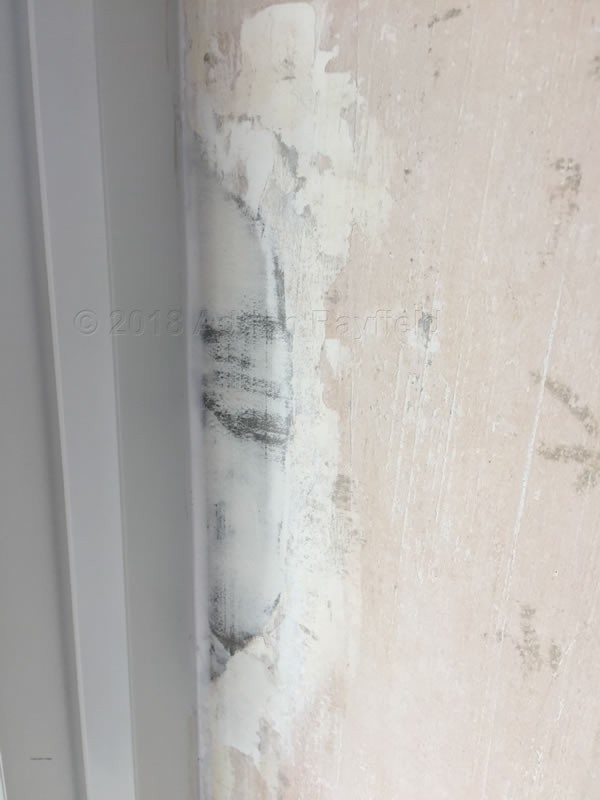
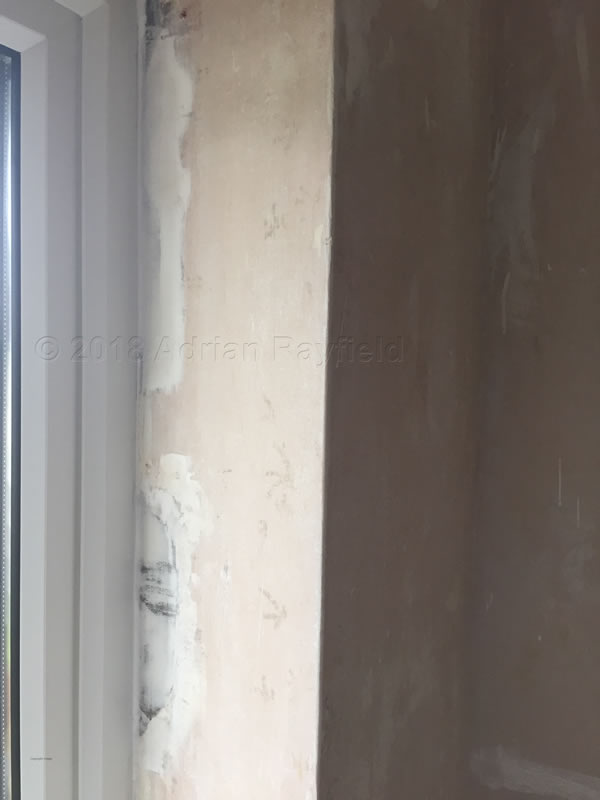
I removed the wallpaper top layer and soaked the under layer, all was going well and as expected. Then I removed the paper around the windows. These were not original windows and had been renewed with uPVC windows.
It was here that I found the broken away plasted that had left a deep hole. I have come across this problem many times so wasn’t surprised.
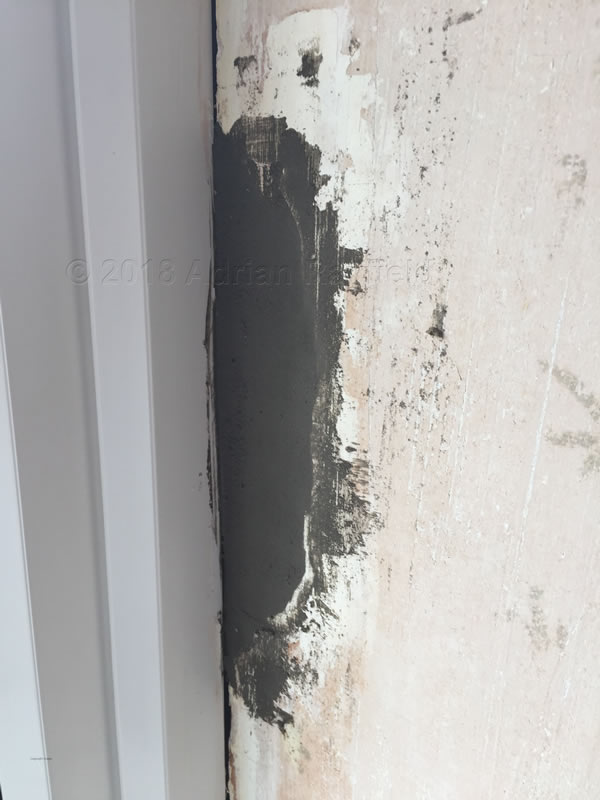
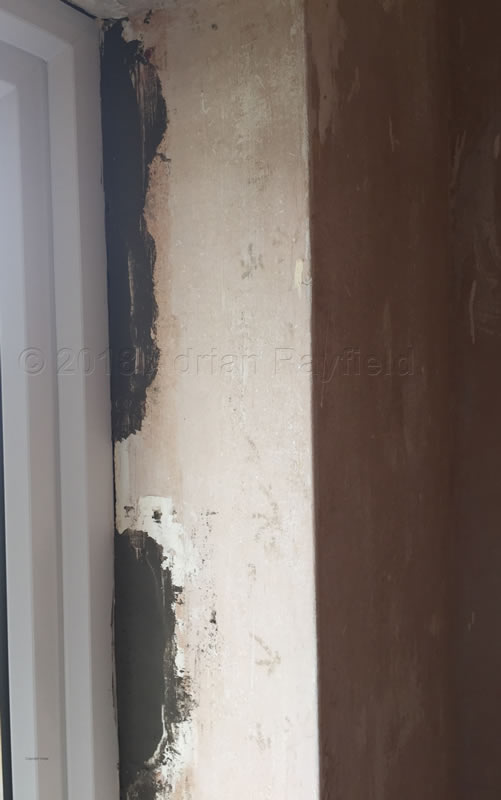
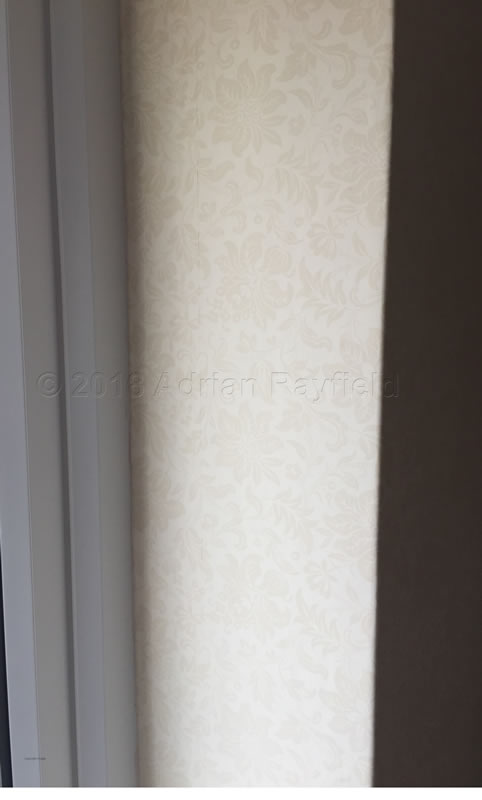
Luckily I always carry a fast setting filler so I could fill the deep hole to just below the surface, and finish of with a fine filler. This was done within half a day so I wasn’t help up, I then waited until the next day to hang the wallpaper and could complete the work on time at no extra cost.
As you never know what you may find under the old wallpaper, it is best to expect the unexpected, sometimes it maybe just lots of holes, other times it may involve blown plaster or loose render and plaster around replaced windows and doors.
You may be lucky and only find the dates of when the room was decorated over the years written on the wall, don’t forget to add yours!
Tags: bedroom, Ceiling, Door, Filler, Holes, Paint, Plaster, Removing Wallpaper, Render, replacement windows and doors, UPVC, Wallpaper, Walls, Window, Woodwork
Posted in Decorating Tips | No Comments »
How to Choose a Paint Roller
Posted by Adrian
September 23rd, 2016
How to Choose a Paint Roller
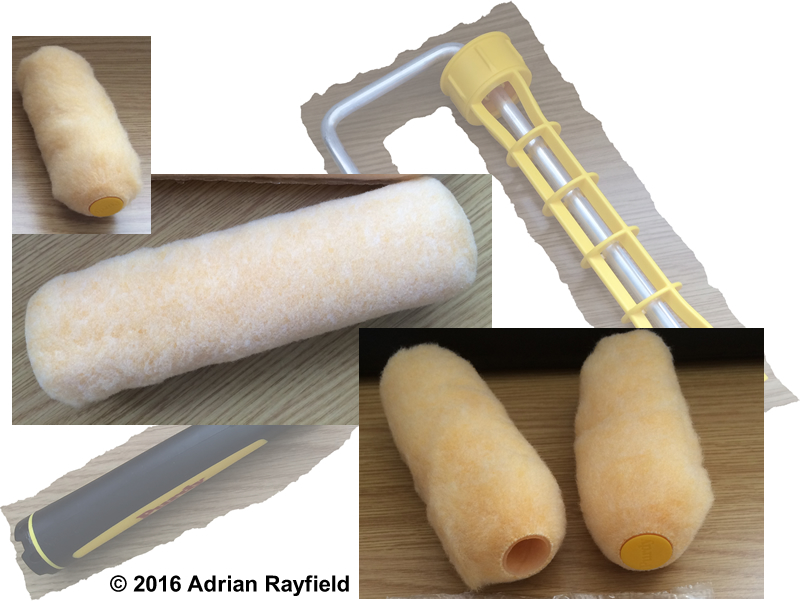
When it comes to painting walls, ceilings or trim you need to consider the type of roller you need to use for the best results for the job you are doing. This not only includes the length of the roller but the nap or pile of the roller, a bigger nap roller will hold more paint, whereas as a smaller nap roller will hold less but will give a smoother finish.
You also have to have the correct roller cage or arm for the roller sleeve. Roller sleeves have a different diameter core, or hole, for where the cage fits into, it may have a 1 ½ inch or a 1 ¾ inch core so make sure you have a matching cage and roller sleeve.
Some rollers, such as a 4 inch mini rollers don’t need a cage, the sleeve has a small diameter core that slides over a arm. This is essentially a length of metal that has a right angled bend on the end to accept a mini roller sleeve. If you get a long arm for a 4 inch microfibre sleeve it is ideal for getting into those hard to reach places such as behind a radiator.
Some manufacturers do however make small rollers that do need a small ¾ frame for there 4 inch rollers.
Choosing the right roller sleeve for the job
Below is a list of roller sleeve pile thickness (nap) for a particular job, there are slight variations between manufacturers so thickness given is only a guide.
- Short pile – ⅜ nap (10mm approx) Ideal for smooth surfaces, newly plastered ceiling and walls, emulsions, eggshell and satin finishes.
- Medium pile – ½ nap (13mm approx) Ideal for semi-rough surfaces such as Artexed ceiling and walls, flat walls and ceilings, emulsions.
- Long pile – ¾ nap (19mm approx) Ideal for semi-rough to rough surfaces, emulsions, masonry paint.
- Extra long pile – 1 ¼ nap (32mm approx) Ideal for rough to very rough surfaces, masonry paints, emulsion.
- Mini microfibre roller – ⅜ nap (10mm approx) Ideal for smooth finishes, emulsion, new plaster.
- Foam roller – High Density Foam Ideal for smooth finishes, trim, gloss, satin and varnishes.
So basically a thin nap is ideal for flat surfaces, trim etc and thick nap is ideal for rough textured surfaces such as heavy artex or masonry. Foam rollers are great for trim, doors etc.
It is worth paying for a decent roller set up if you intend to use it more than once, some cheap DIY store offerings should be avoided as they do not last and the sleeve may molt leaving you with bits of roller sleeve in you paint, or you spending more time picking bits out of the paint rather than painting.
Tags: Ceiling, Eggshell, Emulsion, Foam, Long, Masonry, Medium, Microfibre, mini, Nap, Paint, Pile, Plaster, Roller, Satin, Short, Sleeve, Walls
Posted in Decorating Tips | 1 Comment »
How to remove artex
Posted by Adrian
June 4th, 2013

How to remove artex
Artex is a decorative finish, you may have it on your ceilings and maybe your walls. There are several popular finishes such as swirl, stipple, broken leather, scroll, circle and bark for the walls. Artex was very popular until the 1990’s were it became less popular in favour of smooth plastered ceilings and walls.
Before the mid-1980’s Artex contained white asbestos to strengthen it. Depending on when your house was build or when Artex was applied in your house will depend if it contains asbestos.
Artex and health issues
If you are unsure if your Artex contains white asbestos or not it is best to get a local firm to test it first, for advice, contact the Environment Agency or your local environmental health department or look at www.asbestoswatchdog.co.uk.
If the Artex is untouched and has been sealed with paint, or the Artex was produced after the mid-1980’s then there shouldn’t be any health risks, but if unsure always get it checked first.
For more information of Artex you can read more about Artex on Wikipeadia.
How to remove Artex from ceiling and walls
First be sure that your Artex doesn’t contain harmful white asbestos, if you are unsure get it checked before doing any removal or disturbing the Artex, or call a local firm to remove it for you.

Once you are sure the Artex doesn’t contain white asbestos you have a couple of options to get rid of it.
You can skim over it with plaster, making it smooth and ready to paint or wallpaper once dry. This option is a quicker and far less messy option, although it may require some scrapping to remove high spots before plastering.
The other option is to completely remove it, this can be done with a scrapper. Make sure you wear protective clothing, goggles and a mask and cover the floor with dust sheets. Use a scrapper to scrape the Artex off, this could take some time, once the worst is off you could use a wallpaper steamer to remove the rest. This will obviously make a fair bit of mess, especially if your removing Artex of the ceiling.
Once you have removed all the Artex you can then plaster or if the ceiling or walls are is in good enough condition paper over them, you may have to fill holes, joins and scrapper marks before this is possible.
If you found this or any other post on the Property Decorating blog, please feel free to leave a comment, share on Facebook, Twitter and Google+. You can also follow us and Like us to find out when we have a new decorating tip go live.
Tags: Artex, Broken Leather, Ceiling, Emulsion, Plaster, Stipple, Swirl, Wallpaper, Walls, White Asbestos
Posted in Decorating Tips | No Comments »