Painting, decorating and home improvement tips blog
How to sand a floor
Posted by Adrian
November 23rd, 2013
How to sand a floor
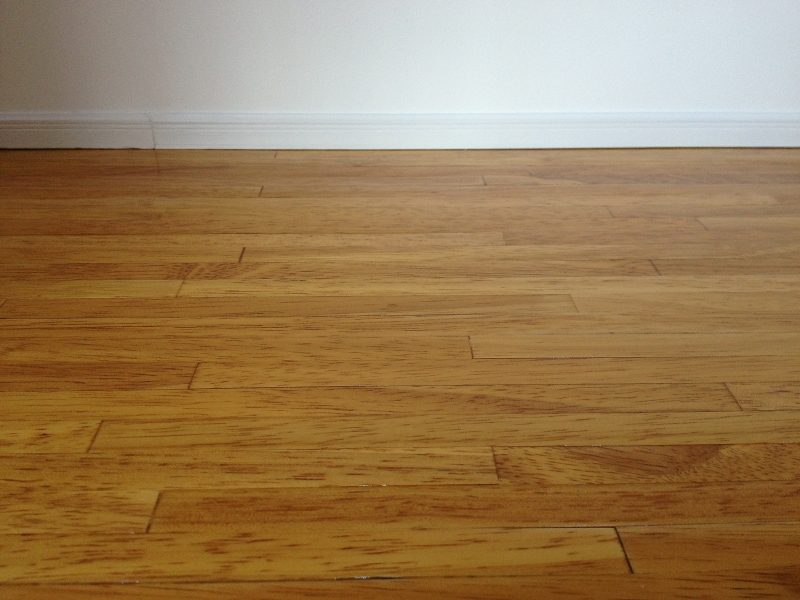
You may want to have an alternative floor covering to carpet, but don’t want the expense of a hardwood or laminate floor. Well, if you have wooden floorboards you can sand them down and either paint them a colour or use a clear floor varnish to show off the beautiful wood, or stain them.
To sand the floor well you will need to hire a floor and an edging sander. Hiring these is relatively inexpensive at around £50 for the two sanders for a day, and you typically get 24 hours hire which should be enough time for an average sized room.
Before you start sanding
As you sand the floor you will make a lot of dust, so remove as much as you can from a room, cover wall and ceiling lights (as long as they are not in use) with black bags, put masking tape over wardrobe doors and cupboards to prevent dust getting in, you can also seal around any doors to try and contain the dust in the one room.
Safety first
You should wear a suitable dust mask, goggles and ear defenders whilst sanding. These can be bought from the hire shop when you pick up the sanders.
Preparation for sanding the floor
Before you start sanding you should fix any loose floorboards, replace any damaged or rotten boards, and nail punch raised nails as they can catch the sandpaper and rip it, and maybe even cause damage to the sander which could result in paying a charge for repair at the hire centre.
Start sanding
To start sanding decide on the coarse of sandpaper to use, you should of got three types when you hired the sander, a coarse, medium and fine. Depending on the condition of the floor will depend on what sandpaper to use, if the floor is in good condition and has not been previously painted or stained you can use the medium, otherwise start with the coarse.
You should keep the sander moving at all times whilst it is switched on to prevent making dips and low spots.
Sand diagonally across the boards, this will help level them off and remove a good amount of the surface to reveal the wood lower down. Once you have completed one diagonal sanding, go the other way, and them sand in the direction of the boards.
Once you are happy with the boards you can change to the medium grit, working in the direction of the boards go up and down overlapping each strip, once you have done this a couple of times, repeat the process with the fine sandpaper until the floor is smooth.
Finishing of the edges
To finish off the edges, use the edging sander, again use the coarse, medium and fine sandpaper. A word of warning, be careful around heating pipes as the sander could damage or even cut the copper pipe. You can use a scraper or chisel to get right into the corners and around pipework.
Staining, painting or varnishing a floor
Once you have sanded the floor and you are happy with it, it is time to clean up all the dust, vacuum the floor in both directions, and around and under the skirting boards, to remove any fine dust left on the floor, use a soft cloth and white spirit to wipe over the boards, this has the added benefit of removing and grease that may be left on the boards.
At this stage you need to be aware that the floor is vulnerable to stains so be careful walking across it and don’t spill your tea or coffee over it as you stand back and admire your hard work.
Painting the floor
If you are varnishing, painting or staining the floor the principle is the same, use a roller to apply the paint, I prefer to use a small roller but you may find it easier with a 9 inch roller to cover the area quicker. You will also need a brush to paint around the edges of the skirting boards.
Make sure the paint you are applying is a good quality floor paint, start with painting around the edge and then rollering up to it, apply one coat and leave to dry. If it is a quick drying paint / varnish you can apply more coats the same day otherwise leave overnight to dry.
Lightly rub the floor down between each coat and remove the dust before apply a second coat.
For high foot traffic areas apply three good coats to the floor. Once you have applied all the coats leave to fully dry before putting back furniture etc into the room. You may consider adding felt pads to the bottom of furniture such as dining table and chairs to help protect the floor.
Tags: Edging Sander, Floor, Floor Paint, Floor Sanding, Floor Stain, Floorboards, Flooring, Painting, Sanding, Sandpaper, Varnish
Posted in Decorating Tips | No Comments »
Painting Fascia boards
Posted by Adrian
October 29th, 2013
Painting Fascia boards
Painting fascia boards is an essential part of property maintenance, the fascia board is the part just under the roof and the area the guttering is screwed too. I go into more detail as to what fascia boards, soffits and bargeboards in my post Painting fascia and soffits and bargeboards.
In this post I am only talking about fascia boards, a recent job I was working on prompted me to write this post. One of the jobs on a recent exterior job I was doing was to paint the fascia boards, now this is a very typical part of a job for me so am used to preparing and painting them.
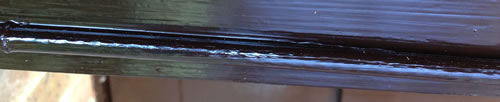
On one length of fascia board an aerial or satellite cable had been clipped to the bottom face of the board, so what’s the problem you maybe asking, well nothing except you could be shortening the life of the board. Why, you ask, well if the paint degrades behind the cable allowing water to get in you will quickly get rotten boards, the cable hold the water on the board longer as the water gets between the cable and the fascia, trapping it there far longer than if the water was allowed to run off.
So if you need to run cabling run it behind the fascia board or along the wall so you do not trap water against the fascia.
Square and round edges
Another thing to look out for are square edges on the bottom of the fascia, the paint can not cover a 90° sharp angle as you typically get on a fascia board, you may notice the paint starts to deteriate here first and may even peel and lift exposing bare wood, as described in my post How to get paint to adhere to edges of woodwork. In this situation I always rub the square edge into a slight rounded one, this will allow the paint to cover far better and last longer, so your fascia boards should last longer and it may even prolong the amount of time you need to re-paint your fascia boards.
Just a couple of tips for painting your fascia boards, but they may help the fascia and paint on them last longer.
Tags: Exterio Painting, Exterior, Exterior Wood, Fascia, Fascia Boards, Painting
Posted in Decorating Tips | Comments Off on Painting Fascia boards
Painting and Decorating : 20 years
Posted by Adrian
March 31st, 2013

Painting and Decorating for 20 years
2013 sees the 20th year of my decorating career. It was twenty long years ago that I first picked up my paint brushes and rollers and started painting and decorating. I have worked in a few places in the UK during this time but now prefer to stay close to home, here in Southend on Sea.
Over the past 20 years of painting and decorating I have seen a few changes, not only in the painting industry but the economy also, we all have to adapt and a few years ago I also started including DIY and Handyman jobs in the list of services I provide. I feel this offers a complete service to my customers, this came about as my customers often would ask me if I could assemble a flat packed wardrobe for a newly decorated bedroom or hang the odd picture or two, as I know how to do these types of jobs I agreed and now offer this as a service.
I have undertaken commercial work as well as residential work in my career and painted things from warehouses to high street shops to mansion houses.
Styles and fashions have changed over the past 20 years from everything being emulsioned to feature walls, either in emulsion or wallpaper. And who can forget the phase of terracotta!!

Painting and Decorating Website and Blog
Way back when I started there wasn’t the Internet but have had www.propertydecorating.co.uk since 2007 which now includes a painting and decorating tips blog, that has over 60 decorating tips and has proved to be very popular.
I also have two other sites, www.rayfields.co.uk and www.improvingyourproperty.co.uk, both have blogs also covering DIY and Handyman topics as well as painting and decorating.
I have also created and written the code for four materials calculators, a wallpaper calculator, a ceiling paper calculator, a tile calculator and a paint calculator, these have proved to be very popular with lots of hits per day with people working out their materials. These are used not only by DIYer’s but tradesmen also.
I enjoy writing for all the blog’s and helping people out who want to do painting and decorating or DIY jobs around the house but are not sure how to go about it. I find this very rewarding.
New Media
Over more recent years I have started tweeting on Twitter, all the sites have a Facebook pages, I have a Google+ account as well as LinkedIn and a YouTube channel.
YouTube
Most recently I have started to put so video’s up on my YouTube channel, I plan to do lots more of video’s when time allows. But feel free to subscribe to my channel and comment on my videos.

Here’s to another 20 years!!!
Tags: Decorating, Decorator, Facebook, Google+, Painter, Painting, Twitter, Video, YouTube Video
Posted in News | 2 Comments »