Painting, decorating and home improvement tips blog
Colour Trends For 2021
Posted by Adrian
October 5th, 2020
Colour Trends For 2021
Every year a team of top international design experts come together to discuss world trends. This is then translated into a colour scheme. They have compiled a colour of the year with supporting colour palettes. They have selected a range of colours they think will be the trend throughout 2021.
What Is The Trend Colour For 2021
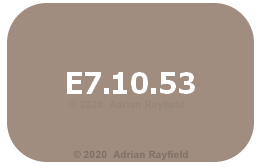
The colour of the year 2021 is…… E7.10.53 (also known as Brave Ground).
“Every year, our colour specialists, plus a team of top international design experts discuss the latest global trends that will affect every area of our lives. We then translate these insights into one key colour that reflects the mood of the moment – a tone that’s set to have an impact on homes all over the world.”
Quote from Dulux website.
You can see more of this years colour schemes here:
See more of this years colour of the year and colour schemes.
Paint Calculator
If you would like to use the colour of the year (E7.10.53) or any other colour you need to buy and need to work out how much you need to buy, use our Paint Calculator.
Other useful links
Here are some further reading links:
- Past years Colour trends from Property Decorating
- Colour Futures 2021 (40 colours)
- Dulux Trade Expert Brave Ground
- Dulux colour of the year
Video from Dulux YouTube channel.
Tags: 2021, AkzoNobel, Brave Ground, Calculator, colour 2021, Colour of the year, Colour Trends, colour trends 2021, Dulux, Dulux Colour Futures, dulux colour of the year, Dulux Trade, E7.10.53, Paint, Paint Calculator, Painting, trend, Trends
Posted in Decorating Tips, Home Improvements, News, Resources | No Comments »
How to fit a door Cylinder rim lock
Posted by Adrian
September 30th, 2020

How to fit a door Cylinder rim lock
A cylinder rim lock is often known as a night latch lock or a Yale lock, it is a very common lock and can be found on lots of front doors, you may even have one on your front door. A cylinder rim lock is a lock that is mounted on the surface of the door, rather than being fitted in a door such as a mortise lock. With a rim lock the door is held closed by a latch that can often be deadlocked with the key externally or via a button on the inside of the door. It can only be opened from the outside via a key or a handle on the inside.
Choosing the correct position for a cylinder rim lock
A rim lock is fitted typically ⅓ from the top of the door or 1500mm from the bottom of the door, but there are no hard and fast rules. Decide the best place for you but avoid fitting a lock on a joint where a rail (horizontal part) goes into the stile (the vertical part) as this could weaken the door.
Fitting a cylinder rim lock
Firstly gather all the tools required to complete this job, you will need:
- A cylinder rim lock / night latch / Yale lock
- A drill
- Wood drill bits
- A Tape measure
- Chisels
- A pencil
- A door wedge
- Masking tape
- A junior hacksaw

When you have all the tools together, start by opening the lock packet and familiarise yourself with all the parts. Inside the pack should be a template, this will help you mark and drill the main hole through the door, you don’t want to get this bit wrong. There should also be a cylinder lock, keys, a backing plate, a lock body, fixing screws and a staple.
Place the template on the door as instructed, use some masking tape to hold it in position. You will need a large spade drill bit, typically a 32mm / 1 ¼ inch. You are going to need to drill a 32mm hole through the door, start drilling from one side, then as the tip of the drill comes through the other side, stop and drill from the other way, this will help prevent the wood splintering as you drill through.
Next drill two holes for the two fixing screws that hold the cylinder lock onto the door. Again, drill all the way through the door. You may need to drill the inside holes with a slightly bigger drill bit to allow the screws to go into the door when you screw the cylinder on and do not fail the operation of the backing plate when it is fitted.
Now take the backing plate and position this on the door, mark and drill the fixing holes, then remove. You typically will need to drill three holes.
On the template there may be a line for a recess on the door edge, mark this on the door and then hold the lock body in place, draw around the part of the lock body that goes onto the door edge, you will then need to chisel this area away to allow the lock to sit flush on the door edge. The recess will only need to be 2-3mm depending on the thickness of the lock body edge. Not all locks will require this as they do not all go onto the door edge.

Once you have done this mark the two retaining screws of the lock body on the door edge, drill pilot holes, but do not screw the lock on yet.
Fitting the Cylinder rim lock to the door
![]()
With all the parts of the lock off the door, you can now assemble the lock onto the door, place the cylinder in the large hole and the slip ring or cylinder latch pull if you have one, make sure the arrows on the rear of the lock body line up before filling it. Put the cylinder connecting bar into the slot on the backing plate, screw the backing plate on, screw the cylinder on. You may need to put the key in the cylinder and turn it to allow access to all the screw holes but make sure you put it back in the same place when your done. If the connecting bar is to long, you can shorten it using a junior hacksaw.
Once the cylinder and the backing plate are securely fitted you can now fit the lock body, hook one edge of the body on first, then with a little wiggle and slight operation of the lock handle you should be able to get the lock body on. Once it is on, use the retaining screw to secure it to the door.
Fitting the door lock staple
The staple is the part that holds the door shut and goes on the door frame. Once the lock is fitted to the door, close the door and mark the position where the staple has to go, chisel out a recess for it to sit in. Drill pilot holes to fit the staple to the frame and screw the staple to the frame. Ensure the gap between the lock and the staple is no more than 5mm, if it is the effectiveness of the lock is greatly reduced.
And finally, try the door to make sure it closes OK without catching the staple, if it does you may need to recess the staple a little more. Once the door closes OK try the lock from inside, then try opening the lock with a key from outside.


Tags: Backing Plate, Cylinder Latch Pull, Cylinder rim lock, Door, Lock, Mortise Lock, Night Latch, Staple, Yale Lock
Posted in Home Improvements | No Comments »
How to secure outbuildings and sheds
Posted by Adrian
August 31st, 2020
How to secure outbuildings and sheds
We all struggle for storage spaces and often fill our sheds, garages, summerhouses and outbuildings with ‘stuff’, now whether we need it or not or simply store it until we go to the local dump with it the problem is all the same.
Sometimes we may have a man cave where we go and organise our tools and tinker on the latest product, or maybe we have turned our shed into our office? Whatever we use the buildings for we need to make sure they are secure as they can often be easy pickings for thieves.
Keeping it secure
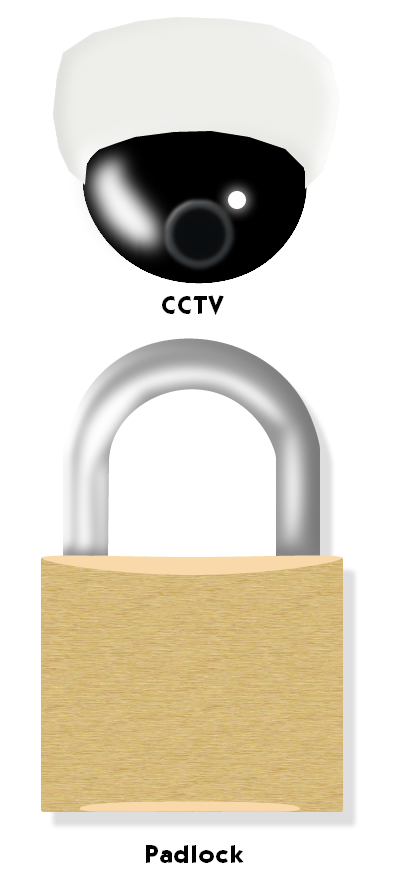
The simplest way and cheapest way is to fit a padlock onto the door using a hasp and staple. However, you can go further and install alarms and CCTV but this choice comes down to what you keep stored away.
The very least should be a lock of some kind, this will deter the opportunist thief. Adding locks is far cheaper than replacing stolen belongings such as bikes, lawn mowers etc. Once you have a lock fitted, always lock up when you are finished.
If your outbuilding has windows you could put bars over the window to stop easy access through the window, if the windows are lockable, lock them.
Lights, CCTV, Alarm
If you have more valuable stuff stored away such as bikes or your outbuilding is a home office you may wish to consider adding a little more security than just a padlock. An exterior light fitted with a PIR (passive infrared sensor) that comes on when movement is detected is a good idea and could scare off would be thieves.
If you want to keep an eye on what is going on you can install a simple CCTV system, these have come down in price in recent years and will allow you to see what is going on and who maybe lurking around. There are many systems to choose from, many are self install and can be connected to a PC or TV for viewing.
An alarm could also be fitted, these can be self install and don’t have to cost a lot of money for a basic system. A simple PIR (passive infrared sensor) and one or two door / window magnetic sensors should come in under £100.00.
Securing other items
Some people may have extension ladders that do not fit into a shed, garage or outbuilding and simply leave these lying on the garage roof or just in the back garden, well these can be used to gain access to yours on someone else’s property, securing these is simple and cheap, ladder clamps that allow ladders to be securely hung on a wall, or a simple heavy duty chain and padlock secured to a permanent fixture will prevent them being used.
Other items such as screwdrivers, hammers etc. shouldn’t be left around in the garden for example as these can aid a burglars access to a property or outbuilding.
Keeping keys safe
If you have several people needing access to outbuildings, garages, or even just to your house but you don’t want to give keys to lots of people. The ideal solution is a key safe that is secured to a wall, the keys safe, or box, has a changeable combination. So all you need do is to give the combination code to people, and you can change the code at any time. These boxes range in size and price, but it is worth paying for a good one, even one that is police approved.

In conclusion
We all have to store things and most often this is done in outbuildings, simple steps such as those listed above could prevent items being taken or use to gain access to a property.
They don’t have to cost a lot and it is up to you how far you want to go, be it a simple padlock or more secure with locks, security lights, CCTV and alarms, this will mainly come down to the area you live in and the value of items stored.
Tags: Alarm, Burglar Alarm, CCTV, Clamp, extension ladder, garage, Hasp, ladder, Lights, Outbuilding, Padlock, PIR, shed, Staple, Summerhouse
Posted in Home Improvements | No Comments »