Painting, decorating and home improvement tips blog
How to bleed a radiator
Posted by Adrian
February 11th, 2020
How to bleed a radiator
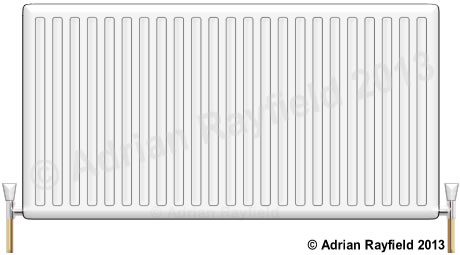
If you have central heating and radiators you will from time to time need to bleed them. This basically means allowing any build up of air out of the system and allow that space to be filled with water.
If you do not bleed the system you will get cold areas within the radiator and the system will not be as efficient and you will not be getting the full heat out of the system.
How can I tell if I need to bleed my radiators
You can tell if you need to bleed your radiators simply by feeling them once they have been on for a while, the radiator will feel cooler at the top than the bottom, mostly the air will be at the top of the radiators, but you may feel cooler spots lower down also. If you find cooler areas more than likely this will be air which doesn’t get as hot as the water so therefore is cooler. If this is what you find, bleed the radiators.
How do I bleed my radiators
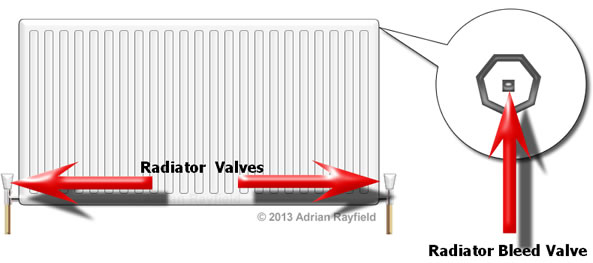
This is a quick and easy job, firstly open up all the radiator valves fully, including thermostatic ones, then run the system for around 10 minutes and then turn the system off. You will then need a radiator bleed valve key and a cloth. If you haven’t got a bleed valve key, they can be bought cheaply at a hardware store.
Go around all radiators and open slightly the bleed valve by turning anti-clockwise, this will be located at the top of each radiator and on one edge. Depending on the age of the radiator you may have a small plastic end over the bleed valve, this will direct the water away from the wall. Make sure this is facing away from the wall if not turn it so that it is, you could aim it into a bucket before opening the bleed valve.
Carefully open the valve slightly with the valve key, air should then come out, keep the valve open until water comes out then shut the valve by turning clockwise. Hold the cloth around the bleed valve as you do this to catch any water.
Once you have done this to all radiators you may have to check the pressure of the boiler by looking at the gauge, if the pressure has dropped you may have to ‘top up’ the pressure. This is normally done by opening a tap on the boiler until the correct pressure is reached. To top up the boiler open the tap on the filling Loop, check the boiler handbook to find out how to do this.
If you find that after you have bled the radiators the radiators nearer the boiler are hotter than those furthest away, this means the radiators aren’t balanced and you may have to turn the valves down on the radiators near the boiler and leave the ones furthest away fully open, this will allow the water to reach the furthest away radiators before cooling down.

Top Tip : If the bottom of the radiators are cold, this could be due to a build up of sludge and rust, this needs solving by draining the system down and flushing it all through. If you are unsure call a plumber / heating engineer.
Tags: Bleed, Boiler, Central Heating, DIY, Handyman, heating, Plumbing, Radiator, Valve
Posted in Home Improvements | No Comments »
Fitting a letterbox draught excluder
Posted by Adrian
November 27th, 2018
Fitting a letterbox draught excluder
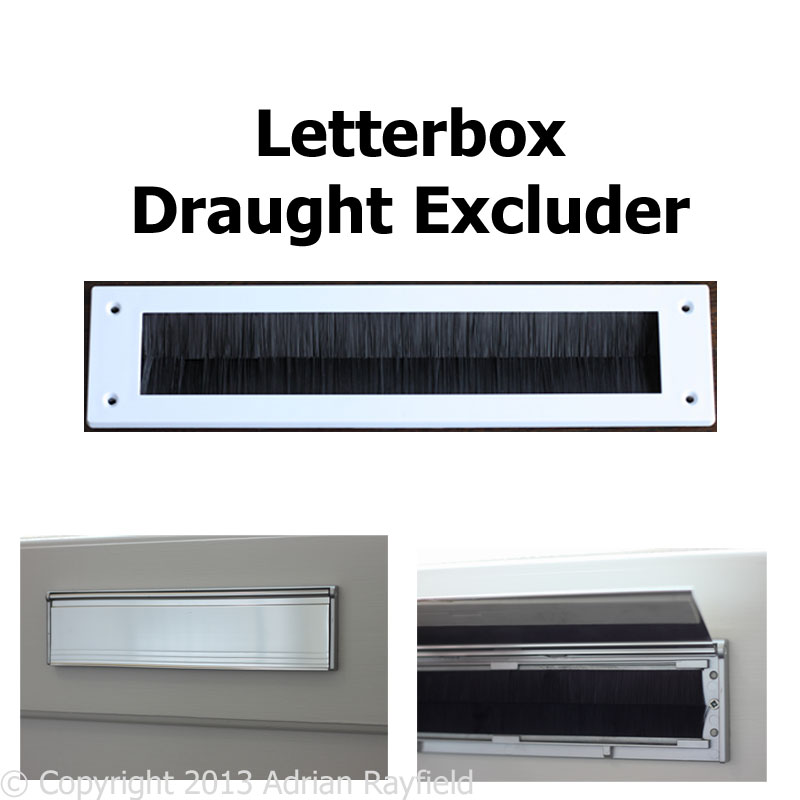
If you have a letterbox fitted into your front door, you can help reduce heat loss and draughts if you be draught proof it. Modern doors such as PVCu door will come fitted with a letterbox pre-installed and will have a flap on the outside as well as the inside so no further draught proofing is required.
If however you have an older door and only a flap on the outside of the letterbox, for only a few pounds you can add an internal flap or a draught excluder. These are easy to fit and only take a few minutes.
These draught excluders are readily available at DIY and hardware stores. Once you have bought one you simply need a drill, drill bit and screwdriver, an optional extra is a small level to ensure you fit the excluder level. The screws should be in the packet when you buy the excluder.
Types of draught excluder
There are two types of excluder available, a brush type that has brushes that help stop drafts, the same idea as the brush excluder you fit to the bottom of the doors. Two rows of brushes reduce the draught from coming into your property. The other type is a brush with flap, these are slightly more expensive but do look neater.
To fit both types of excluder simply align on the door, using a level to ensure it is straight, then drill pilot holes to take the screws. Then simply screw the two or four screws into the door to compete the job.
Both types of letterbox draught excluder are fitted internally.
Tags: Door, draft, Draught Excluder, excluder, heating, letter box, Letterbox, Money, post box
Posted in Home Improvements | No Comments »
Painting pipes and Pipework
Posted by Adrian
January 31st, 2017
Painting Pipes and pipework
From time to time we have to paint pipes or pipework, this can be inside or outside a property. It could be plastic PVCu drainage pipes from kitchens or bathrooms, or maybe copper water pipes for heating etc.
What ever the situation un-painted pipes can look unsightly, pipes look better painted. They maybe in a different colour, sometimes a different finish such as gloss or satinwood.
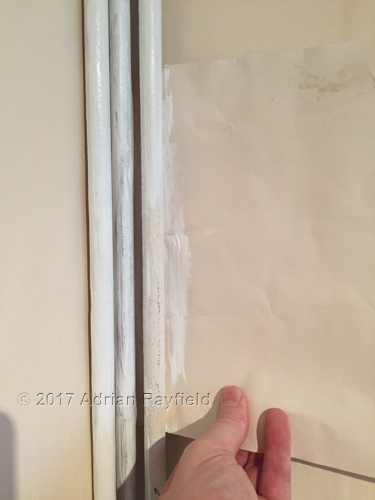
To get a good professional finish you don’t want to get paint from the pipes onto the surrounding area, such as walls. A good trick is to put cardboard of a sheet of paper or old wallpaper behind the pipes to protect the area behind getting splashed or the brush touching the wall as you try to get the back part of the pipes, once done you will have beautifully painted pipes and no paint on the walls behind.
This tip works for all types of pipework, interior and exterior.
How to paint pipes and paintwork
To paint new copper pipes you need to ensure they are free from any plumbing flux and grease, so a wipe over with soapy water, methylated spirits or white spirit should remove this. With the pipes clean you can prime the pipes and then topcoat. I prefer satinwood but you can use gloss or emulsion. Oil based paints can yellow on hot water or heating pipes due to the heat.
To paint previously painted copper pipes, give them a quick wipe over to remove any dust etc, gently rub down to give a key, prime / undercoat and them topcoat with your preferred paint.
To paint plastic PVCu pipes, such as soil pipes, drainage pipes etc, ensure they are free from dirt and debris, including any plumbing grease etc. Give them a rub down with a fine grit sandpaper to give it a key, then prime, and paint with topcoat of choice.
Tags: Bathroom, Copper, Downpipe, heating, Kitchen, Painting, Pipes, Pipework, Plumbing, UPVC
Posted in Decorating Tips | No Comments »