Painting, decorating and home improvement tips blog
Making and using a water level
Posted by Adrian
March 31st, 2021
Making and using a water level
Water levels can come in very useful when you need to make a level line across a big expanse, such as in a room and a level simply won’t do. You can buy laser levels but they can be expensive and you may only require it once, this post describes how to make a cheap water level.
Water levels can be used for things such as dado and picture rails, wallpaper borders etc.
Making a water level
To make a water level is fairly straightforward, you will need the following items.
- A long length of clear tubing
- Water
- Something to bung ends of tube (optional)
- Funnel (optional)
You will need a length of clear tubing, long enough to reach around your work area, such as a room. The tube needs to be clear so you can see the water, so a garden hose wouldn’t be any good as it isn’t transparent.
Once you have your length of tubing you need to fill it with water. This can be done by using a funnel in one end of the tube and running water into it to fill the tube. You can also try the syphon method, but whatever you find works best for you. Make sure that there are no air bubbles in the length of tube, if there are work them out to an open end.
Don’t fill the tube fully as you will need to allow the water to move without it coming out all over the place and for it to settle to get the level.
Once the tube is filled enough you will need to stop the water coming out again, this can be done simply by placing your thumb over the end or a bung of some kind if you have one.
Using a water level
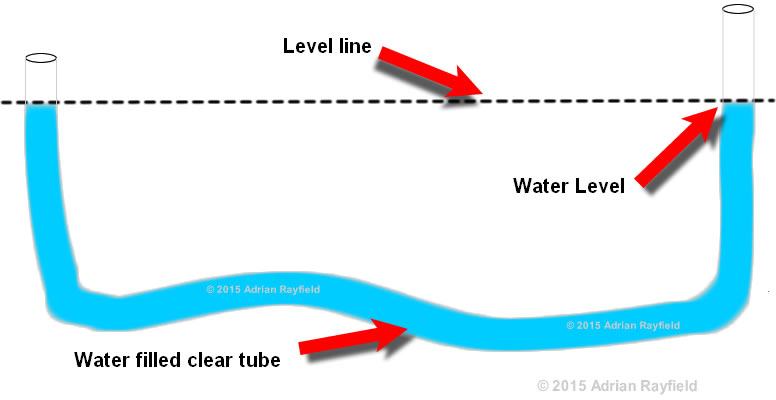
Now that you have made your water level you are ready to use it. You will need a starting point, this can be achieved by measuring and making a pencil mark, or maybe using an existing level, such as a dado rail, it could even be something in another room if the tube is long enough. For example if you want to make sure the dado rail is the same in two rooms. This will be your starting point.
You will need a second person to help you with using the level. One stays at the original level point whilst the other uses the level and marks the wall at the level.
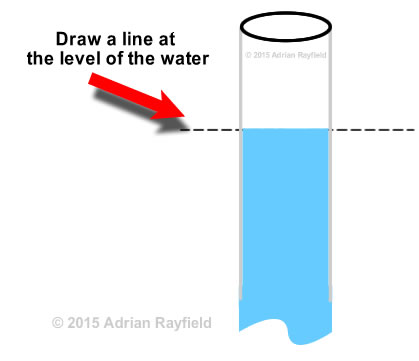
The person holding the ‘fixed’ end, that is the original level mark stays holding the tube at this point, whilst the second person moves to a new point and holds the tube against the wall. The first person instructs the second person to move up or down until the water is level with the original mark, the second person can then mark the wall level with the water in the tube, thus giving a level line.
Continue doing this in several places as required. Remember not to lift tube too high without having end blocked as it will flow out. You can then if required draw a line and join up the marks.
Tags: Dado rail, Decoratomg, DIY, Handyman, Level, Painting, Wallpaper Border, Water, Water Level, Woodwork
Posted in Home Improvements | No Comments »