Painting, decorating and home improvement tips blog
How to remove artex
Posted by Adrian
June 4th, 2013
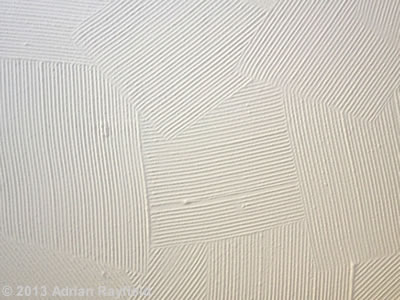
How to remove artex
Artex is a decorative finish, you may have it on your ceilings and maybe your walls. There are several popular finishes such as swirl, stipple, broken leather, scroll, circle and bark for the walls. Artex was very popular until the 1990’s were it became less popular in favour of smooth plastered ceilings and walls.
Before the mid-1980’s Artex contained white asbestos to strengthen it. Depending on when your house was build or when Artex was applied in your house will depend if it contains asbestos.
Artex and health issues
If you are unsure if your Artex contains white asbestos or not it is best to get a local firm to test it first, for advice, contact the Environment Agency or your local environmental health department or look at www.asbestoswatchdog.co.uk.
If the Artex is untouched and has been sealed with paint, or the Artex was produced after the mid-1980’s then there shouldn’t be any health risks, but if unsure always get it checked first.
For more information of Artex you can read more about Artex on Wikipeadia.
How to remove Artex from ceiling and walls
First be sure that your Artex doesn’t contain harmful white asbestos, if you are unsure get it checked before doing any removal or disturbing the Artex, or call a local firm to remove it for you.

Once you are sure the Artex doesn’t contain white asbestos you have a couple of options to get rid of it.
You can skim over it with plaster, making it smooth and ready to paint or wallpaper once dry. This option is a quicker and far less messy option, although it may require some scrapping to remove high spots before plastering.
The other option is to completely remove it, this can be done with a scrapper. Make sure you wear protective clothing, goggles and a mask and cover the floor with dust sheets. Use a scrapper to scrape the Artex off, this could take some time, once the worst is off you could use a wallpaper steamer to remove the rest. This will obviously make a fair bit of mess, especially if your removing Artex of the ceiling.
Once you have removed all the Artex you can then plaster or if the ceiling or walls are is in good enough condition paper over them, you may have to fill holes, joins and scrapper marks before this is possible.
If you found this or any other post on the Property Decorating blog, please feel free to leave a comment, share on Facebook, Twitter and Google+. You can also follow us and Like us to find out when we have a new decorating tip go live.
Tags: Artex, Broken Leather, Ceiling, Emulsion, Plaster, Stipple, Swirl, Wallpaper, Walls, White Asbestos
Posted in Decorating Tips | No Comments »
Wallpapering around light switches and sockets
Posted by Adrian
April 10th, 2013
How to wallpaper around light switches and sockets
If you are wallpapering an entire room or simply a feature wall, more than likely you are going to come across a light switch, a socket, a TV Ariel or satellite point or a telephone socket. These may seem difficult to wallpaper around, but they don’t have to be.
The first thing to remember always is safety first, turn of the power to light switches or sockets before undoing any screws, yes this is a pain because you have to re-set clocks etc. But it’s far better to do that than get an electric shock. Wallpaper by it’s very nature is wet, the paste makes the wallpaper wet, this conducts electricity very well, so be safe, turn off the power.
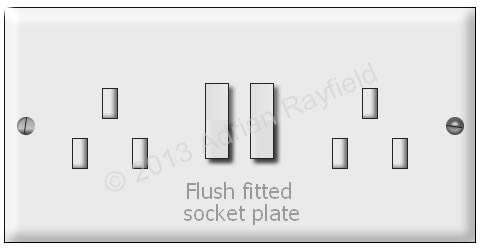
The first thing to do is identify which kind of fitting you have, if your sockets or switches have the socket or switch box on the wall they are surface mounted, if just the face plate is showing then the box is sunk into the wall, this is flush fitted. You tackle these two types slightly differently.
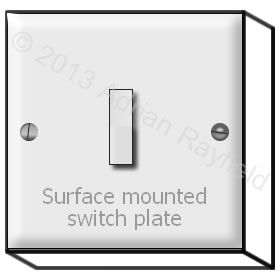
Wallpapering around surface mounted sockets and switches
Wallpaper down to the switch or socket, support the wallpaper with one hand and smooth the paper into the switch surface mounted box, cut along the top of the box, then carefully, pull the paper away from the wall slightly so you can smooth the paper to the edge of the box, trim this edge, now do the same with the other edge. Finally cut with scissors the remaining ‘square’ out of the sheet of wallpaper but leave enough to trim. Smooth down the paper and it should go around the switch box, finally trim the bottom edge.
Clean off any excess paste off of the wallpaper and switch, making sure not to get too much water on the switch, then allow to dry for a bit and turn the power back on.
Wallpapering around flush fitted sockets and switches
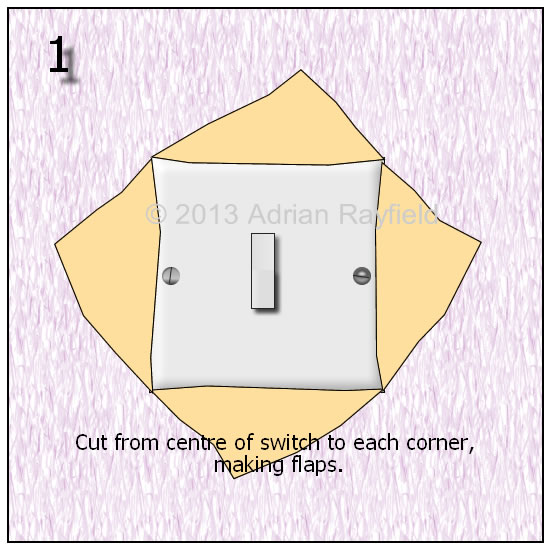
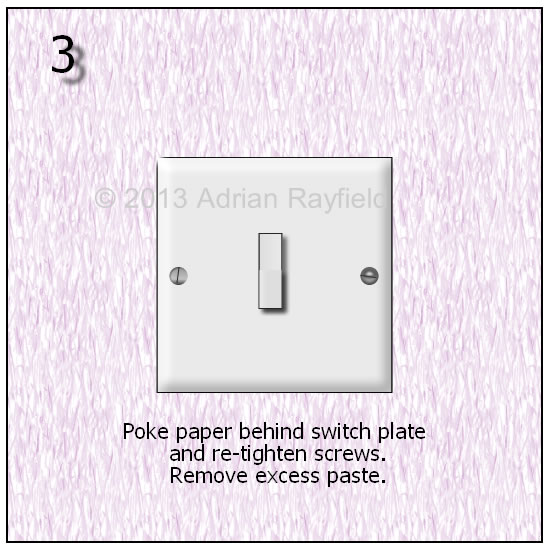
As you wallpaper down to the switch or socket, make a small hole in the wallpaper, about the centre of the switch, now from the centre hole you have just made, cut from the middle toward the corner of the switch, so diagonally. Now smooth the wallpaper down onto the wall and trim the ‘triangle’ sections off but leaving enough to tuck behind the switch. Do this to all the ‘triangle’ sections. Now loosen, but don’t remove the face plate, and tuck the wallpaper behind the switch. Smooth out and air bubbles toward the switch. Finally screw the face plate down again, making sure not to over tighten and crack it.
Clean off any excess paste on the wallpaper and switch making sure not to get too much water on the switch, leave the power off long enough allowing for the wallpaper to dry out enough and any paste to dry.

Tags: Electrical, Light Switch, Satellite, Socket, Switch, Telephone Socket, TV Ariel, Wallpaper, Wallpapering
Posted in Decorating Tips | No Comments »
How do you paint a hall stairs and landing?
Posted by Adrian
January 13th, 2013
How do you paint a hall stairs and landing?
Painting a hall, stairs and landing for a lot of people is a daunting task and too much for them to tackle themselves, so they call a professional decorator like myself to do it for them. A lot of people will not have the ladder to aid them to reach the tallest part, or the stairs are an awkward shape.
Having the right tools makes it safe and easier to do, safety should always be in your mind when painting and decorating but especially if you are painting and decorating your hall, landing and stairs. Falling off a ladder whilst working on a stairway can be very painful.
Painting a hall, stairs and landing
Painting a hall, landing and stairs is just like painting any other interior room, you start at the top and work down.
So, start with preparing the walls, filling and holes and cracks, then paint the ceiling and coving, if you have any. Paint the picture rail next, if you have one, then emulsion the walls, if you have a dado emulsion down to that, then paint the dado before painting the remaining walls below the dado rail. This will save the newly painted wood work getting splashed with emulsion.
Finally, paint the stair stringers (the bit that goes up each side), the spindles and handrail and skirting boards.
And don’t forget the loft hatch if it’s in the hallway.
Wallpapering a hall, stairs and landing
If you are going to wallpaper your hallway, landing and stairs it is similar to wallpapering and interior room, you do all the preparation first, then you paint the ceiling and coving, then paint any woodwork such as picture rail, dado rail and the the stair stringers, spindles and handrail and also the skirting boards.
Once all the paint is dry, the final job is to wallpaper your hall, landing and stairs.
Useful links
Below is a list of useful links you may find help you when either painting or wallpapering your hallway, stairs and landing.
- Wallpaper calculator
- Paint calculator
- Ceiling wallpaper calculator
- How to wallpaper
- How to wallpaper around a door
- How to wallpaper around a window or door reveal
Please feel free to comment below, share this and other posts and follow us on our social media channels.
Tags: Ceiling Wallpaper Calculator, Decorating, Door, Hall stairs landing, Interior Decorating, Paint Calculator, Painting, Reveal, Skirting Boards, Wallpaper, Wallpaper Calculator, Wallpapering, Window
Posted in Decorating Tips | 6 Comments »
