Painting, decorating and home improvement tips blog
How to build a step
Posted by Adrian
June 30th, 2020
How to build a step
On a recent job I was asked if I could repair a step to a back door, the step was already built out of Celcon blocks and rendered over. The rendering had broken off and become loose over time. I was asked to re-render the step, which I did. I have included some photos of the finished job below.
Building a step
Before you build your outside step you need to work out the height, width and depth of your step, you also need to decide on the materials used to build it, such as concrete, bricks, blocks, block paving blocks, are you going to top it off with slabs?
Once this has all been decided you can start building your step. If you are going to use bricks, lay the edge bricks out to make sure you are happy with the size, you can then fix these down with mortar. Once these are set you can fill in using sand and cement, concrete or hardcore. You can then fix slabs on the top.
If you are going to use concrete only you are going to need to build a form (this is a temporary mold) use timber such as skirting boards to build the shape and size of the step you require, once you have done this you can mix and pour the concrete into the form, tamp it down to ensure all areas are filled and any air bubbles come to the top. You are going to want to have a textured finish the the top of the step to avoid it becoming slippery when wet of with snow and ice on it. The best way to do this is once the concrete is at the top of the form and levelled off, take a piece of wood wider than the step and tamp down across the form, this should leave ridges in the top of the concrete so when it dries you are left with a non-slip surface.
Once the concrete has set you can remove the form leaving you with a concrete step.
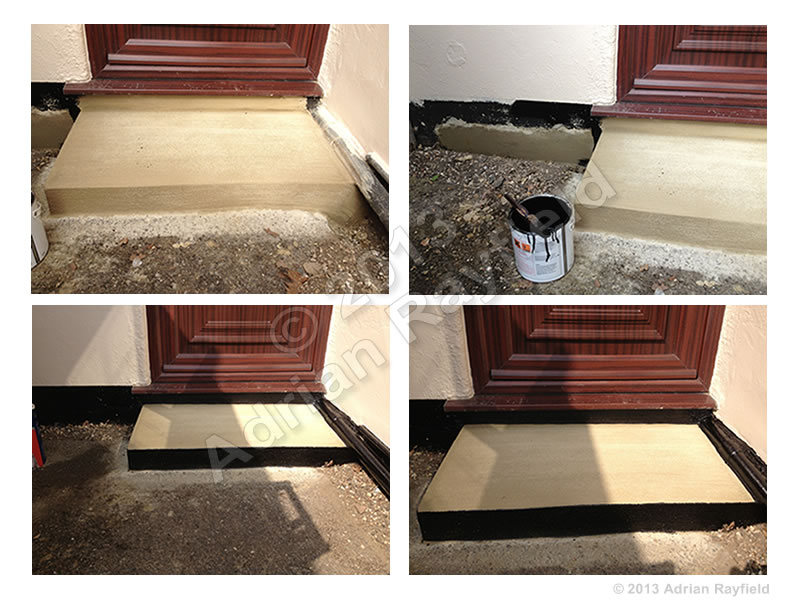
With the step I repaired the blocks were already in place, all I had to do was re-render the step, I did this by removing the loose render, cleaning the exposed bricks and sealing with a PVA sealer to aid adhesion. I then mixed up my render and rendered the step, I did this without a form so I could render the top and sides in finish the surface. Once I had got the basic shape, and ensured the top of the step sloped away from the house I left it to dry for a few hours, I then returned to see if it had set enough to ‘work’, which it had, at this point I used a rendering float to rub over the step, this showed up and low spots I needed to fill in. Once this was done I rubbed over with the rendering float to remove the sharp square edges and to leave a non-slip textured step and sides. I then painted the edges of the step to match the plinth, which also had a repair done to it.
To finish off I painted the plinth and the edge of the step in black bitumen paint.
Finished step
Below is the step that I repaired and painted.
Tags: Building a step, Concrete Step, Doorstep, Render, Step, Step Repair
Posted in Home Improvements | No Comments »
How to fit door handles or door knob
Posted by Adrian
May 24th, 2020
How to fit door handles or door knob
Once you have fitted a lock such as a mortise sash lock or a cylinder rim lock or are just simply replacing the handles. This post will explain how to do it, it is a fairly simple task and should’t take to long. This post assumes the lock is already fitted to the door and you just need to fit the handles or you are just replacing handles. If you are fitting a new door, you will need to fit a lock first.
As always, you will need to gather the tools you require together before starting the job, you will need:
- A door handle or knob set
- A drill
- A small drill bit
- A screwdriver
- A small level
- A junior hacksaw (possibly required)
Fitting the door handle or door knob
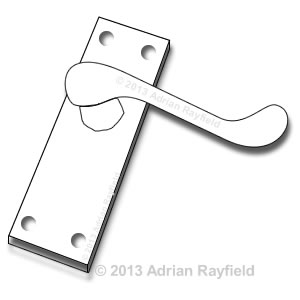
In the door handle pack you should have two handles, fixing screws and a square spindle. Open the pack and put to one side.
Firstly take the spindle and put it through the lock, then take one handle and place it on the spindle.
Now take the level and upright the handle by placing the level on the side of the handle, that is, of course as long as the handle doesn’t have uneven sides or it is a door knob.
When the handle is upright and level, hold it with one hand while you drill two pilot holes, do this for example for the top left and bottom right holes. Then screw the fixing screws in and then drill the final two holes for this handle or knob.
Now take the other handle and try it on the spindle, the spindle maybe too long and requires cutting. Put the second handle on the spindle and see how far the back of the handle is away from the door, you will need cut this amount of the spindle.
Once the spindle has been cut you can fit the second handle, do this the same way as you did the first one. Once all the screws have been screwed in you can try the handle, if the handle stays down without returning to its original position, try loosening the handle fixing screws slightly, this should help. If it doesn’t help, remove one handle and see if the spindle is rubbing on the door where the spindle goes into the lock, if it is remove the spindle and chisel away where it is rubbing, refit the spindle and handle and try again.
Finally, clean off and finger marks off the handle with a soft cloth.
Tags: Cylinder rim lock, Door, Door Handle, Door Knob, Handle, Mortise Sash Lock, Spindle
Posted in Home Improvements | No Comments »
Filling holes in wood with wooden plugs
Posted by Adrian
April 22nd, 2020
Filling holes in wood with wooden plugs
When it comes to filling holes in wood, plaster etc it is typically done with a powder filler or a two part filler, as discussed in this blog post about fillers, the different types and their uses.
But what do you do if you want to fill screw holes in wood and then varnish the wood in clear varnish or leave it natural, you could use a natural coloured filler or you could use wooden plugs or pellets. This may occur, for example if you have a hardwood window sill, such as oak or mahogany and you want to use a clear varnish on it, then you don’t want to see the filler, this is where these wooden plugs come in.
What are wooden plugs
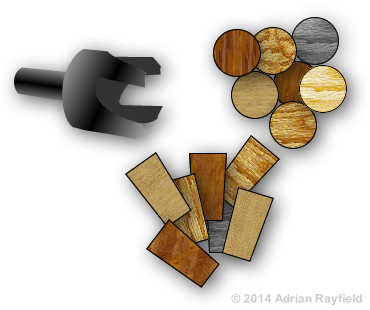
Wooden plugs are used to conceal and hide screw holes in wood without the use of a wood filler. They are made from the same wood as surrounding wood so that the grain and wood colouring match in when finished. You can make your own wooden plugs by buying a wooden plug cutter, these are available from any good hardware or timber store. They come in different sizes to match the size hole you wish to fill.
When you drill the plug you will notice the edges are slightly tapered, this is to allow for a good fit.
Using wooden plugs
Firstly you will require a piece of wood, such as an off cut of the timber you wish to fill the screw hole in. You will also need the plug cutter.
Lay the off cut on a flat surface, drill into the off cut with the plug cutter, this will produce a plug for you. Once you have the plugs you require you can fix them into place.
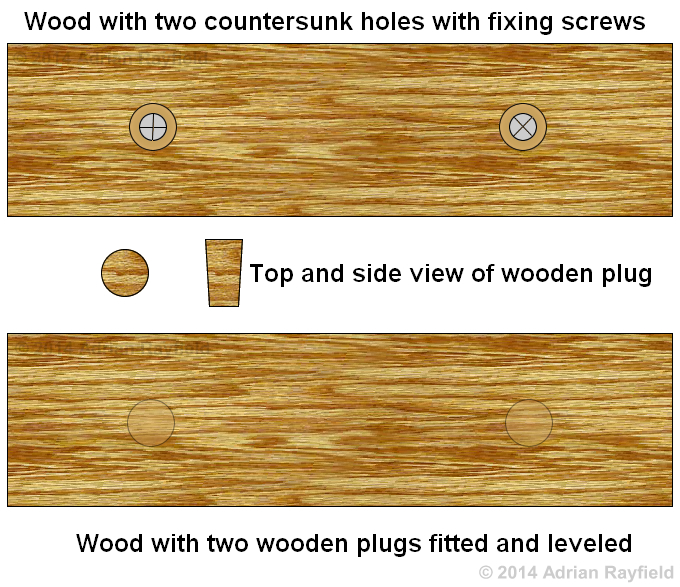
Take some wood glue and put a little around the plug and a little in the screw hole. Next place the plug into the hole making sure the grain of the plug runs the same way as the surrounding wood, give the top of the plug a little tap with a hammer to ensure a good tight and secure fit. Wipe any excess glue that may ooze out with a damp cloth, allow the glue to fully dry.
When the glue has fully dried you can finish the plug off, to do this you need to carefully remove the top of the plug with a sharp chisel, leave the plug just proud of the surrounding timber. The remaining plug can then be sanded down level with the surrounding area.
Once you are happy with the plug you can apply the finishing coat over the wood and the screw hole will almost be invisible.
Tags: Filler, Lumber, Powder Filler, Timber, Varish, Wood, Wooden Pellet, Wooden Plug, Wooden Plug Cutter, Woodwork
Posted in Decorating Tips, Home Improvements | No Comments »